What Is LearnPress WooCommerce?
When creating LearnPress and Eduma, we try to add everything to the product. So sometimes you may see unnecessary details like Shipping information on the course checkout page. In this article, we will explore how to remove all unnecessary information on the course checkout page. How to add more fields according to your needs. In order to do this, you will need to have the latest version of LearnPress installed and activated on your site. And also have LearnPress WooCommerce Add-on installed and activated on your site.
If you are using Eduma, Coaching, or any other LMS WordPress Theme for LearnPress made by ThimPress. You can get LearnPress WooCommerce and other add-ons in the LearnPress Bundle by filling in this form here and following the instructions.
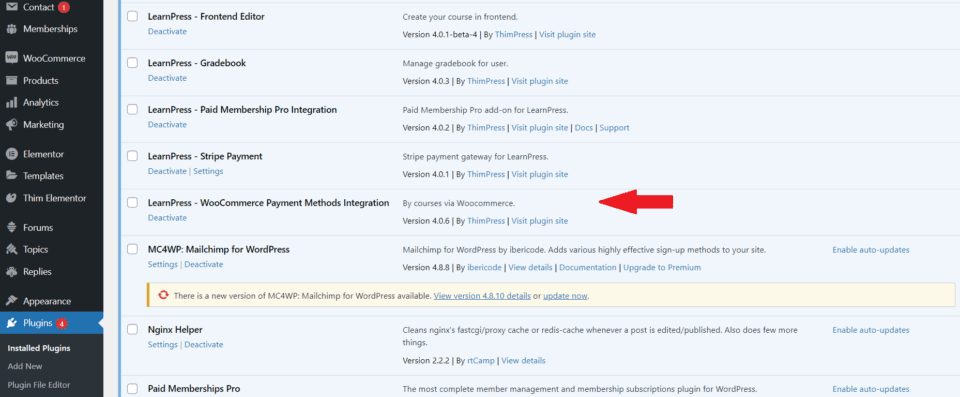
1. Installing & Activating LearnPress WooCommerce Add-on
If you do not install and activate LearnPress WooCommerce Add-on, your course checkout page would be very primitive with only a few fields and payment methods limited to Paypal only.
Once you have installed WooCommerce and integrated it with LearnPress. You can unlock many great features like using many different payment gateways, and all the features of WooCommerce like Coupons, statistics, etc.
Suppose that you have already downloaded LearnPress WooCommerce Add-on as instructed above. You can install it by going to your WordPress Admin > Plugins > Add New > Upload and choosing the zip package of the add-on.

After that, you will need to replace the default LearnPress payment method with LearnPress WooCommerce by going to LearnPress > Settings > Payments > WooCommerce Payment > Enable the option for WooCommerce Payment as in the image below.
2. Installing a Check-Out Form Manager Plugin.
A checkout form manager plugin is a plugin that helps you manage the checkout form of WooCommerce by letting you add, edit or remove form fields. This basically gives you the power to do anything you want with the checkout page.
In this tutorial, I am using WooCommerce Checkout Field Editor (Manager) Pro as currently it has 30k active installs. It’s compatible with the latest version of WordPress and it has just been updated 1 week ago so it’s popular and it’s well maintained. There should be no problem.

Please go to your WordPress Admin > Plugins > Add New, and search for WooCommerce Checkout Field Editor (Manager) Pro. Install and activate the plugin.
3. Start Tweaking the Checkout Page

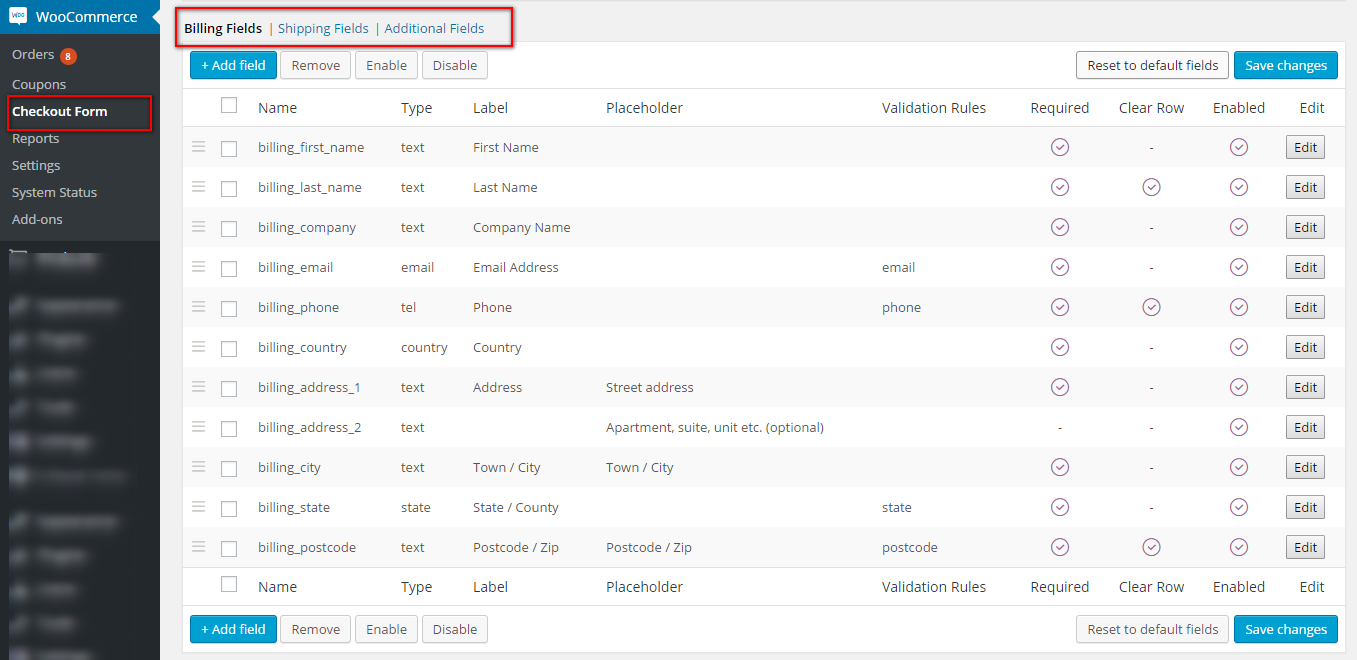
Once you have installed the plugin. You can edit your Checkout form by going to WooCommerce > Checkout Form and choosing which fields to disable, which to enable, and which to be completely removed.
You can also edit form fields to add classes, add label classes, add a placeholder, make a field required or not, and many other options.
In this example, for ease of registration. I have disabled all other details but First name, Last name, and Email. Also, I made the Last name not required so the checkout process is quite simple.
Hopefully, this can help you with your course page and gives you a higher conversion rate.
Read More: Uncover The 5 Best Online Course Themes for LearnPress
Contact US | ThimPress:
Website: https://thimpress.com/
Fanpage: https://www.facebook.com/ThimPress
YouTube: https://www.youtube.com/c/ThimPressDesign
Twitter (X): https://x.com/thimpress_com


