Eduma is a WordPress theme on the topic of education with many different variations serving users with the main purpose of combining with the LearnPress plugin to create and sell courses.
In this article, ThimPress will guide you through the process of Installing Eduma Theme on WordPress in the most detailed and simple way. Minimize errors during the installation process and notes during the Eduma WordPress theme installation process.
First, let’s assume you have your WordPress website installed. The first step is to upload the theme to WordPress.
Upload Eduma Theme to WordPress
Follow the steps below to install the Eduma theme via WordPress:
- Step 1: Visit the WordPress Admin Dashboard.
- Step 2: Click Appearance on the sidebar.
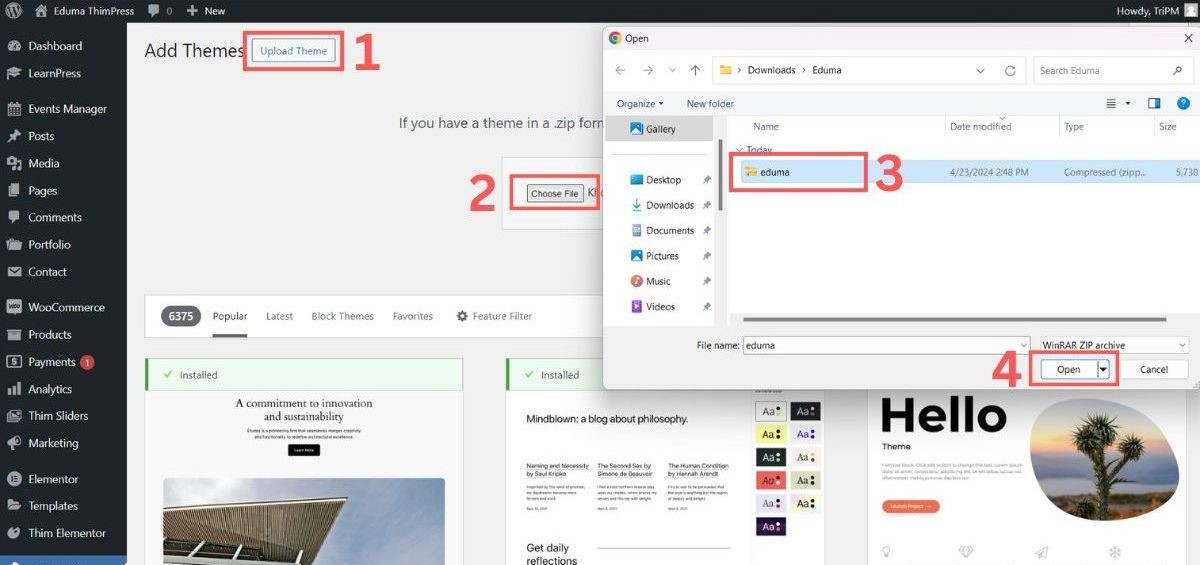
- Step 3: Click Upload Theme.
- Step 4: Browse the eduma.zip file on your computer by clicking Choose File or drag-n-drop eduma.zip file to the Add Themes screen.
- Step 5: Click Install Now.
Activate Eduma Theme
After completing the upload of the Eduma theme to WordPress, the next step is to activate the Eduma theme using the code you are provided after purchasing the theme.
Purchase Code you can get through ThemeForest. For details, please refer to this article: Where Is My Purchase Code?
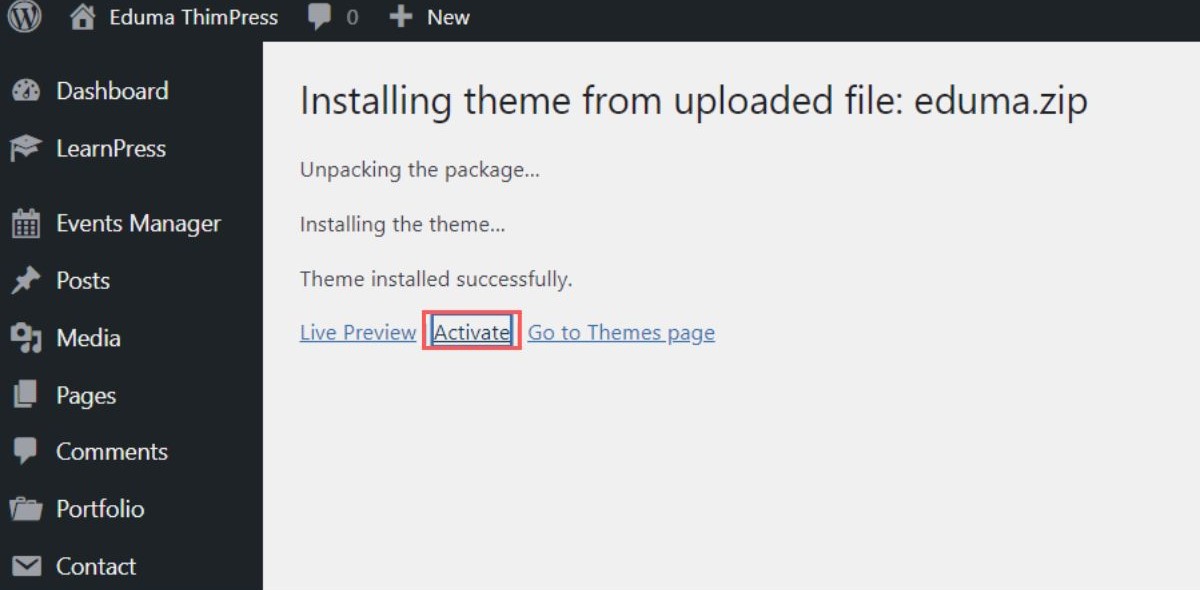
After you successfully activate the Eduma theme, you will be notified about Enable Thim Core. Please, don’t ignore it because it is our powerful plugin in supporting ThimPress themes and plugins.
After that, the system may redirect you to the Admin Dashboard. Then we will come to the next step, click “Let’s Get Started” on the Admin Dashboard.
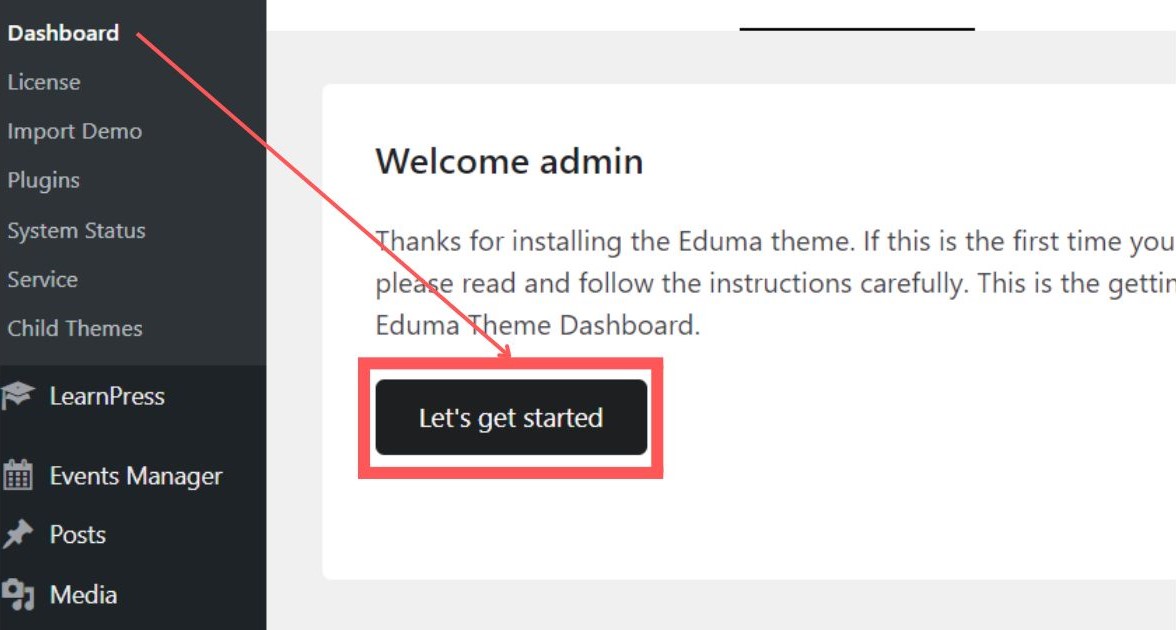
Then, we will come to the setup steps. Please follow these setup steps to ensure the Eduma installation process goes smoothly:
Set Up Eduma WordPress Theme
After reading the content in the Welcome section (quite important if you are new to Eduma), you will come to the setup step.
General Setup
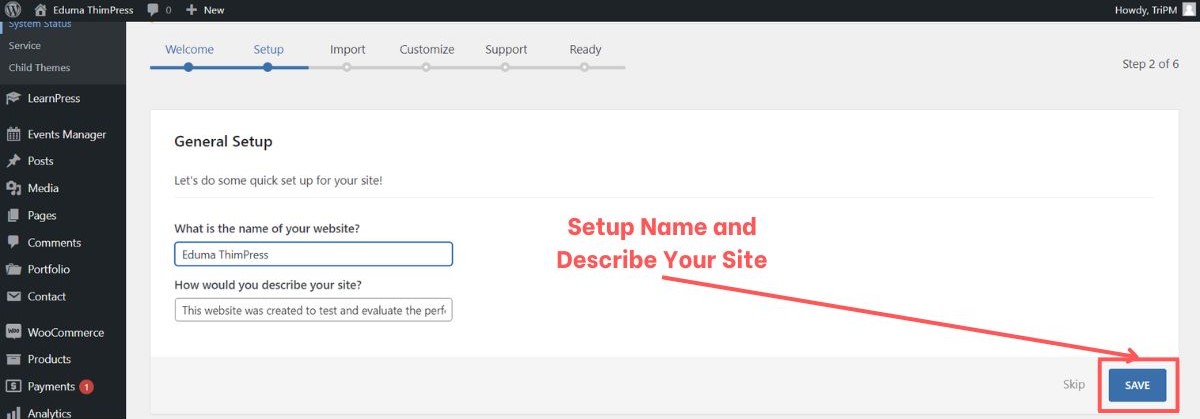
First, for General Setup:
- In the field “What is the name of your website”: Name of the website.
- In the field “How would you describe your site”: A short description of the website.
Basically, when setup is complete, your website’s Landing page will have the title:
[Name of the website] – [A short description of the website]
Therefore, you should choose a short description instead of a long description to make the website title more beautiful.
Import Demo
After completing General Setup, we will come to one of the most important steps to start building your website to create and sell courses: Import Demo or you can think of it as Import Pre-build website, where we have built the entire content framework for your website.
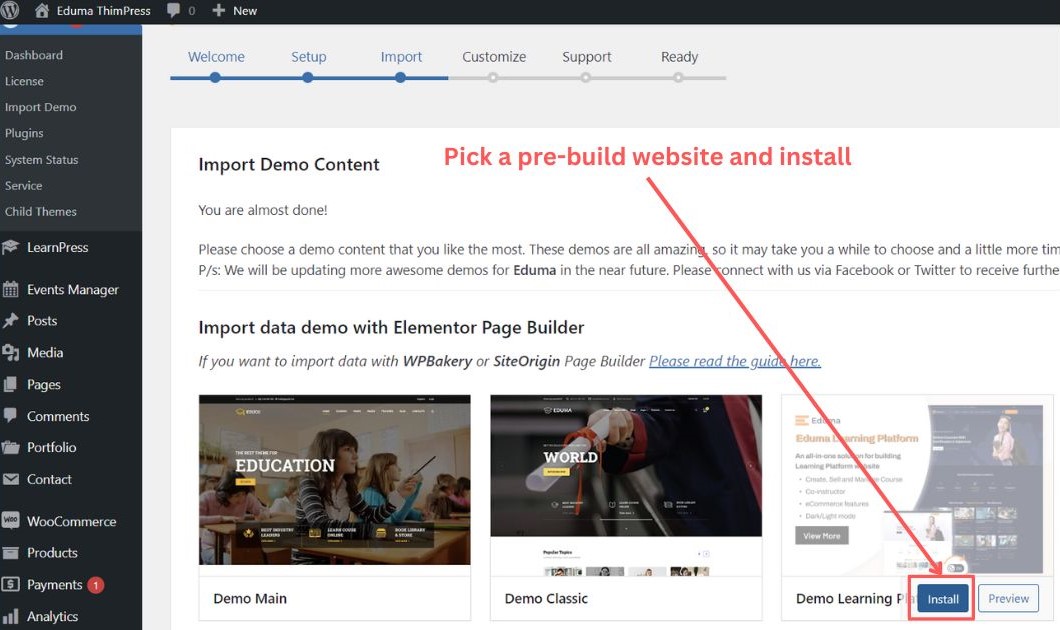
To get a better overview of Eduma’s demo, you can visit Eduma’s landing page. Here, we provide a detailed look at over 35 Eduma demos, including pre-build pages and detailed descriptions for the demos, ensuring you will choose the most suitable demo or demos for your website.
At this step, you can select the pre-build pages that we have prepared in advance to import. We recommend that you choose all pages because they are highly synchronized, increasing the UX/UI experience for customers.
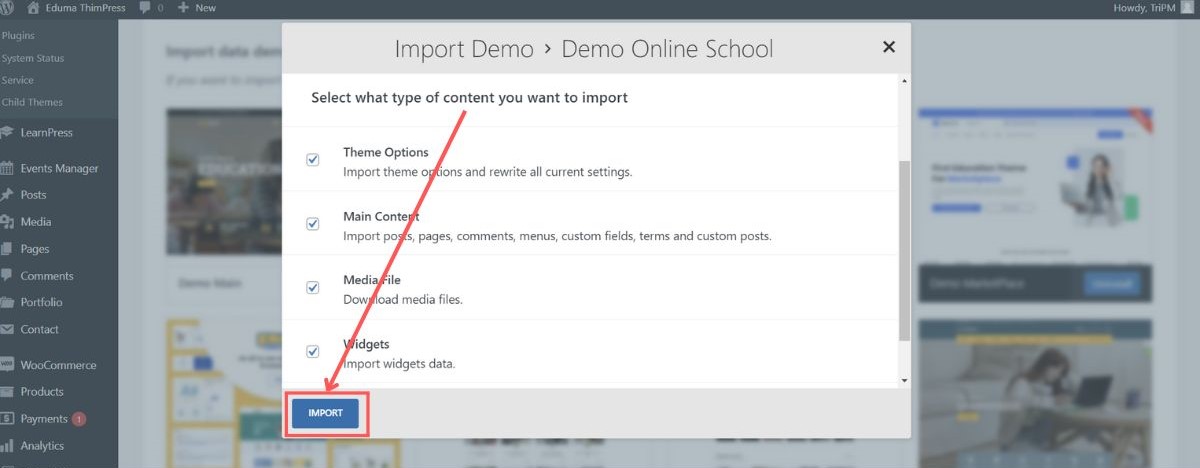
Eduma’s demo import process can take about 2 to 10 minutes, depending on your connection. This process includes downloading images, HTML, CSS, JavaScript code, etc. so it will take some time, please understand and wait for Eduma to complete the installation.
Install Required Plugins
The next step is equally important, the system will direct you to the “Install Required Plugins” screen. These are plugins that we have carefully selected, ensuring you will use Eduma in the best way.
Among them, especially important are LearnPress and the plugins/add-ons that support LearnPress. Without LearnPress, you won’t be able to create courses or create quizzes and questions in Eduma. Please don’t ignore them.
Note 1: If you have previously installed LearnPress, this screen will be different, with fewer recommended plugins.
Note 2: You can skip the Customize step and we will discuss it in another article.
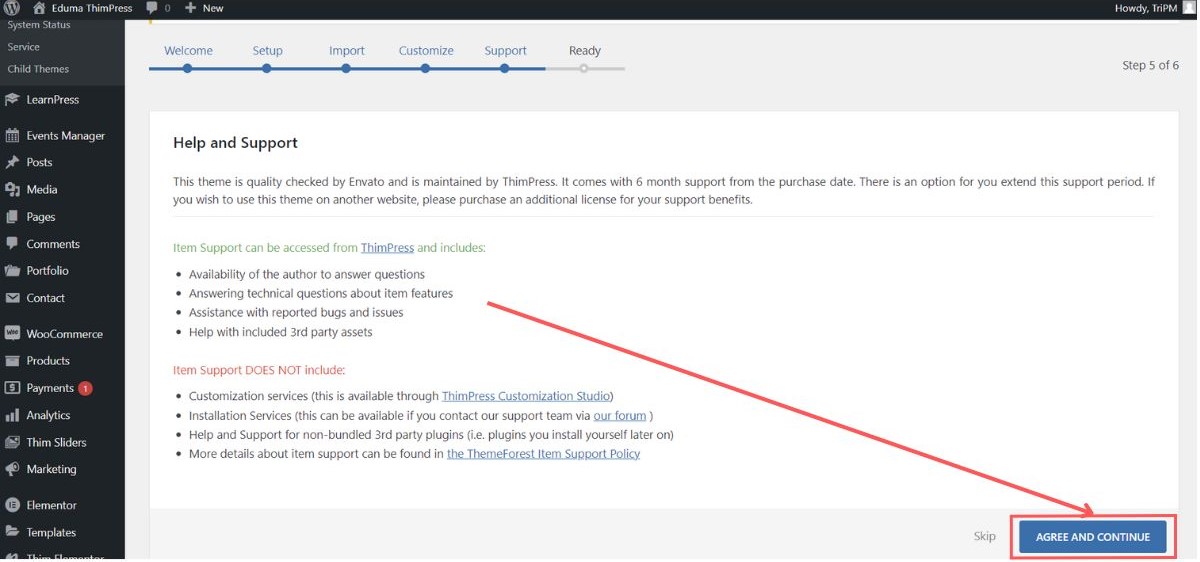
Help and Support
So you’ve come to the final step.
Actually, you have already completed the Eduma installation process, but this is a step for you to confirm your future benefits, especially our support process when encountering errors.
We guarantee to support you including:
- Questions about errors during installation and use of Eduma.
- Questions about technical errors while using Eduma’s features.
- Support receiving and handling Eduma’s bugs and issues.
- Support receiving and handling Eduma conflicts with 3rd party applications.
For errors related to 3rd party plugin conflicts, it will take us more time to learn and fix because it is related to PHP code. Please understand and sympathize if we are slow in handling the issue.
Installing Eduma Theme is Completed
Above are instructions for installing Eduma along with notes during the installation process. If you encounter any problems while installing and using Eduma, do not hesitate to contact us through social media and support forums.
Additionally, for issues you don’t understand clearly about Eduma, our separate Eduma documentation can help you. Hope you have a good experience with Eduma WordPress Theme.
Contact US | ThimPress:
Website: https://thimpress.com/
Fanpage: https://www.facebook.com/ThimPress
YouTube: https://www.youtube.com/c/ThimPressDesign
Twitter (X): https://x.com/thimpress_com


