We’re old enough to remember a time when the most advanced piece of technology in the classroom was a protractor. Yes, you read that right. Don’t carbon date us?
Thankfully, classroom technology has come a long way since then. With learning management systems (LMS) like LearnPress, you can spend a lot more time teaching and a lot less time fumbling with the overhead projector. But if you really want a 21st-century classroom, you’ll need to pair your LMS with an e-learning automation tool like Uncanny Automator.
In this quick guide, we’ll show you how Uncanny Automator can put your academic administration on autopilot so you can prioritize your students and staff. Auto-tag students in your CRM based on course enrolment or automatically log your staff’s course progress in your database to stay compliant. With Automator you can do it all—and so much more.
Now, toss out that spiral notebook and snap that 2B pencil in half. Class is in session.
What is LearnPress LMS Plugin?
LearnPress is a great LMS WordPress plugin built by us ThimPress. LearnPress is free to download and everyone can take advantage of this plugin to build their LMS site. Understanding that 1 plugin itself can’t do much, there is a wide range of free & paid LearnPress add-ons.
You can buy premium add-ons at a very reasonable price as packs:
Once you download and install LearnPress to your WordPress website, you can start building and editing your education site. Easy as pie!
What is Uncanny Automator?
Uncanny Automator (a.k.a. the world’s best teacher’s assistant) is the #1 WordPress automation plugin. And, with a quick glance at its features, it’s not hard to see why.
With 100+ integrations (and counting), you can connect all of your favorite apps and plugins, automate repetitive workflows, improve your sales funnels and save yourself time and money.

Uncanny Automator has plenty of triggers and actions for your LMS and other plugins packed into its Free version so trying it out is risk-free (and free). And don’t forget to register your free account with Automator. You’ll get a bunch of credits just for signing up so you can try out premium integrations such as GoTo Training, Slack, and Zoom.
We think you’ll find this e-learning automation tool to be considerably more advanced than a photocopier. But, with its no-code guarantee, it’s a lot easier to use—and a lot less prone to jamming.
So, once you’ve downloaded the FREE plugin and registered your account, head to the next section and see for yourself what makes Uncanny Automator the best tech in the classroom.
How to Automate Your LearnPress Website with Uncanny Automator
These are just a few of the ways that you can use Uncanny Automator on your LearnPress website to reduce your workload and save yourself a lot of time.
Connect LearnPress to Your CRM with Uncanny Automator
Auto-tagging your students in your CRM based on their course enrolment is the best way to remind students of upcoming quizzes and tests, inform them of course content updates, and extend unique offers.
We’ll show you how to connect LearnPress to Groundhog but you can replicate this recipe with another CRM such as ActiveCampaign or MailPoet.
Step 1: Create a New Recipe
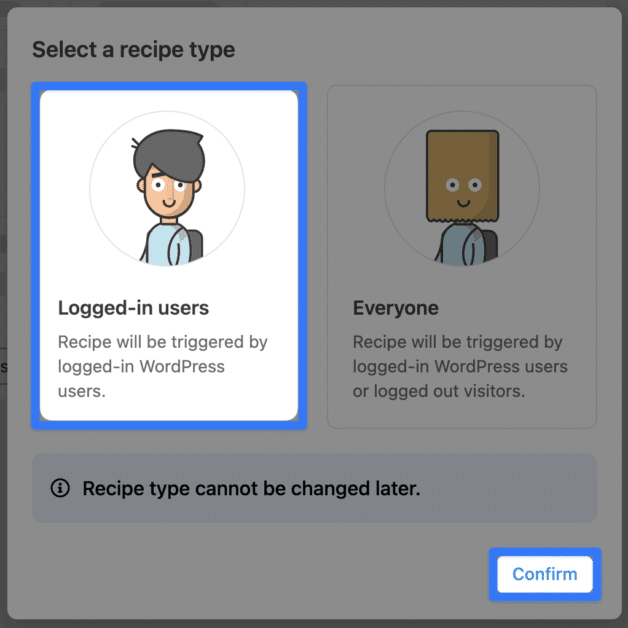
From your WordPress Admin Sidebar, navigate to Automator > Add New. In the pop-up window that appears, select Logged-in users.
Step 2: Name Your Recipe
You’re going to love e-learning automation so much that you’ll be creating dozens (or even hundreds) of recipes. As such, you’ll want to come up with a naming convention for your recipes that makes them easy to identify at a glance. For
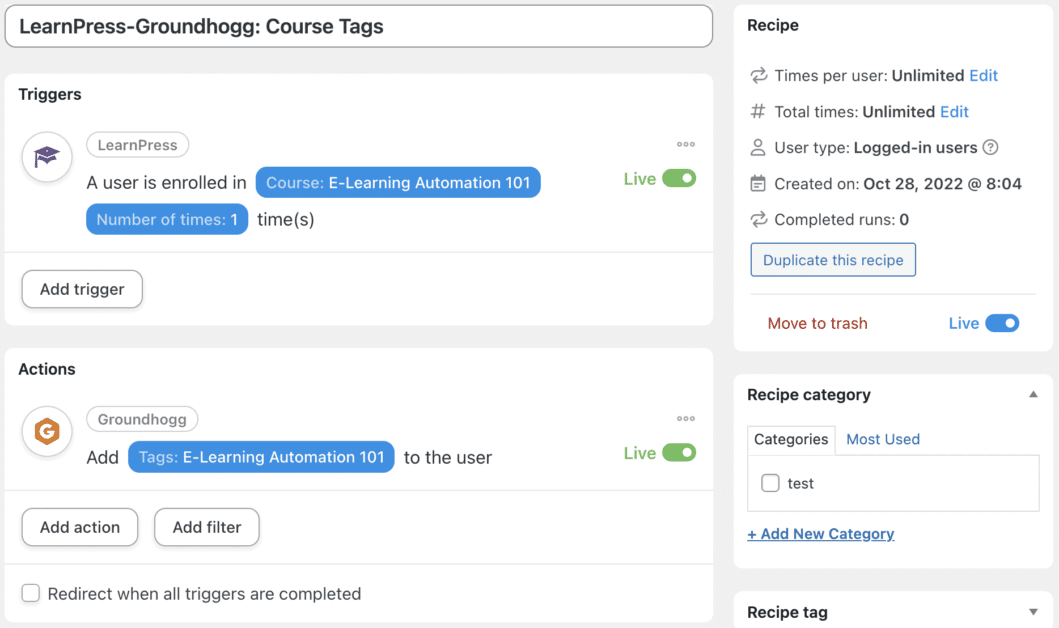
example, we’ve named this recipe LearnPress-Groundhogg: Course Tags because of the integrations involved.
Step 3: Configure Your Trigger
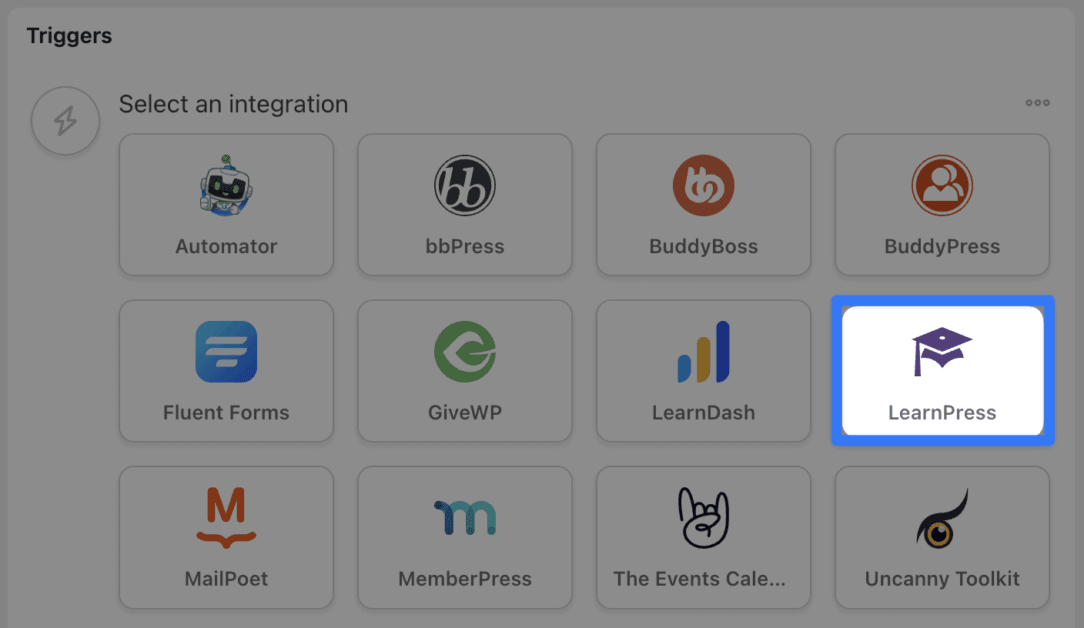
In the Triggers panel, click LearnPress.
From the drop-down list that appears, select A user is enrolled in a course.
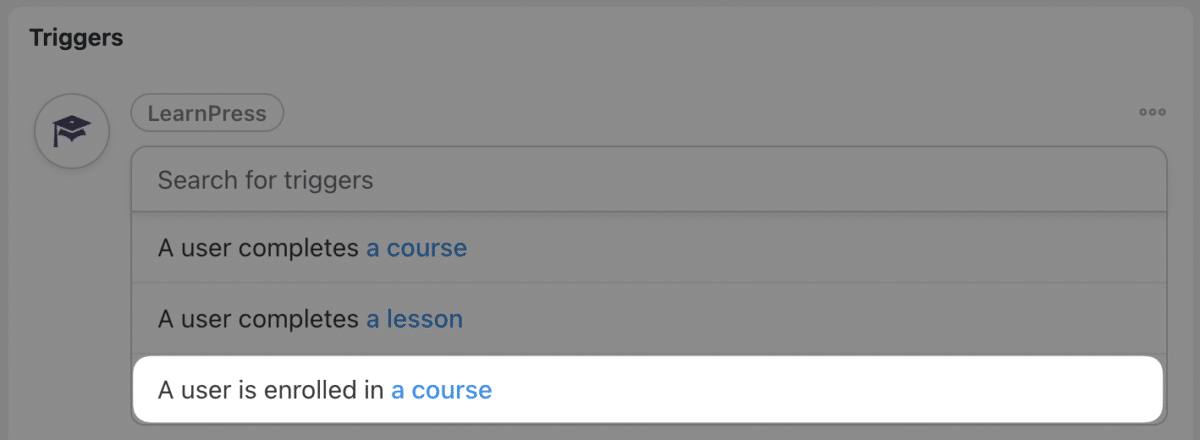
Automator will prompt you to select a course. We’ve selected our course E-Learning Automation 101.
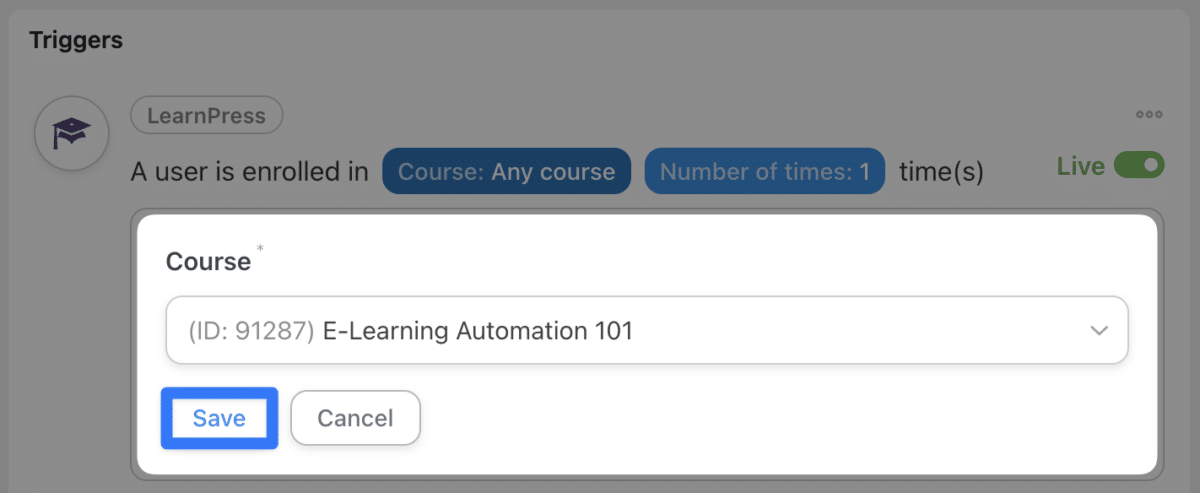
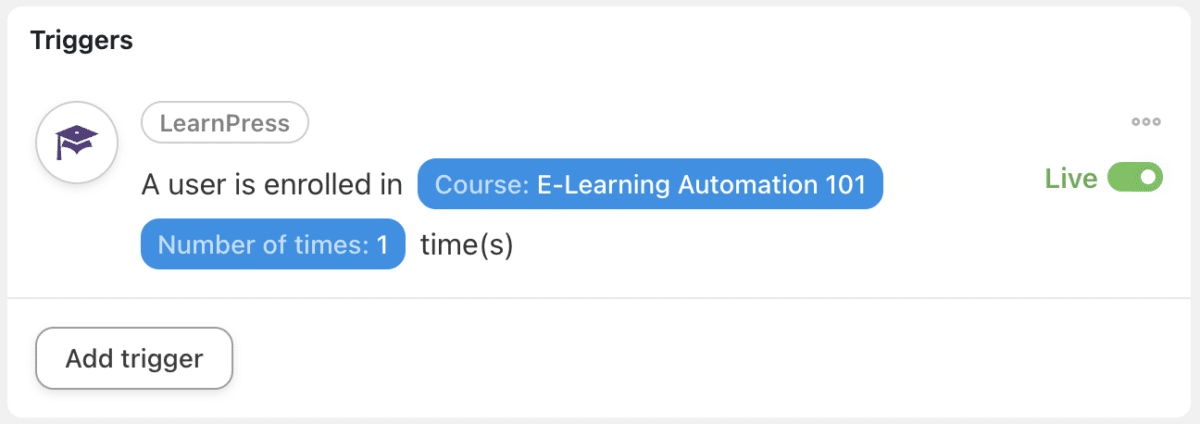
After selecting your course, click Save. Your trigger should look something like this:
Step 4: Configure Your Action
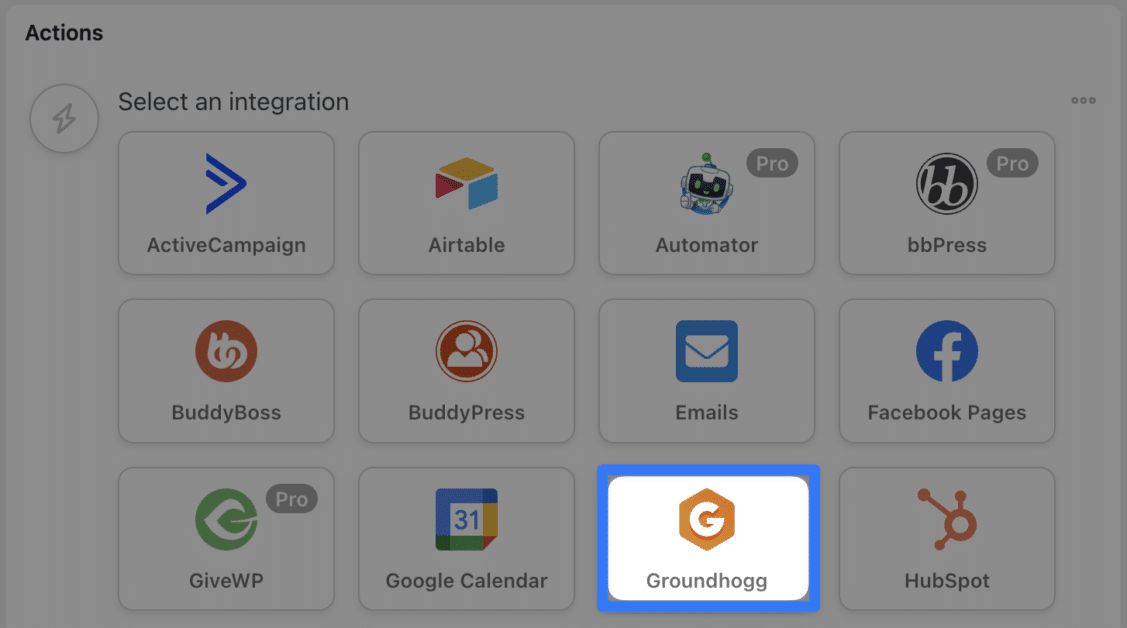
In the Actions panel, click Add Action. From the menu of available integrations, click Groundhogg or your preferred CRM.
From the drop-down list, select Add a tag to the user.

Automator will prompt you to select the tag. After you’ve selected the correct tag, click Save.

Step 5: Go Live and Learn(Press)!
Believe it or not, that’s it! Learning how to create Automator recipes is a lot easier than studying for the LSATs.
The only thing left for you to do is toggle the recipe from Draft to Live and let the learning begin!
Connect LearnPress to Google Sheets with Uncanny Automator
To keep your operations running smoothly, compliance is key, and so is automation. We’ll show you how to connect LearnPress to your Google Sheets employee directory to ensure that you stay compliant.
Note: Google Sheets is one of Automator’s premium integrations so make sure that you have sufficient tokens or upgrade to Automator Pro.
Step 1: Connect Automator to Google Sheets
From your WordPress Admin Sidebar, navigate to Automator > Settings. Click Premium integrations then click Google Sheets. At the bottom of the screen, click Sign in with Google.
Uncanny Automator will prompt you to select the Google account you want to connect.
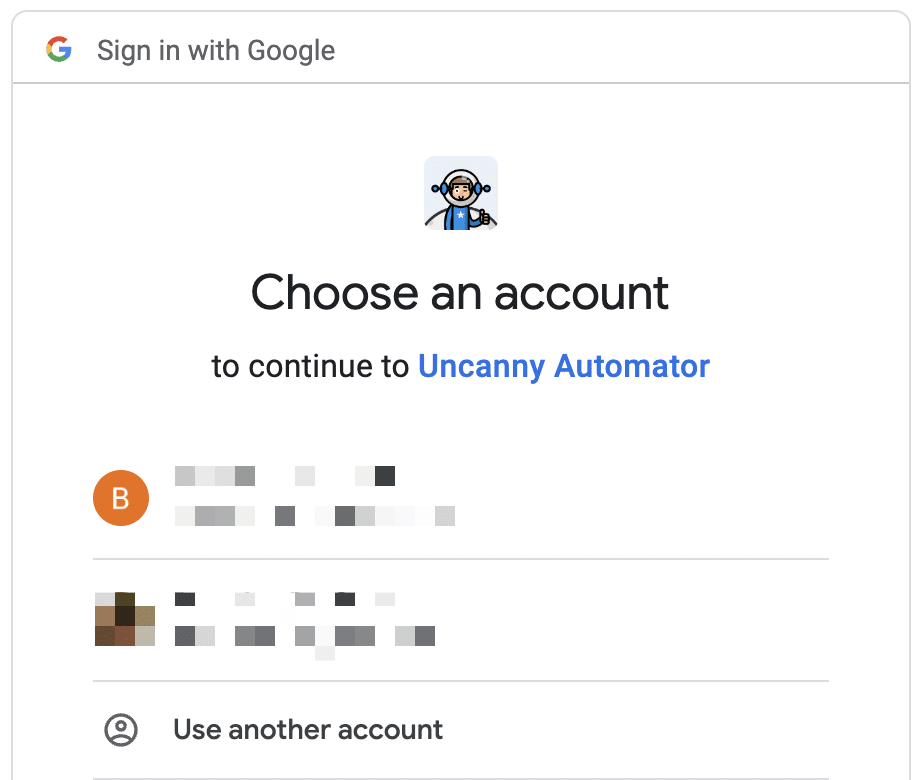
Follow the prompts to connect your Google account.
Step 2: Create a New Recipe
From your WordPress Admin Sidebar, navigate to Automator > Add New. In the pop-up window that appears, select Logged-in users.
Step 3: Name Your Recipe
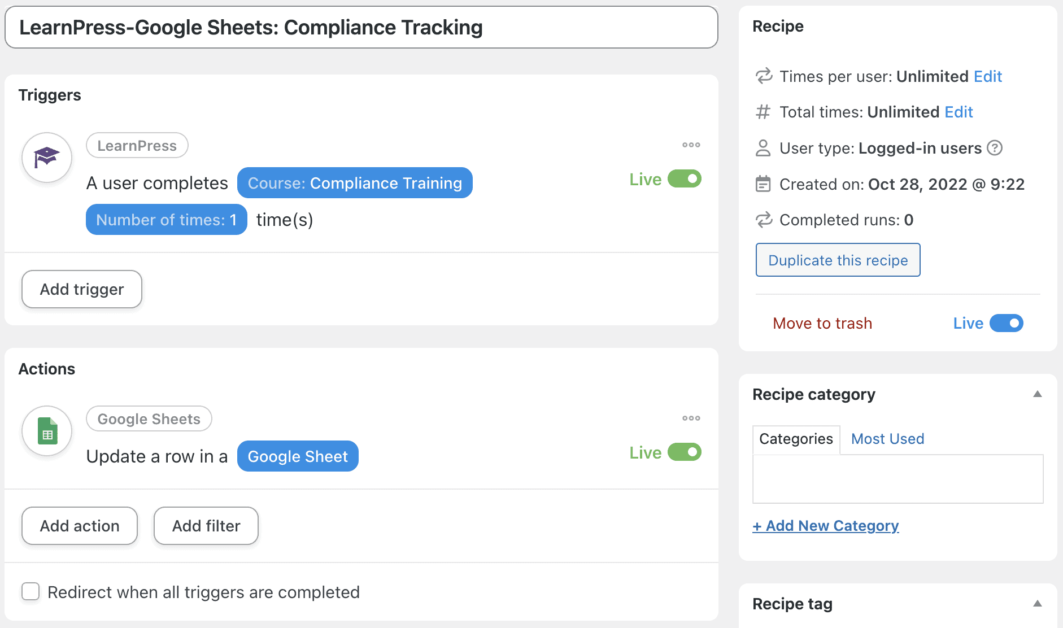
To stick with our naming convention, we’ve called this recipe LearnPress-Google Sheets: Compliance Tracking.
Step 4: Configure Your Trigger
In the Triggers panel, click LearnPress and select A user completes a course.

Automator will prompt you to select a course. We’ve selected our Compliance Training course.

After selecting your course, click Save. Your trigger should look something like this:

Step 5: Configure Your Action
In the Actions panel, click Add Action. From the menu of available integrations, click
Google Sheets or your preferred database.
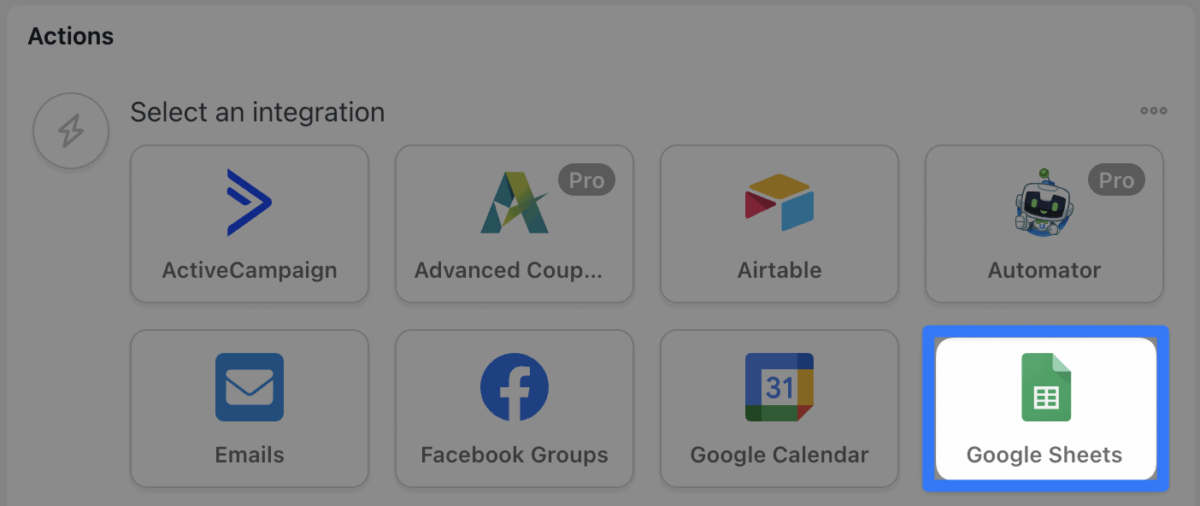
From the drop-down list, select Update a row in a Google Sheet.

Uncanny Automator will prompt you to select the specific Drive, Spreadsheet, and Worksheet where you store your Employee Directory information.
The next two fields are the Column search field and the Match value field. These two fields are what Uncanny Automator will use to identify the range of cells you want to update.
In the Column search field, select a column whose values will be unique to the employee whose records you want to update. For example, we’ve selected the Email column in our Employee Directory.

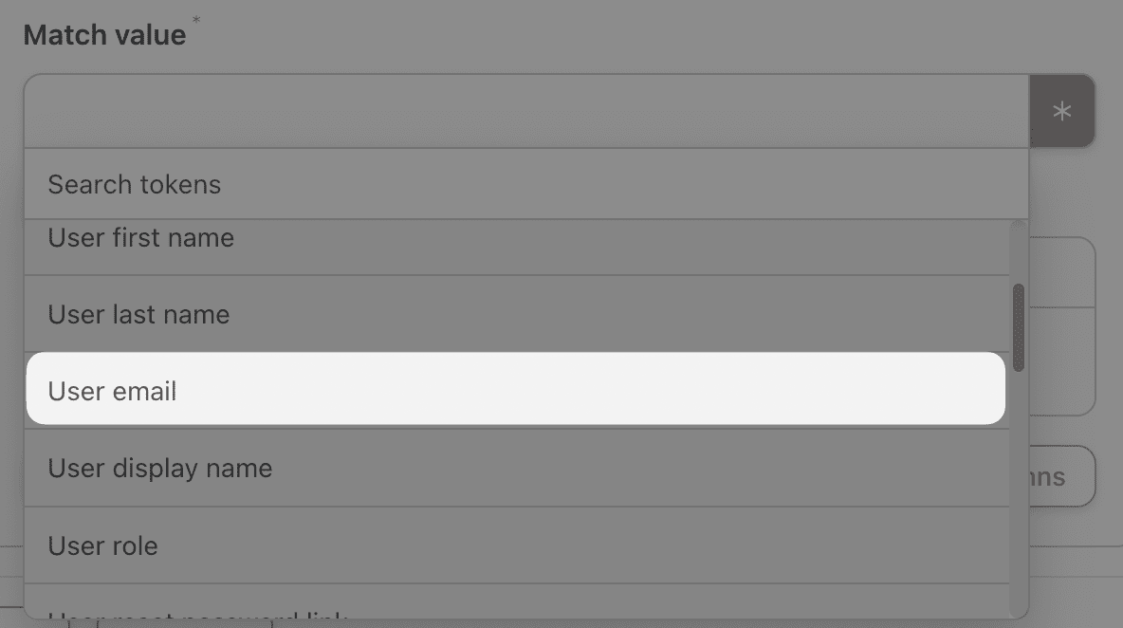
Next, in the Match value field, select the unique identifier to match to the value in your chosen column. We’ve selected the token (dynamic data pulled from our website and integrations) User email to match the value in our Email column.
To do this, click on the Asterisk in the Match value field—that’s the icon for tokens—and select User email.
Finally, you can select the specific cells within your Employee Directory that you want to update. Beneath the field labeled Row, click Get columns. Automator will retrieve the column titles from your Employee Directory and populate the field.

Choose which values you want to update by toggling the Update button. Select your Compliance column and enter the value that indicates your employee has completed the Compliance Training course.
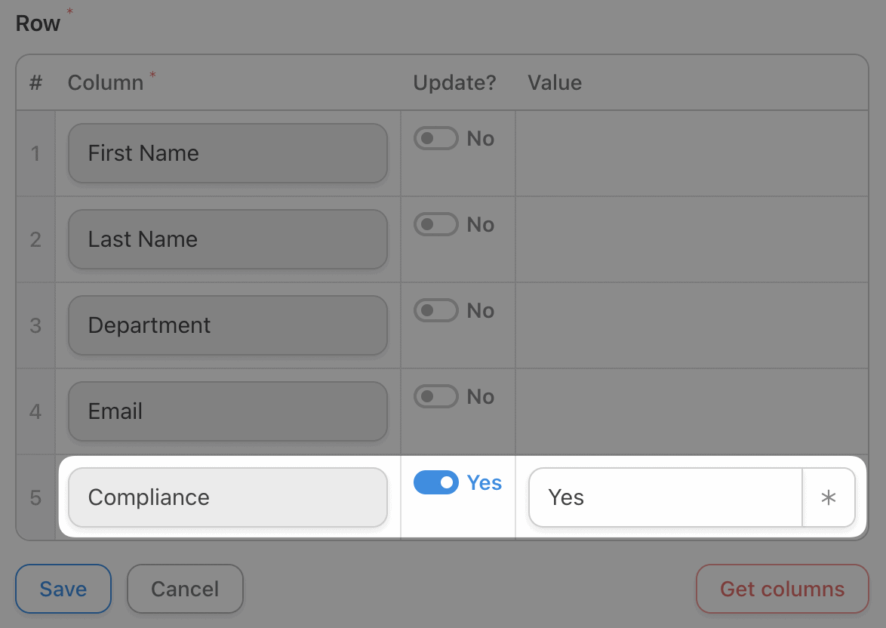
When you’re finished, click Save. Your action should look something like this:
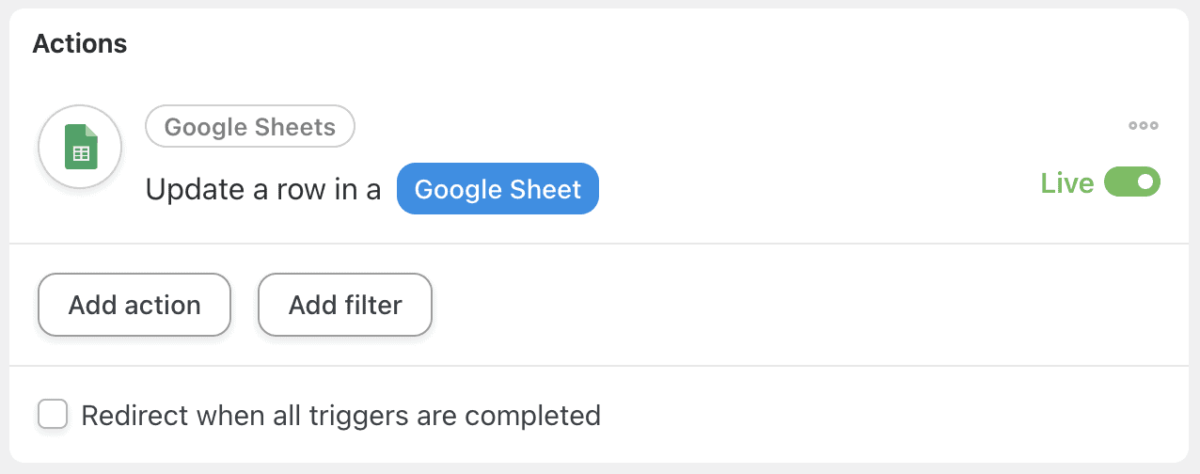
Step 6: Go Live and Stay Compliant!
Toggle your recipe from Draft to Live.
Step 7: Automate Like a Pro
Now that you’ve gotten the hang of simpler automation, you’re ready for the advanced course. Add a delay and another action to notify your HR team via Slack so they have time to review the compliance training before the Automator updates the official records.
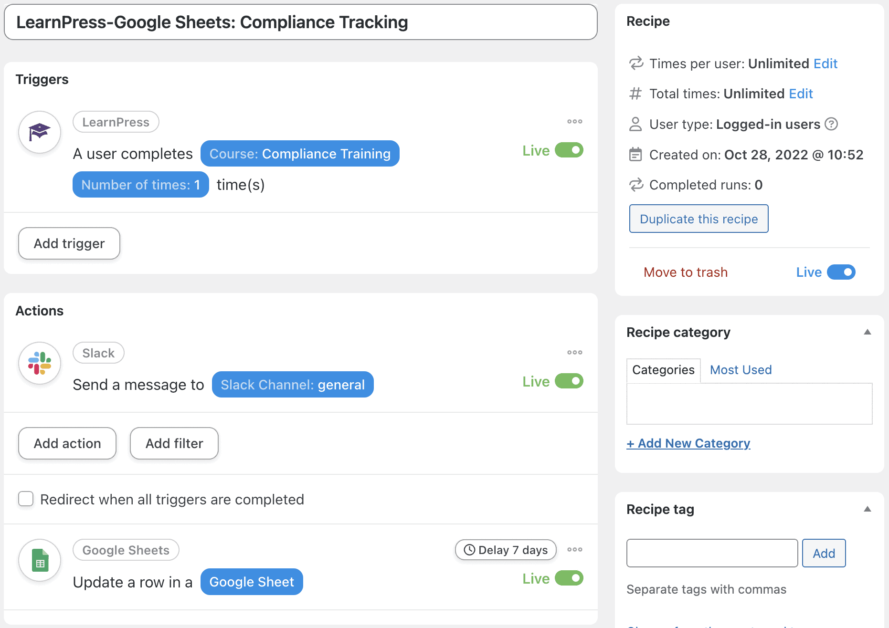
You can use all kinds of filters, tokens, and delays to fit Automator seamlessly into your workflows and create entirely new ones.
Ongoing Education and Automation
Once upon a time, solar-powered calculators were the very cutting edge of classroom technology. Today, it’s Uncanny Automator and LearnPress. We believe that education (and automation) should be ongoing. Tell us what e-learning automation you would like to see in the classroom of the future.
Should you encounter any issues during installation or while using LearnPress, please feel free to reach out to us or consult the comprehensive LearnPress Tutorial & Guide articles provided by ThimPress.
Read more: Add WPML Language Switcher To Menu and Get The Best New Needed
Contact US | ThimPress:
Website: https://thimpress.com/
Fanpage: https://www.facebook.com/ThimPress
YouTube: https://www.youtube.com/c/ThimPressDesign
Twitter (X): https://twitter.com/thimpress
