Want to improve your WooCommerce emails’ open rate, CTR, and deliverability? Then, a cookie-cutter approach won’t be of great help. You need to customize WooCommerce emails so that they resonate more with your target audience.
Don’t worry! In this guide, we’ll walk you through all you need to know about WooCommerce custom email, including:
- WooCommerce email customization overview
- How to customize WooCommerce’s default emails?
- How to customize WooCommerce emails using a plug-in?
Let’s dive right in!
WooCommerce Email Customization 101
How many types of WooCommerce email are there?
There are two types of WooCommerce emails:
- Transactional emails
- Marketing emails
1. Transactional emails
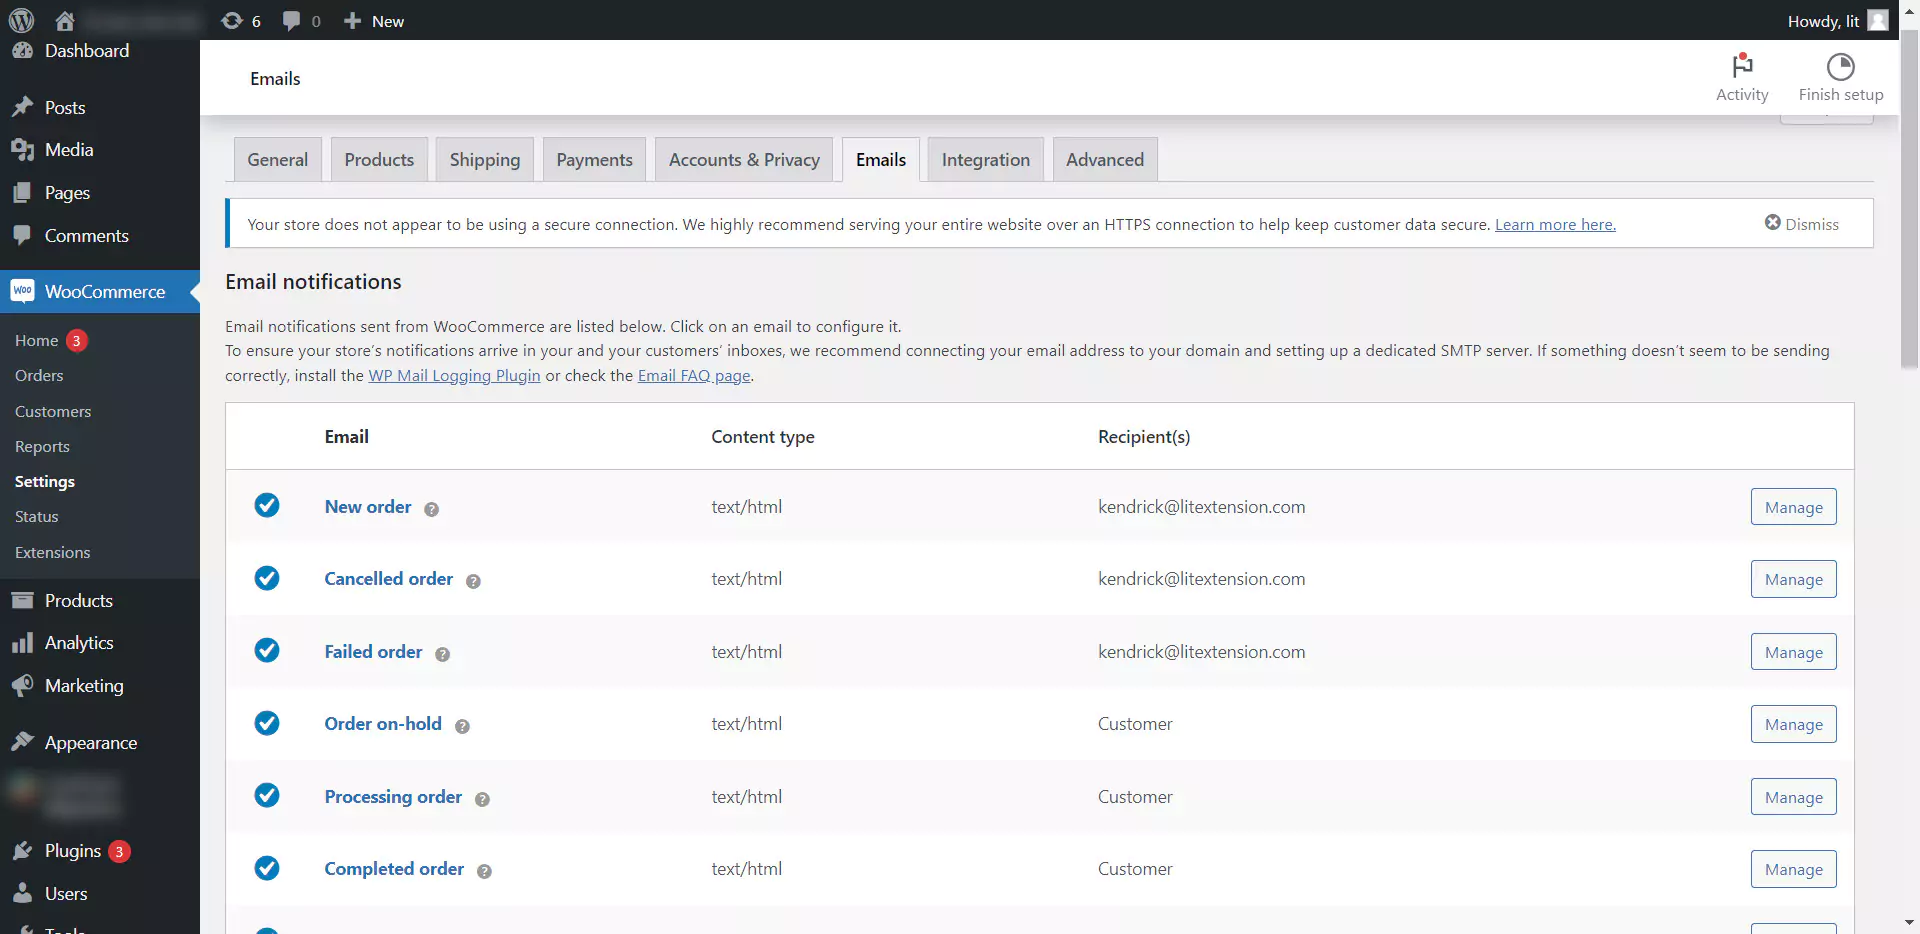
WooCommerce transactional emails, also known as default WooCommerce emails, are the emails that come natively with WooCommerce:
- New Order: This email tells you about a new order.
- Canceled Order: You get this email when an order is canceled.
- Failed Order: You receive this email when an order isn’t sent successfully.
- Order On-hold: Your customers receive this email if there’s a delay with their order.
- Order Processing: After customers pay for their order, they get this email with order details.
- Order Completed: This WooCommerce order confirmation email template tells customers their order has been sent and completed.
- Order Refunded: Customers get this email when their order is given money back.
- Customer Invoice: This email is sent to customers with information about their order and how to pay.
- Customer Note: Sent when a customer adds a note to their account.
- Password Reset: Customers receive this email when they ask to change their password.
- New Account: When customers create a new account, they get this email.
2. Marketing emails
WooCommerce marketing emails are emails that serve marketing purposes like upsell, cross-sell, automation, etc., and do not come natively with WooCommerce’s default emails. Instead, you need a plug-in to activate this type of WooCommerce email.
Why customize your WooCommerce emails?
Just like an ad copy or an organic social post, your WooCommerce emails only work to your advantage when you optimize them with your branding and target audience in mind. Here are the top reasons why WooCommerce email customizations are a must, not a plus:
- Improve your open rate: The subject line is the first thing your audience sees when your email lands in their mailbox. Hence, by customizing your WooCommerce email subject lines, you can increase the chance that the recipients open your well-curated emails.
- Ensure consistency: Customizing ensures that all your email communication maintains a consistent style and messaging, helping you build a strong brand presence.
- Improve your brand image: Custom templates make your emails look more professional and credible, showing customers that you care about their experience.
- Make your emails more relevant: Personalized templates allow you to include relevant information specific to your products, promotions, and services, making the emails more engaging.
- Improve your CTR and sales: Your customers receive tons of emails in their mailbox per da. Hence, if you fail to customize your WooCommerce emails, you are unlikely to make a noise and achieve whatever goal you set for your email campaigns.
But don’t worry! WooCommerce’s limitless customization and wide range of robust email plug-ins allow you to customize your emails to the fullest.
| ?Besides unlimited email capabilities, WooCommerce is also well-reputed for many other things. To name a few, great scalability, extensive customizations, and top-notch SEO features are some features another eCommerce platform cannot come close to. Want to migrate to WooCommerce? We highly advise you to try LitExtension WooCommerce migration service for a fast, risk-free & error-free experience. |
How To Edit WooCommerce Emails By Default?
If you only want to customize WooCommerce’s transactional emails by default, you can actually customize WooCommerce emails free in the WooCommerce email settings.
Here are the four easy steps to get you started:
Step 1: Go to WooCommerce Email Settings
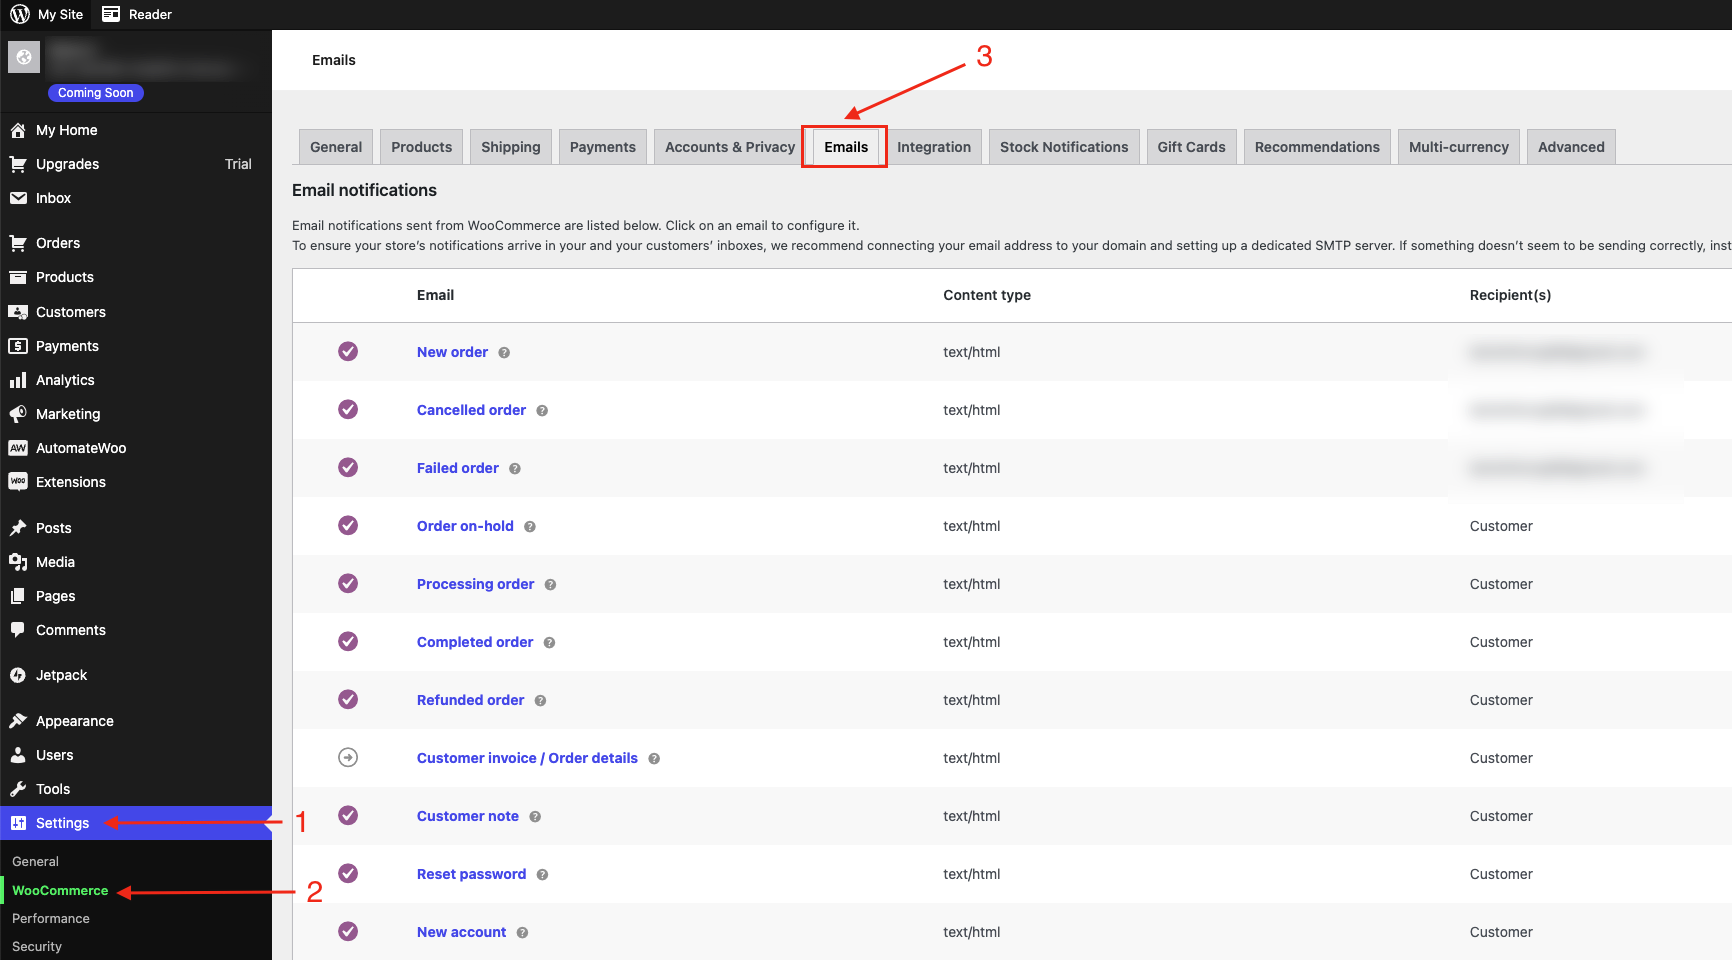
Firstly, log in to your WordPress account. Then, within your admin dashboard, navigate to WooCommerce > Settings > Emails. Herein, you will see a list of all transactional WooCommerce emails that we mentioned above.
Step 2: Customize your WooCommerce general settings
The next thing to do is configure your WooCommerce email global settings.
Note: With “global settings”, you’ll use one template that shares the same set of text color, background color, header image, etc., for all your WooCommerce transactional emails.
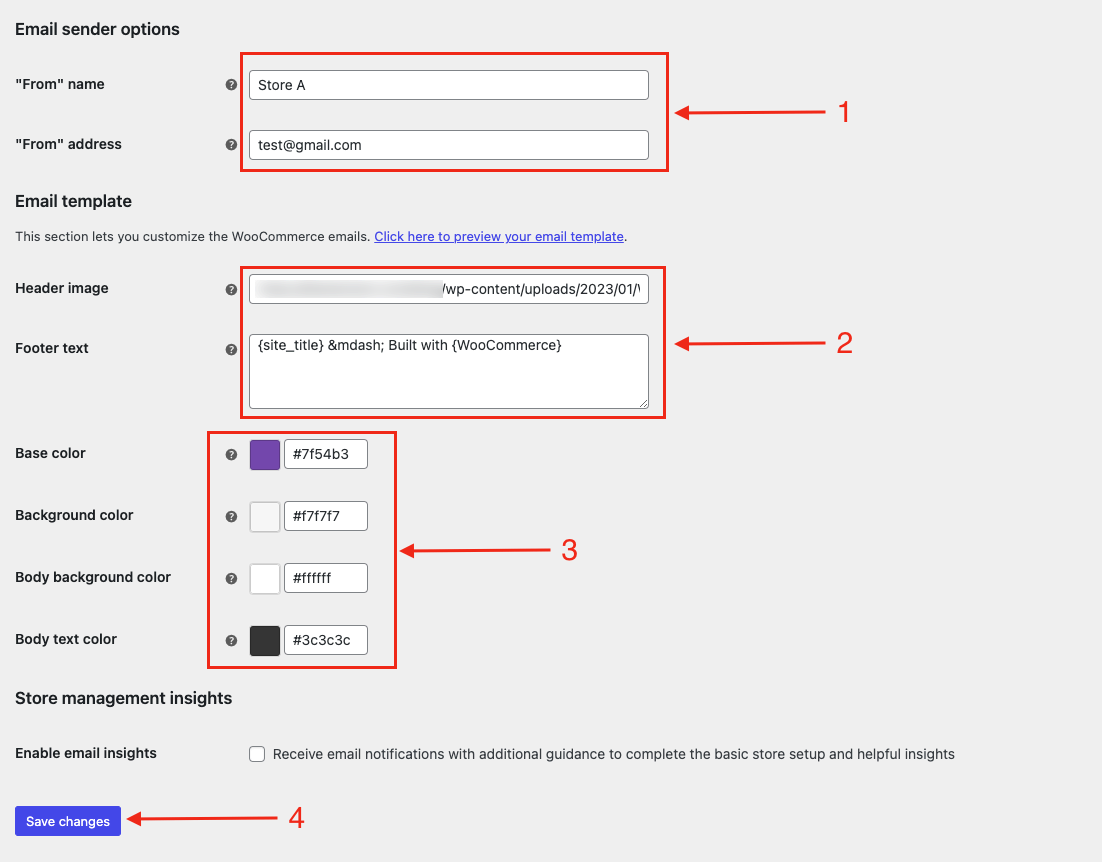
Within the Emails tab from Step 1, scroll down to the Email sender options to add your sending domain. Then, still on the same screen, navigate to Email template section to customize your WooCommerce email’s global settings, which include:
- Header image: This is the image at the top of your emails. We advise you to use your logo or other other branded graphics here.
- Footer text: Information displayed at the bottom of your emails. For instance, you could include your brand’s tagline and link to important pages.
- Base color: The color of headings, links, and the background of your email title.
- Background color: The color of your outer layer’s background.
- Body background color: The color used for your email content’s background.
- Body text color: The color of all the dummy text in your emails.
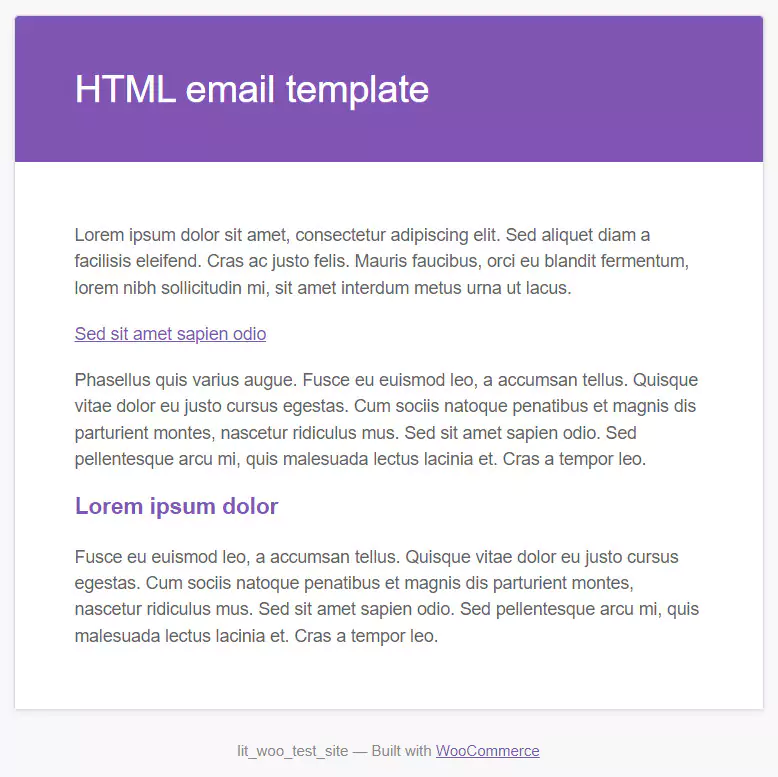
Don’t forget to preview your email’s global settings by hitting the ‘Click here to preview your email template’ link.
After you’re satisfied, click Save.
Step 3: Edit the content of a specific WooCommerce email
Afterward, you can choose to customize any of your WooCommerce’s default emails. Simply click Manage on the specific email you want to edit.

After picking the email you want to customize, the next thing to do is edit your email content.
By default, your WooCommerce transactional email is set under HTML type, but you can switch the email type to plain text or multipart as you wish.
- HTML type allows you to customize your WooCommerce emails with formatting and add multi-media content. If you want to use WooCommerce email shortcodes to customize your WooCommerce emails, HTML is recommended.
- As its name might suggest, with plain text type, you can only edit your WooCommerce emails’ texts
- Multipart type enables you to combine both the email types above in your emails.
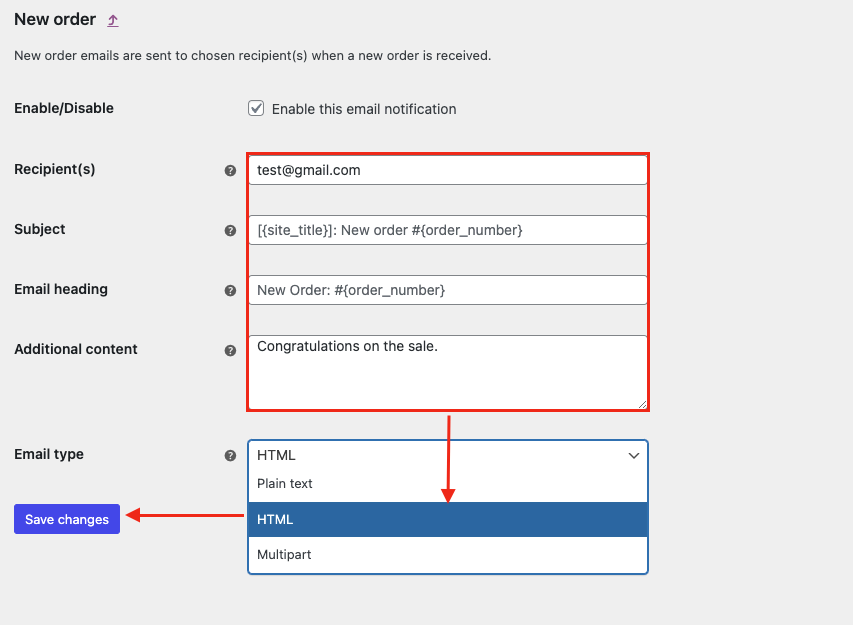
After you have chosen your email type, here are the editable elements of a typical WooCommerce transactional email:
- Subject
- Email heading
- Additional content
After you’ve done this, remember to hit the Save button.
| ? Bonus: Want to learn WooCommerce custom emails per product? If you sell various products, you may want to incorporate specific details relevant to each product in your customer emails. To do this: Navigate to the “Products” section, select the product you want to modify, Click on the “Edit” option. Scroll down to the “Product Data” section, and then select “Advanced.” Within this section, you will find an empty text box where you can insert a Purchase Note. |
How To Customize WooCommerce Emails With A Plug-in?
From our experience, if you are serious about increasing your engagement or converting more sales via email, WooCommerce’s default emails are far from enough.
For instance, if you want to nurture your leads with an email newsletter, send a cart recovery email, or upsell your customers based on a certain attribute or event, you’ll need an email plug-in.
So, let us show you how to customize WooCommerce emails with a plug-in next!
Step 1: Install and activate a WooCommerce email plugin
In this guide, we’ll use MailPoet– an email extension developed by WooCommerce themselves for more reassured quality.
On your WordPress admin dashboard, go to Plug-ins and click Add new > type in ‘mailpoet’ and install it to your site.
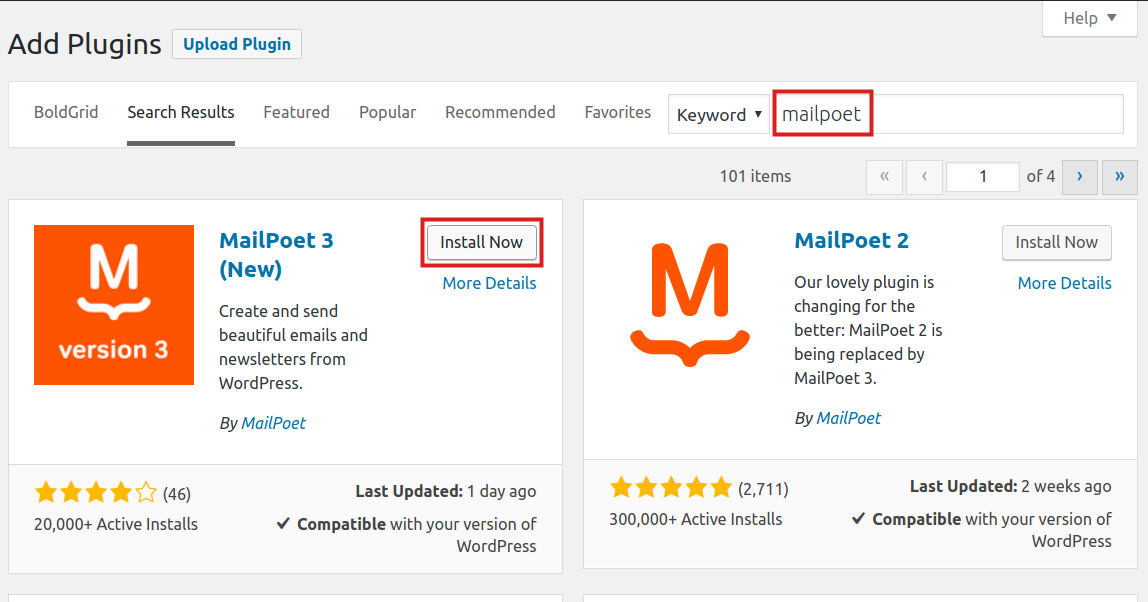
After successfully installing MailPoet, simply click Activate to start using the plug-in as your WooCommerce email customizer.
Step 2: Pick the type of email you want to send
Navigate to your newly-installed MailPoet > Choose Emails and click + New Email.
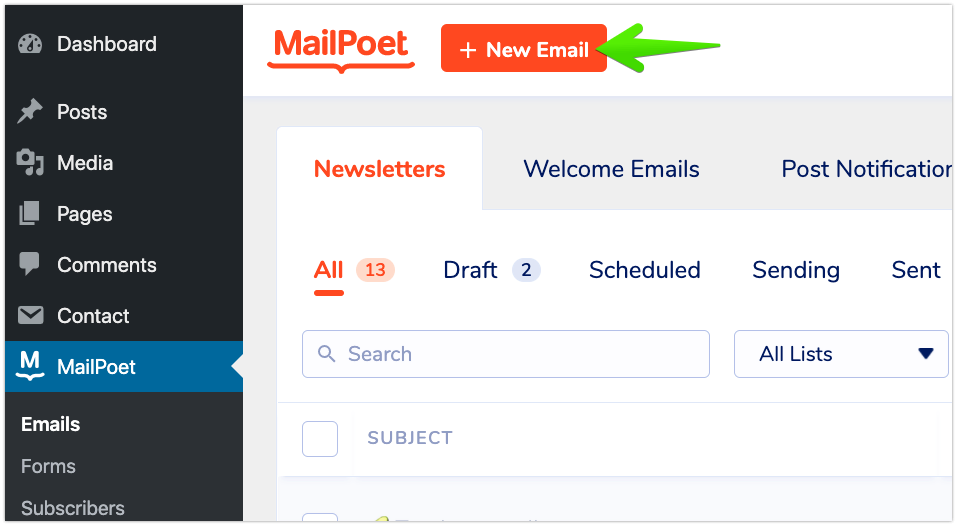
Then, choose the type of email you want to customize. For example, if you want to create an email newsletter, simply navigate to Newsletter and choose Create to get started.
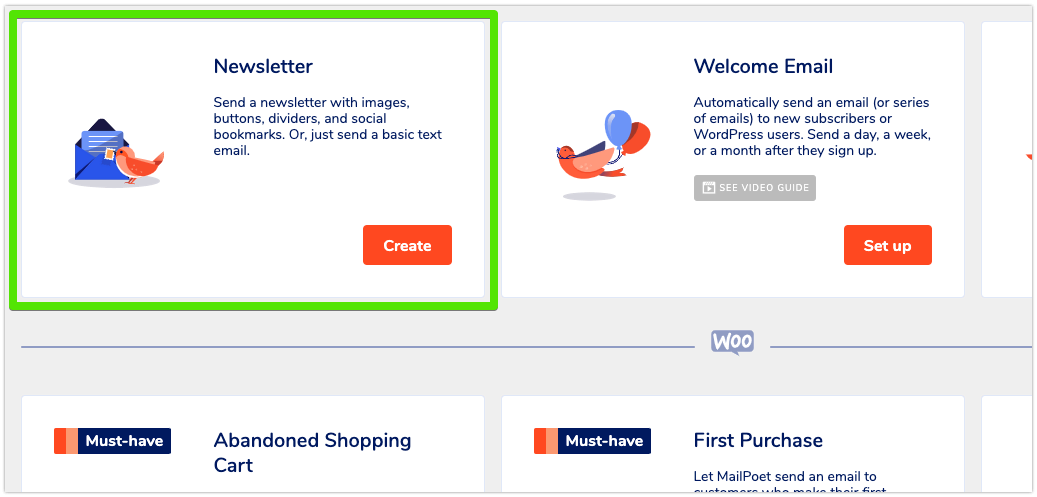
Step 3: Pick a ready-made template
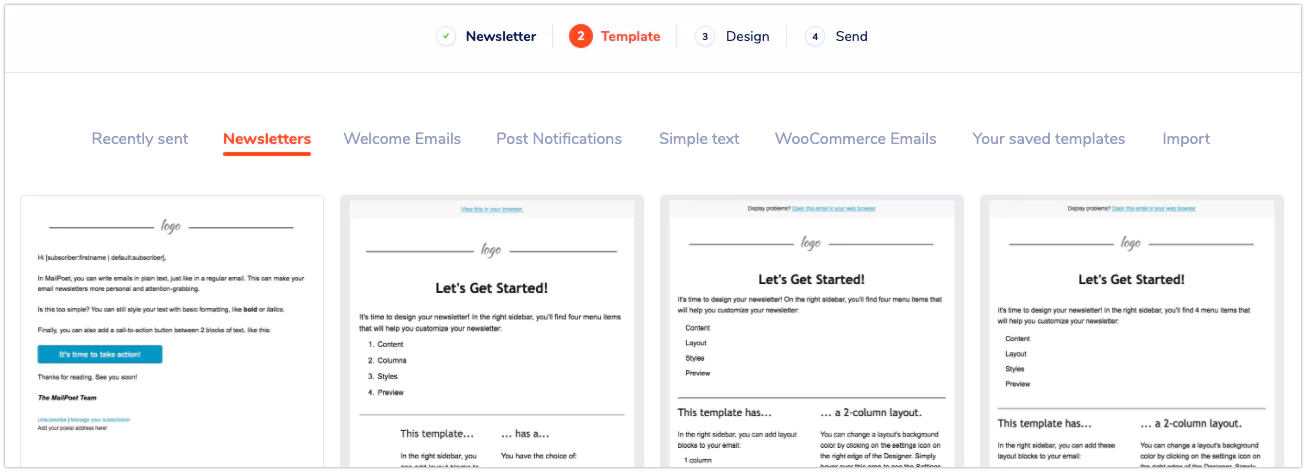
Next, choose a pre-built template from MailPoet’s extensive email templates to build your email newsletter. Click on the template you want to use to proceed to the next step.
Step 4: Customize your WooCommerce emails
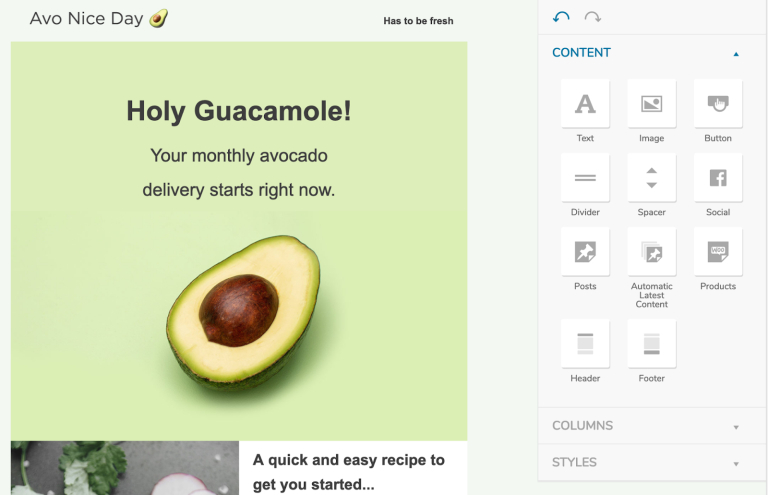
Afterward, you can customize your emails’ looks and feels using MailPoet’s intuitive drag-and-drop editor as shown below:
After you have done customizing your email newsletter, remember to preview it to ensure nothing goes wrong. Then, click Next.
Step 5: Publish or schedule WooCommerce emails
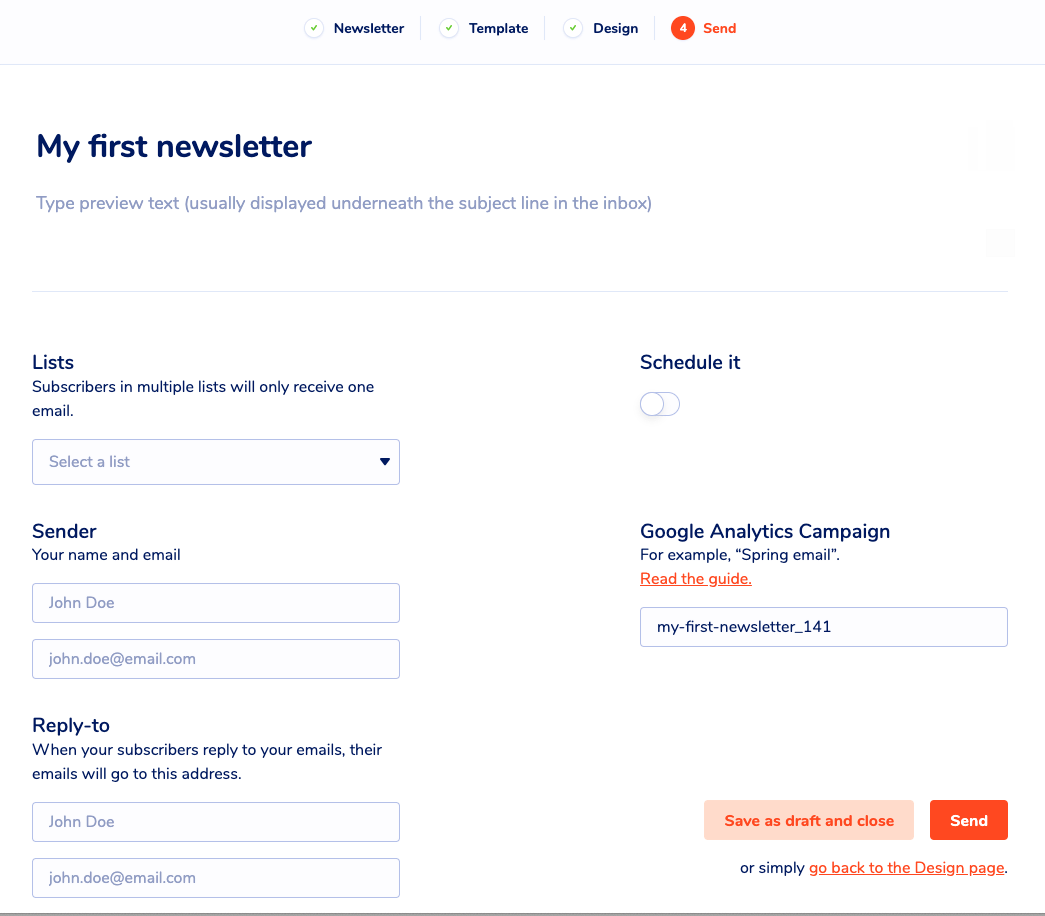
Finally, you can choose to send your email immediately or schedule it to be sent out at a given date and time.
Frequently Asked Questions
How do I customize my email in WooCommerce?
To customize emails in WooCommerce, go to WooCommerce > Settings > Emails. You can edit email templates, content, and styling there.
How do I customize my WordPress email?
You can customize WordPress emails by using a plugin like WP Mail SMTP or an email customization plugin or by coding custom email templates in your theme’s functions.php file.
How do I change my WooCommerce email logo?
Change your WooCommerce email logo by navigating to WooCommerce > Settings > Emails. Edit the email header or footer HTML to replace the logo.
Where are WooCommerce email templates?
A typical WooCommerce email template is located in your WordPress admin area under WooCommerce > Settings > Emails. You can customize and manage them from there.
Wrapping Up!
Email is among the marketing channels with the highest return on investment (ROI) rate. Hence, if you want to leverage the email channel to its full potential, customization is key. And we hope after reading this article, you can know how to customize WooCommerce emails like a real ‘pro’.
Contact US | ThimPress:
Website: https://thimpress.com/
Fanpage: https://www.facebook.com/ThimPress
YouTube: https://www.youtube.com/c/ThimPressDesign
Twitter (X): https://x.com/thimpress_com
