Getting your WordPress Image Sizes right is critical for two reasons:
- You want your images to look more attractive.
- Images should load quickly without slowing down your site.
This essential guide will teach you everything you need to know about WordPress Image Sizes.
Continue reading!
How WordPress Image Sizes Affect Your Site?
When it comes to WordPress, Image Size is important.
If you choose the wrong image size, you may end up with images that are misplaced, blurry, or slow to load, affecting the speed of your website and overall SEO. Fortunately, WordPress can assist you in avoiding these issues.
Image Processing in WordPress (Default Sizes)
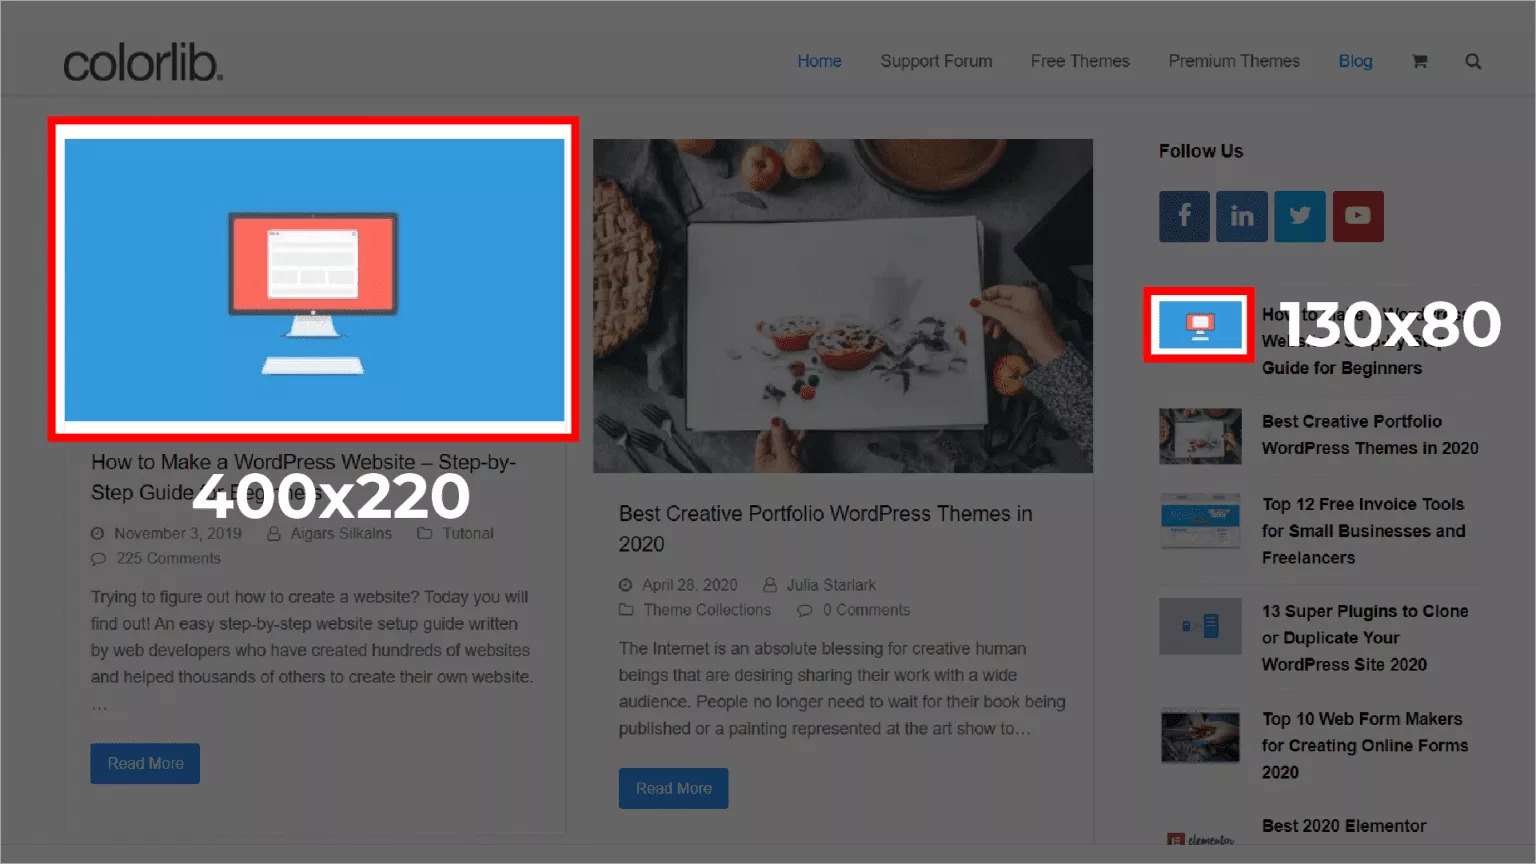
When you upload an image, WordPress generates four different image sizes:
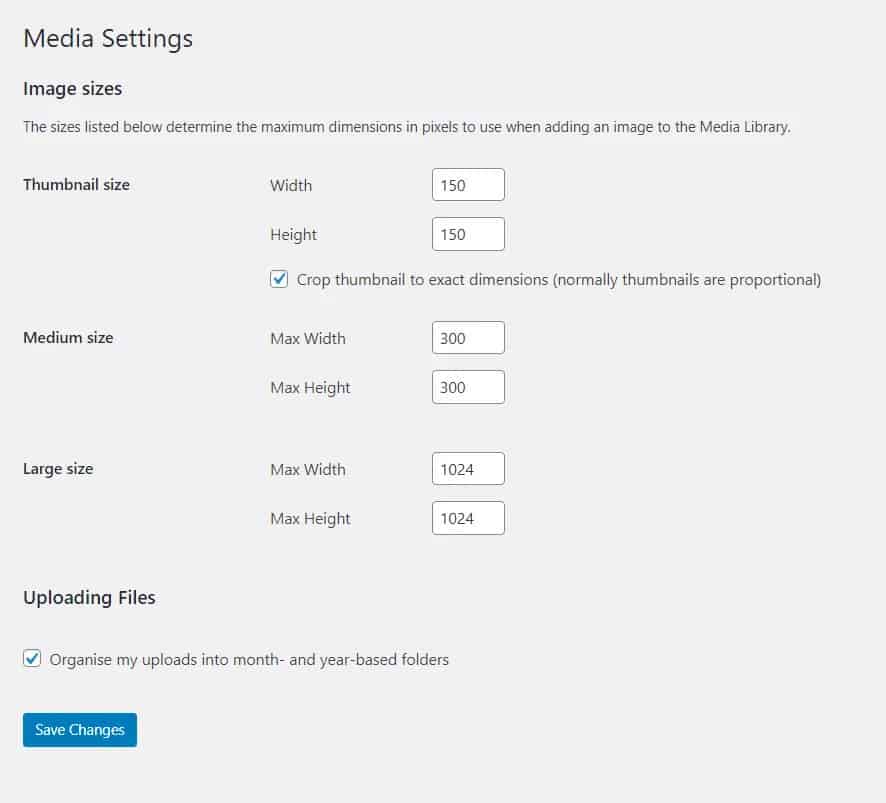
- Size of a thumbnail (150 x 150 pixels)
- Size medium (maximum 300 x 300 pixels)
- Large dimensions (maximum 1024 x 1024 pixels)
- Complete size (the original size of the uploaded image)
WordPress does this so that you don’t have to keep manually resizing images and to ensure that the best image size is chosen for different locations on your website.
For example, the image size used in a blog post’s header will be different from the thumbnail image.
Modify the WordPress Image Sizes
You can upload custom image sizes in addition to the default image sizes to meet your specific needs.
Here’s how it’s done:
- Access the WordPress Admin Dashboard
- Click on Settings – Media
- Adjust the default image settings in the Media Settings to your wish.
- Click Save Changes to confirm
How to Choose the Best WordPress Image Sizes
What is the ideal image size for ensuring fast, high-quality images that look good and respond on desktop, tablet, and mobile devices?
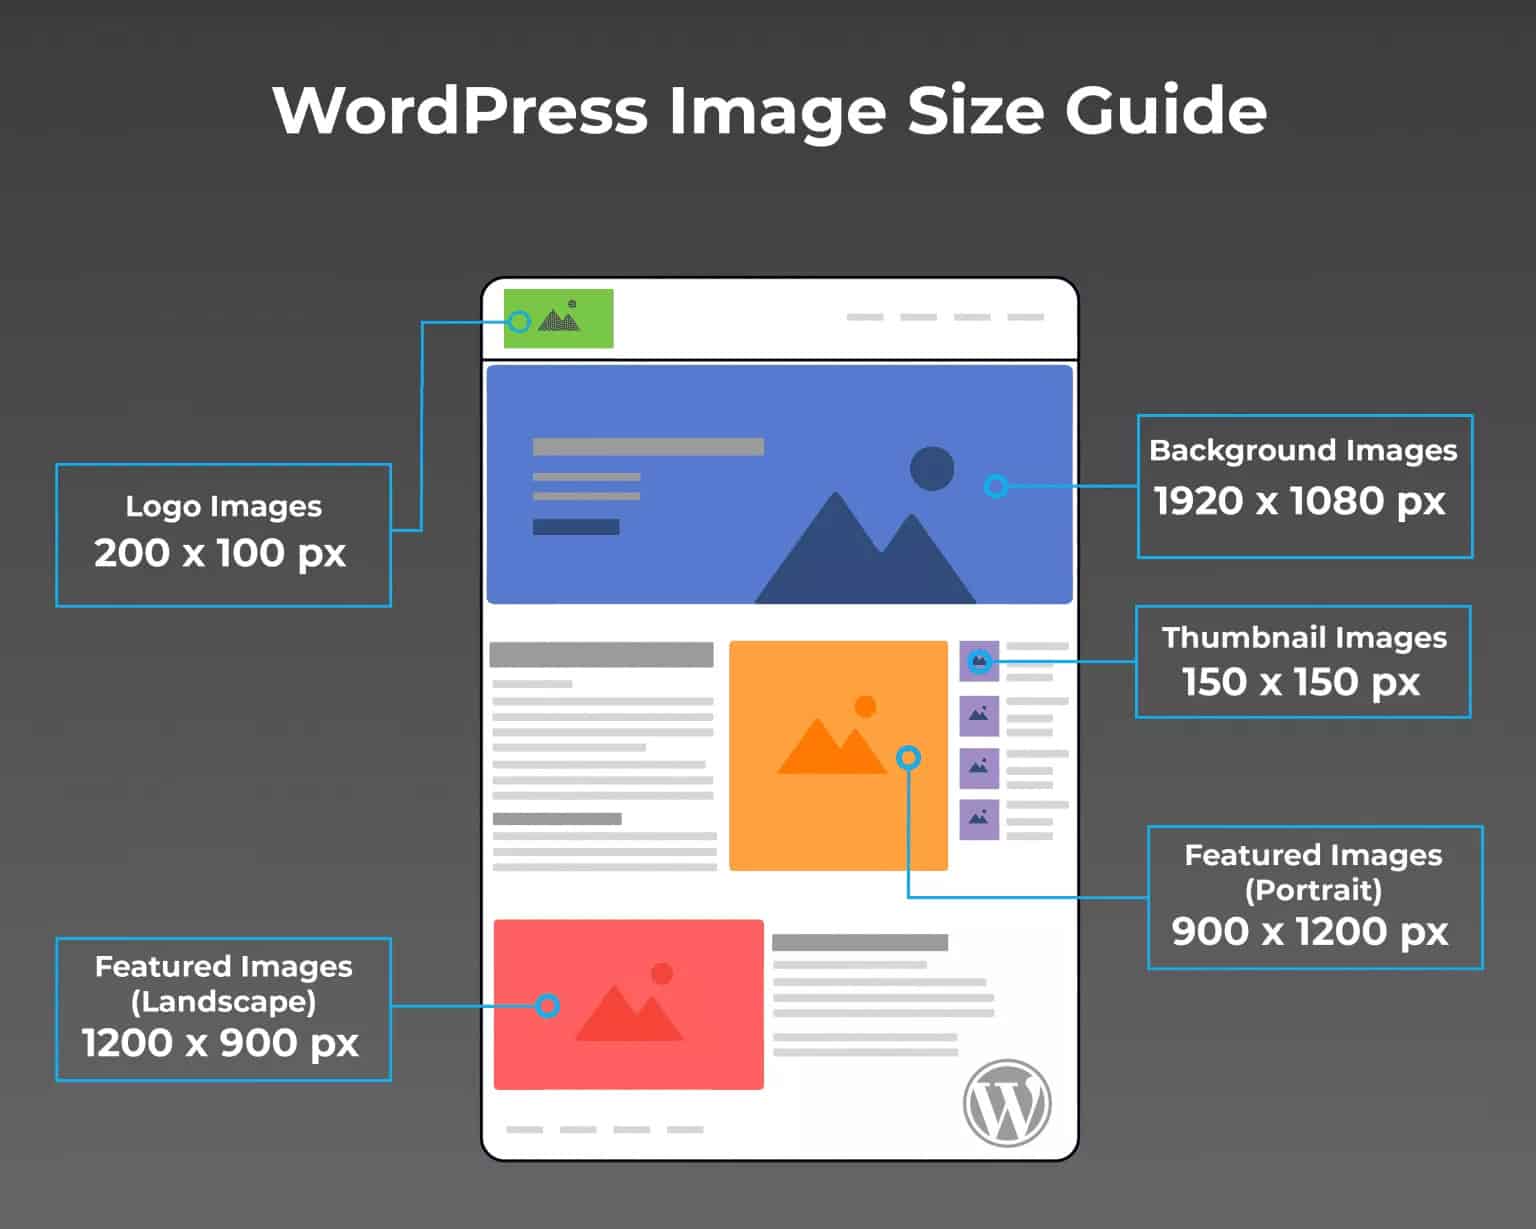
The following are the best image sizes for WordPress:
- Image size for a blog post (1200 x 630 pixels)
- Size of the header image (banner size 1048 x 250 pixels)
- Size of the featured image (landscape 1200 x 900 pixels)
- Size of the featured image (portrait 900 x 1200 pixels)
- WordPress background image dimensions (1920 x 1080 pixels)
- Image size for the logo (200 x 100 pixels)
- Size of a thumbnail image (150 x 150 pixels)
WordPress Image File Sizes Optimization
The size of each image file is an important consideration when uploading images to WordPress. Any image with a large file size will slow down your website, affecting user experience and potentially causing visitors to ‘bounce‘ from your site.
It’s pointless to make images any larger than they need to be.
Except for large photos, WordPress image sizes should be no larger than 150kb.
Don’t Forget about Image Compression
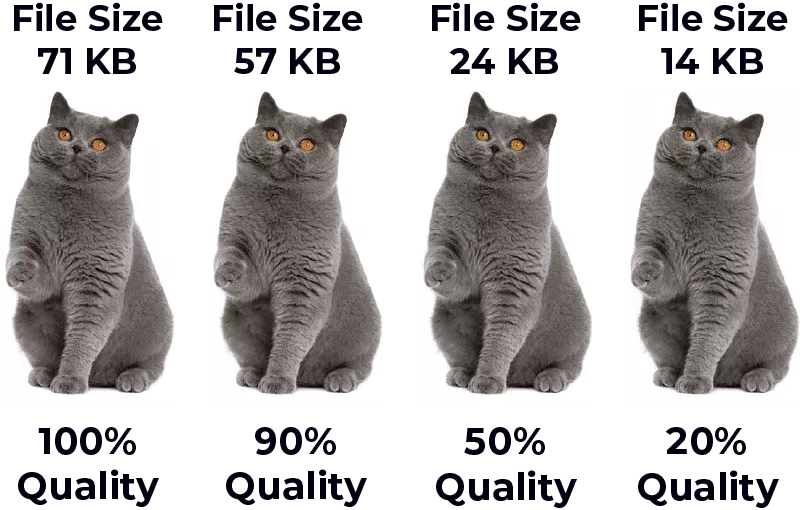
When it comes to the success of your website, website speed is crucial. Compressing images before uploading to WordPress improves performance without sacrificing image quality (it does not resize images).
Every image you upload to your site should have image compression applied; otherwise, your site’s performance will suffer.
TinyPNG is a fantastic online compression tool that compresses images without sacrificing image quality.
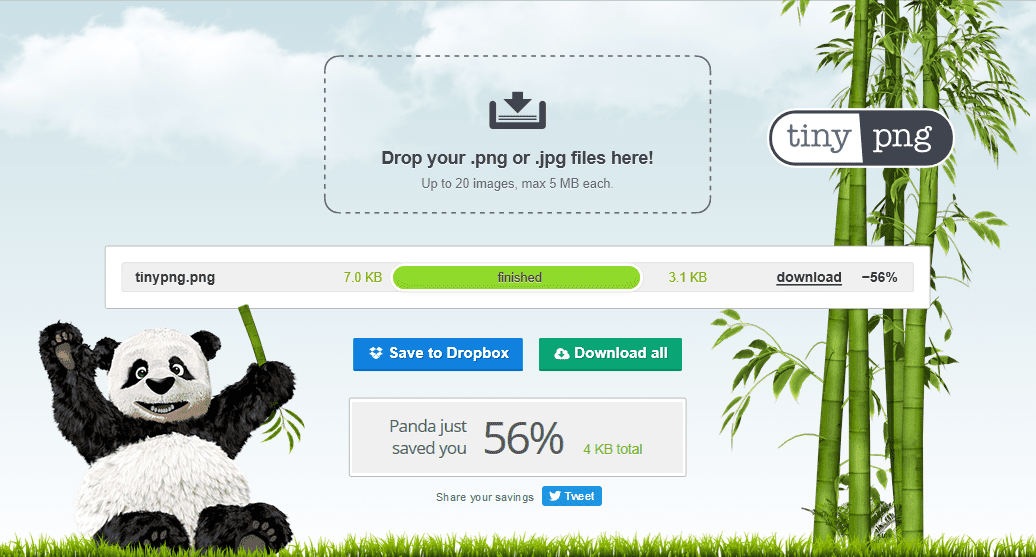
To improve website performance, compress every JPEG (photo) and PNG (graphic) file you upload.
Resizing & Responsive Images
Remember how I mentioned earlier in this post how WordPress handles images?
WordPress, by default, offers responsive image compatibility by automatically generating different-sized images; this allows web browsers (Chrome, Firefox, etc..) to select the best-sized image based on the visitor’s device (mobile, desktop, etc…).
So, if someone is viewing your website on a mobile device, the browser will display a smaller image to speed up page load times. This change is also known as “Responsive”
Bulkresizephotos.com is an excellent resource for resizing WordPress images. Assume your original photo was 5000 pixels wide and you only require 200 pixels wide. You can use this tool to quickly change the size of your images.
WordPress Image Sizes Formats
WordPress accepts a wide variety of image formats. Each format has advantages and disadvantages in terms of file size to image quality ratio.
Pro Tips: Select an image format that provides a good balance of speed and image quality.
Choose the Right Image Format
As a general rule, choose JPEG for photos and PNG for graphics.
JPEG, or Joint Photographic Experts Group, is the smallest file size for photos and supports 16 million colors. When you use JPEG for your photos, they will not only load faster, but they will also appear more vibrant.
Portable Network Graphic (PNG) supports fewer colors than JPEG but allows for image transparency and is quickly becoming the standard format for website elements such as graphics and logos.
WebP. Developed by Google, WebP is a modern image format designed specifically for the web. It aims to create smaller files than JPEG or PNG while maintaining similar or better image quality.
AVIF. It’s a modern image format that offers super-efficient compression. AVIF produces noticeably smaller files than JPEG or PNG, often without sacrificing visual quality.
Graphics Interchange Format (GIF) allows for 256 colors, transparency, and animation.
Image Resolution – DPI (Dots Per Inch)
The resolution of an image is determined by its DPI. The higher the number of dots or pixels per inch in an image, the higher the image resolution.
A 300-DPI image, for example, will have a higher resolution than a 200-DPI image. 72 DPI is the accepted standard for uploading images to the web, and there’s no need to set your images any higher because it will increase your file size.
The only time you would use 300 DPI is for printing.
Best WordPress Plugins for Images
WordPress has some fantastic plugins to help you optimize your images and find the right balance between website performance and image quality that your users will appreciate.
Here are a few of our favorite WordPress image plugins and their applications:
- EWWW Image Optimizer – A free image compression tool that compresses images as they are uploaded.
- Smash Balloon Social Photo Feed – Display your Instagram feed directly on your WordPress website with this plugin!
- Resize Image After Upload – A useful plugin allows you to resize an image after it has been uploaded to WordPress.
WordPress Image Optimization Tips
Keeping your images organized and under control will have a significant impact on the performance and overall success of your site. Here are a few extra tips to assist you in managing your WordPress images.
Image SEO
Did you know that organic SEO can help your WordPress images attract more visitors to your website?
You can improve your chances of appearing at the top of Google Images by making minor changes to each image you upload. Here’s how it’s done:
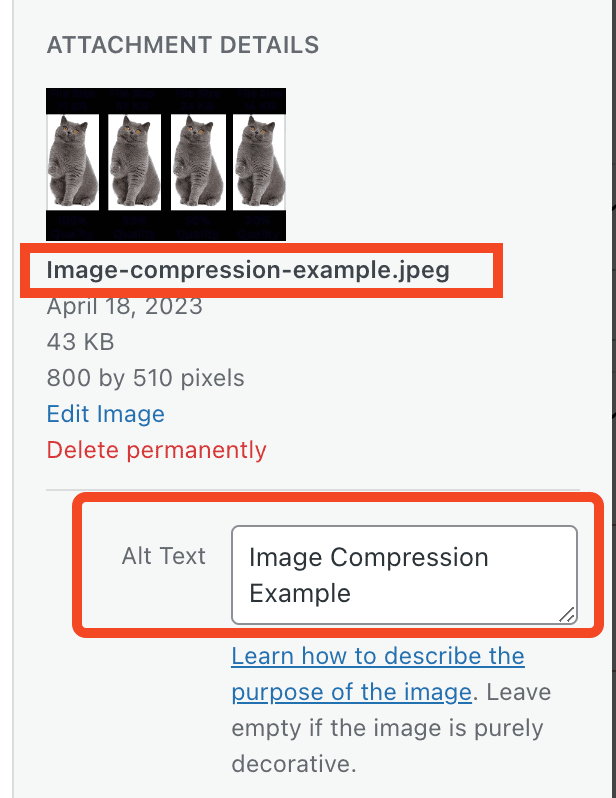
Title Tags
Search engines can use title tags to help them understand what your image is about.
So instead of uploading img_9436.jpg, update the title to something more accurate and descriptive -> this-is-so-awesome.jpg.
Alt Tags
To describe an image, the ‘Alt’ tag (alternative text) is used within HTML code (a small yellow cat).
Alt tags inform search engines like Google about the content of your images and, if properly optimized, can help your images appear at the top of Google and increase traffic to your site.
Final Word
Getting the right WordPress Image Sizes doesn’t have to be a difficult process. Most of the time, the default image sizes provided by WordPress are perfectly adequate.
It’s now your turn.
What is your approach to image management and optimization on WordPress?
Read More: 11 Best eLearning WordPress Themes
Contact US | ThimPress:
Website: https://thimpress.com/
Fanpage: https://www.facebook.com/ThimPress
YouTube: https://www.youtube.com/c/ThimPressDesign
Twitter (X): https://x.com/thimpress_com
