Creating A Multilingual WordPress Website is a great way to reach new audiences and let visitors view your website in their own language.
The best way to build a multi-language WordPress website is with the help of a multilingual plugin. But with so much different content to translate, how do you get started? With a multilingual plugin like WPML, translating your website is easy. From our previous article, you already know how to install and set up WPML on your site.
Now, we’ll show you exactly how to start translating your website into new languages with WPML.
Why Build a Multilingual Website with WPML
To have a truly multilingual website, you need a translation tool that can handle translating every part of your website. That’s exactly what you get with the WPML (WordPress Multilingual) plugin.
With WPML, you can translate:
- Posts, pages, and custom post types
- Content created with page builders
- Admin texts, widget texts, and texts from other themes and plugins
- Categories, tags, and custom taxonomies
- WooCommerce products, variations, store emails, and shipping classes
What’s more, WPML is compatible with most WordPress themes and plugins, provides full user support, and has a comprehensive knowledge base.
How to Create a Multilingual WordPress Website with WPML
The first step to creating a multilingual WordPress website is installing and activating the WPML plugin. For detailed instructions, see our article about setting up WPML on your site.
Next, you need to choose your languages, give your visitors an easy way to switch languages on the front end and translate your content.
Step 1: Choose Your Languages
You may have already chosen your site’s languages in the WPML setup wizard. If not, you can head to WPML → Languages to add or remove languages.
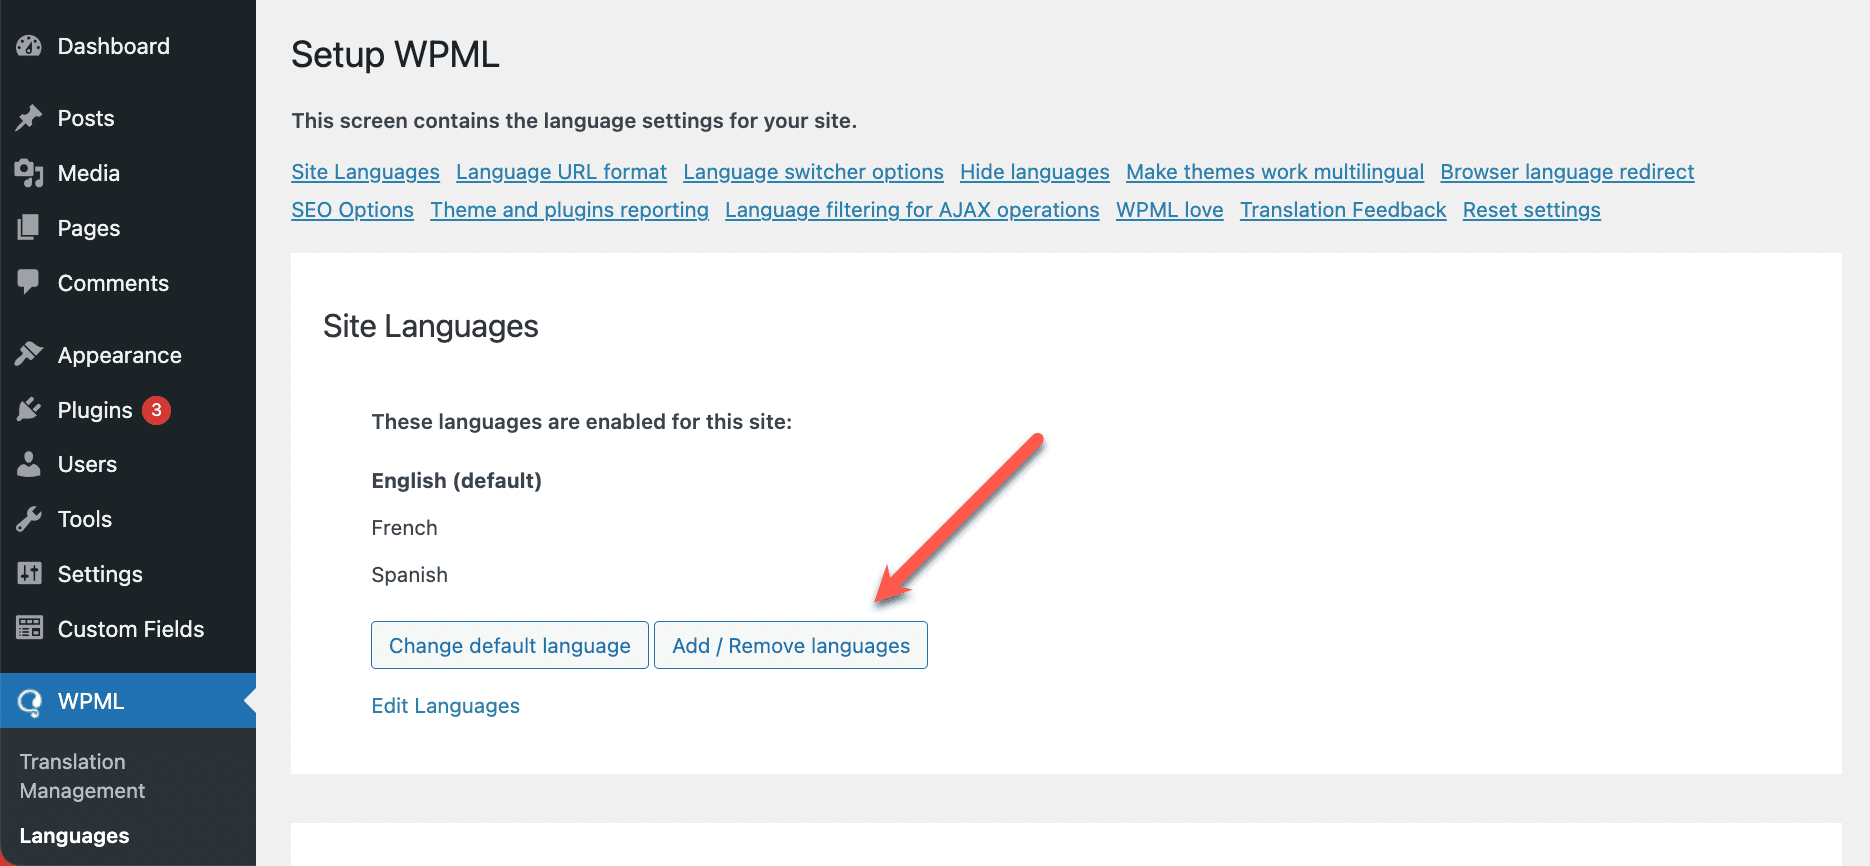
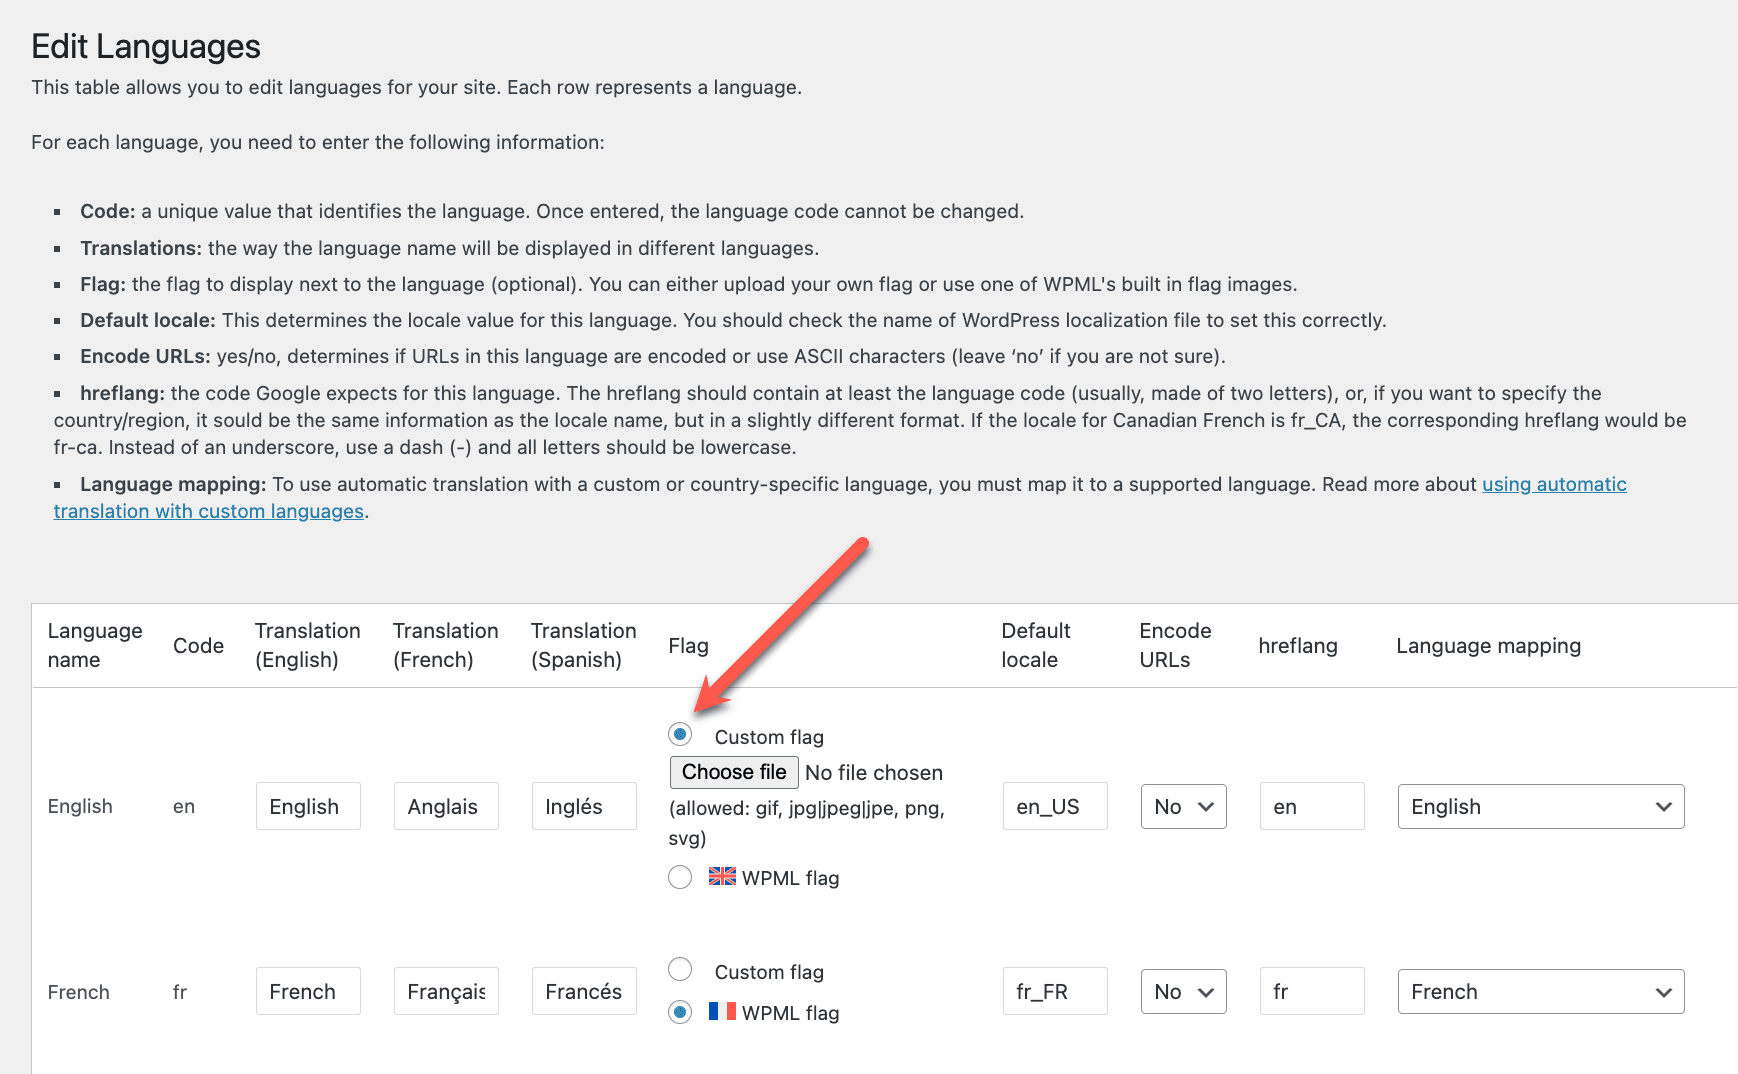
By clicking on the Edit Languages link, you can make changes to the information associated with each of your languages.
For example, let’s say you want to use a different flag than the one provided by WPML for one of your languages. All you need to do is select the Custom flag option and upload your own flag.
Step 2: Configure the Language Switcher for Your Visitors
Now, you need to give your visitors a way to choose their preferred languages. The best way to do this is by adding a language switcher to your site’s front end.
By default, WPML adds a language switcher to your site’s footer. You can also add a language switcher in two different places:
- In the menu
- In a widget area
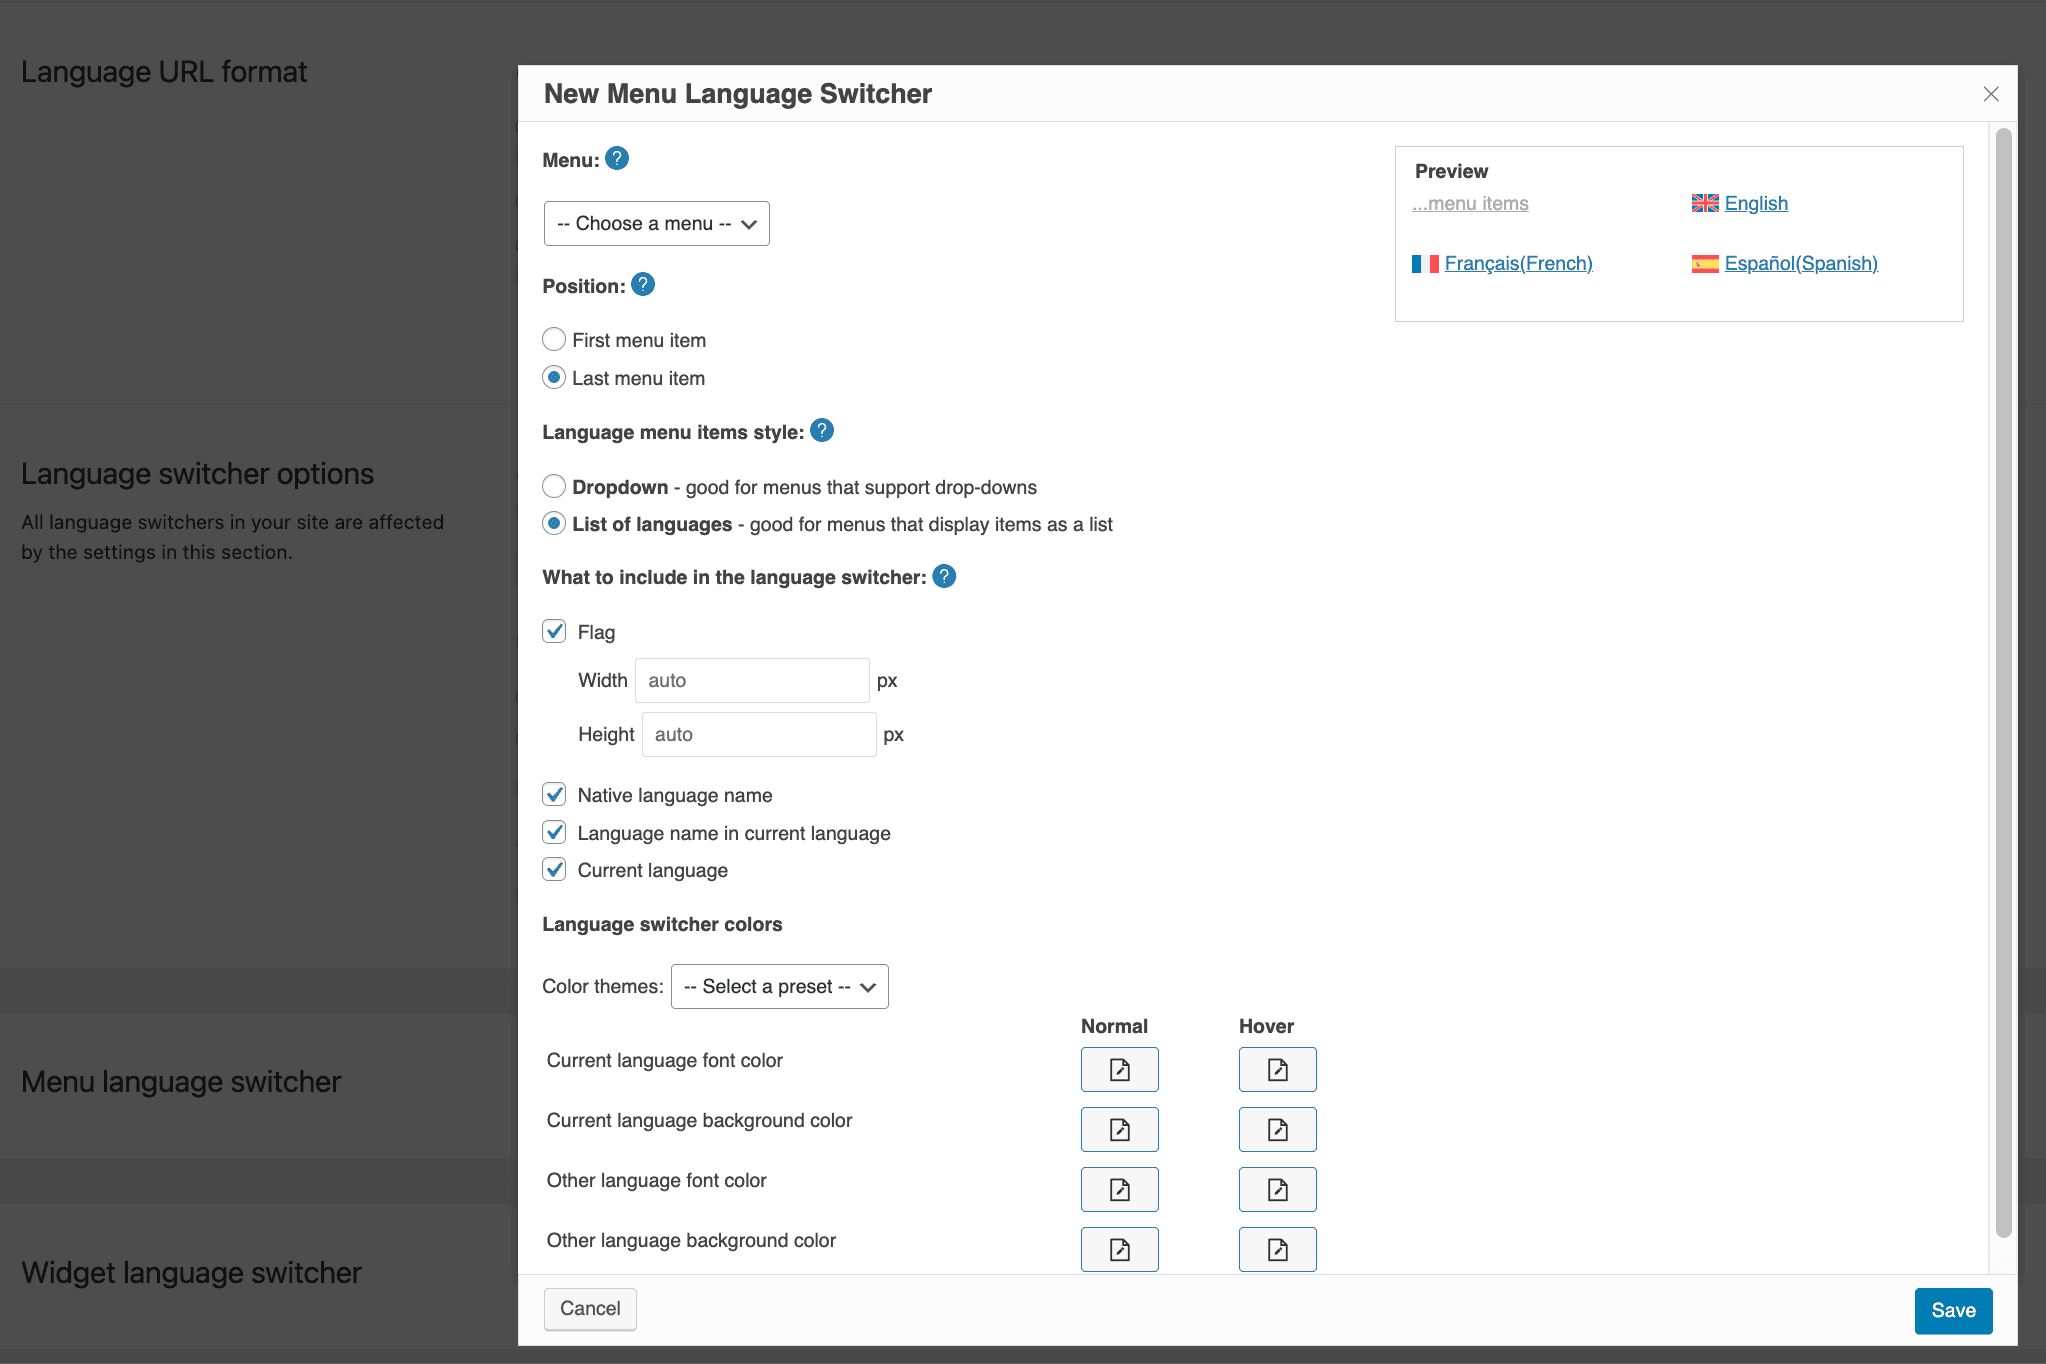
For this, all you need to do is go to WPML → Languages and add a new language switcher to the area of your choice.
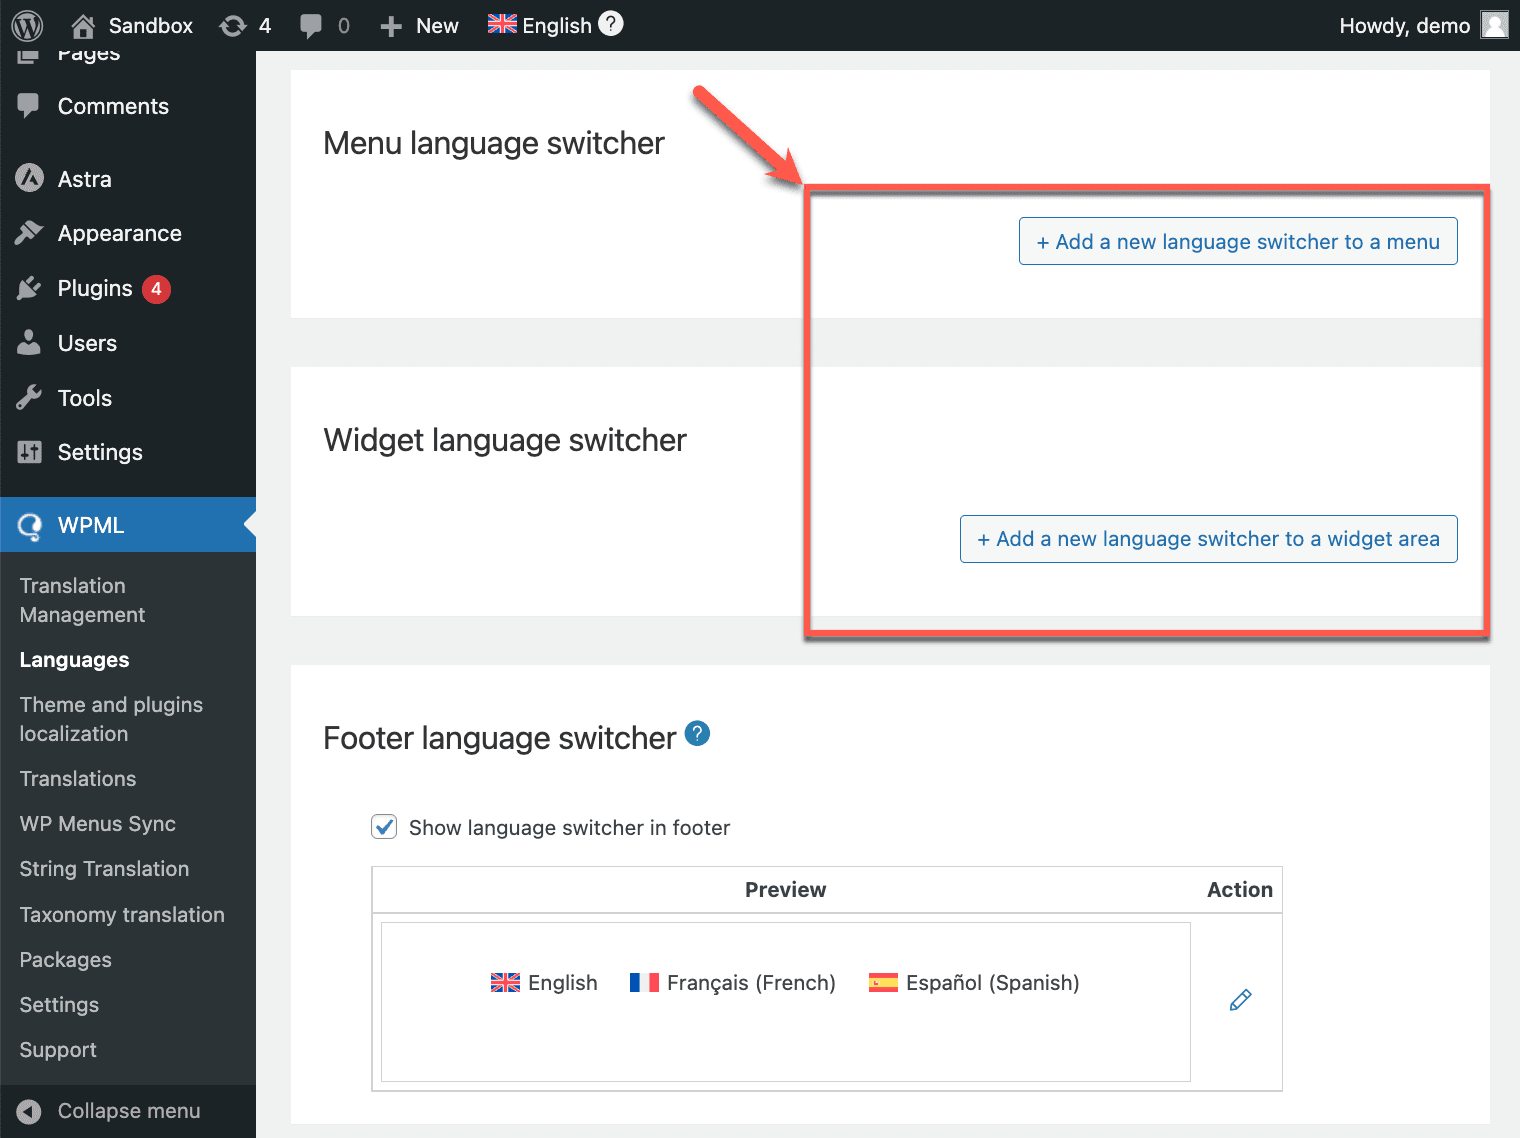
You can then decide what your language switcher includes and how it looks.
For example, you can decide to display languages in a dropdown menu or as a list. You can also opt to include a flag next to each language and customize its height and width of it.
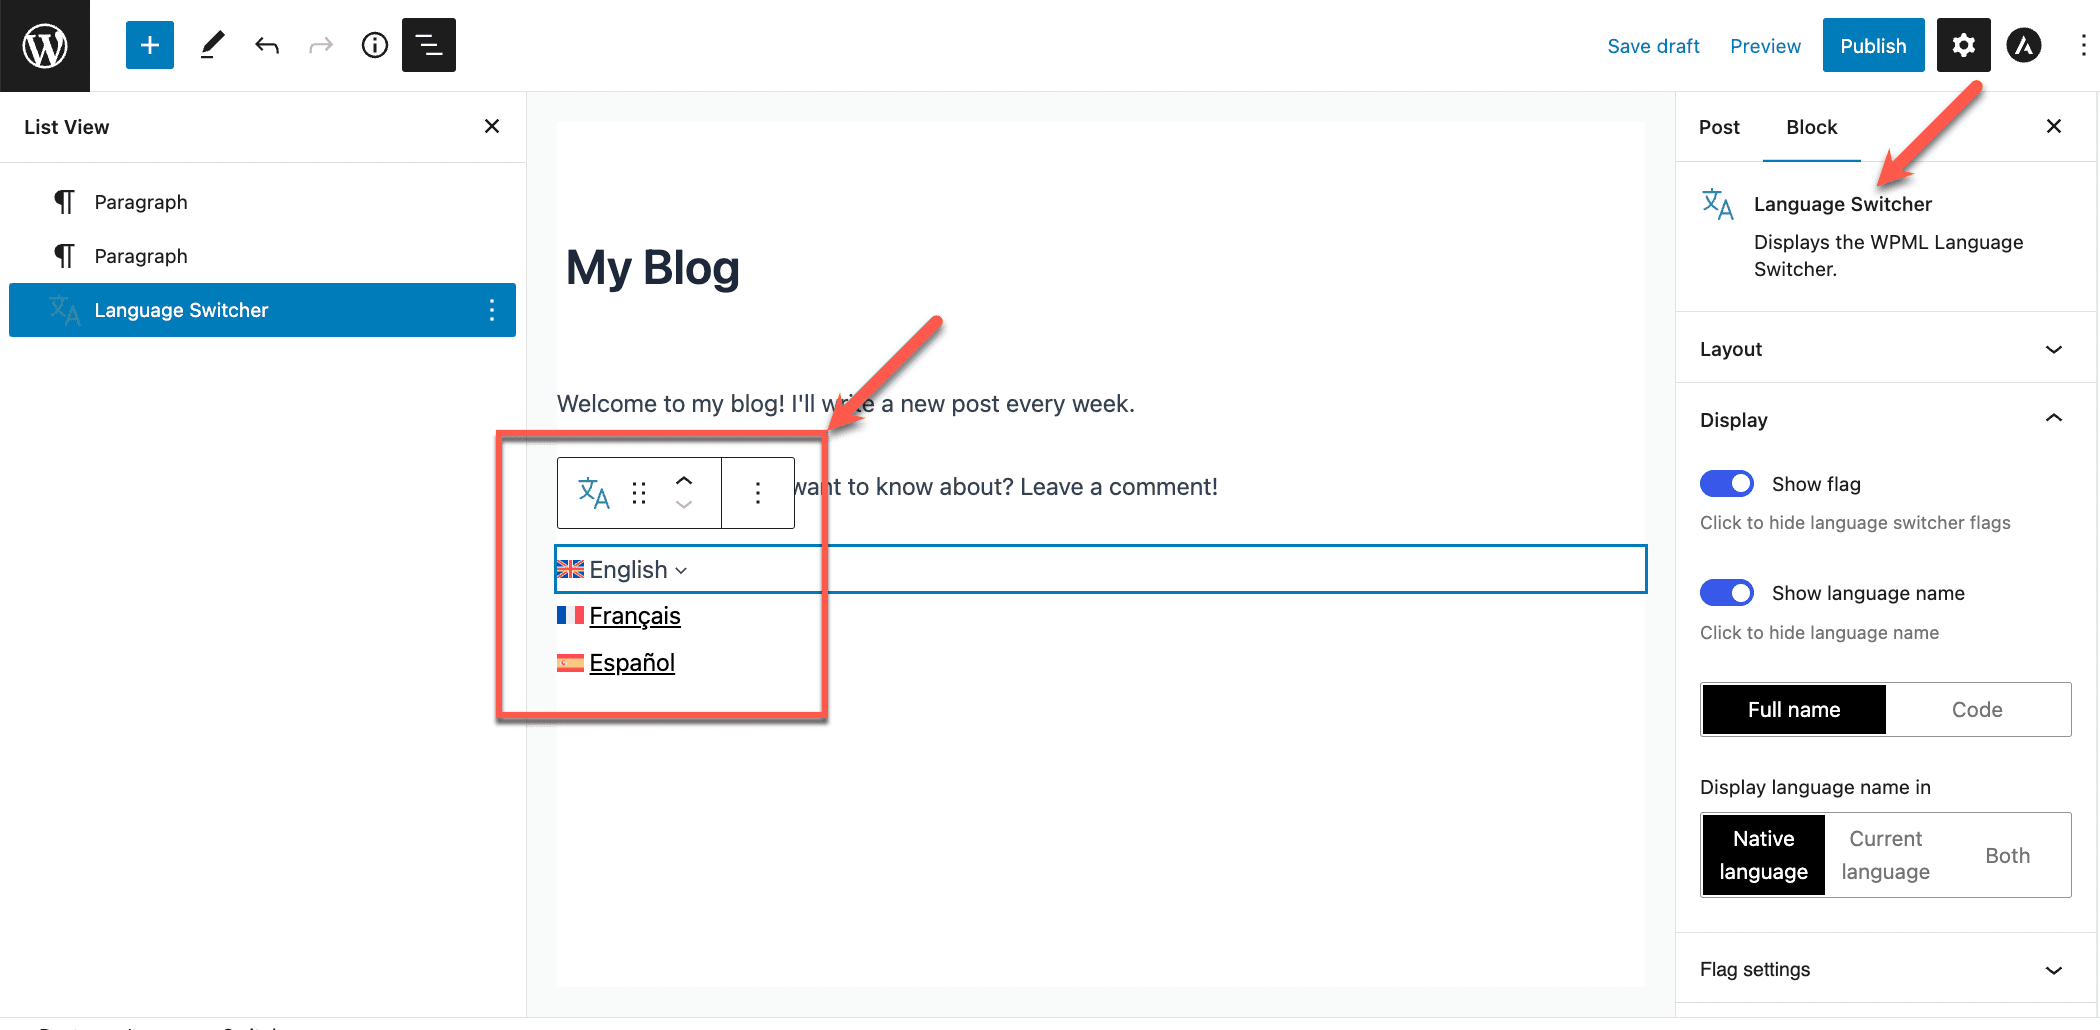
WPML also has another exciting feature – the Language Switcher block for Gutenberg. With this option, you can easily add a language switcher at the bottom of your post or page.
After you add the block to a post or page, you can customize everything from the flag settings to the color and layout of the language switcher.
Step 3: Choose Your Translation Method
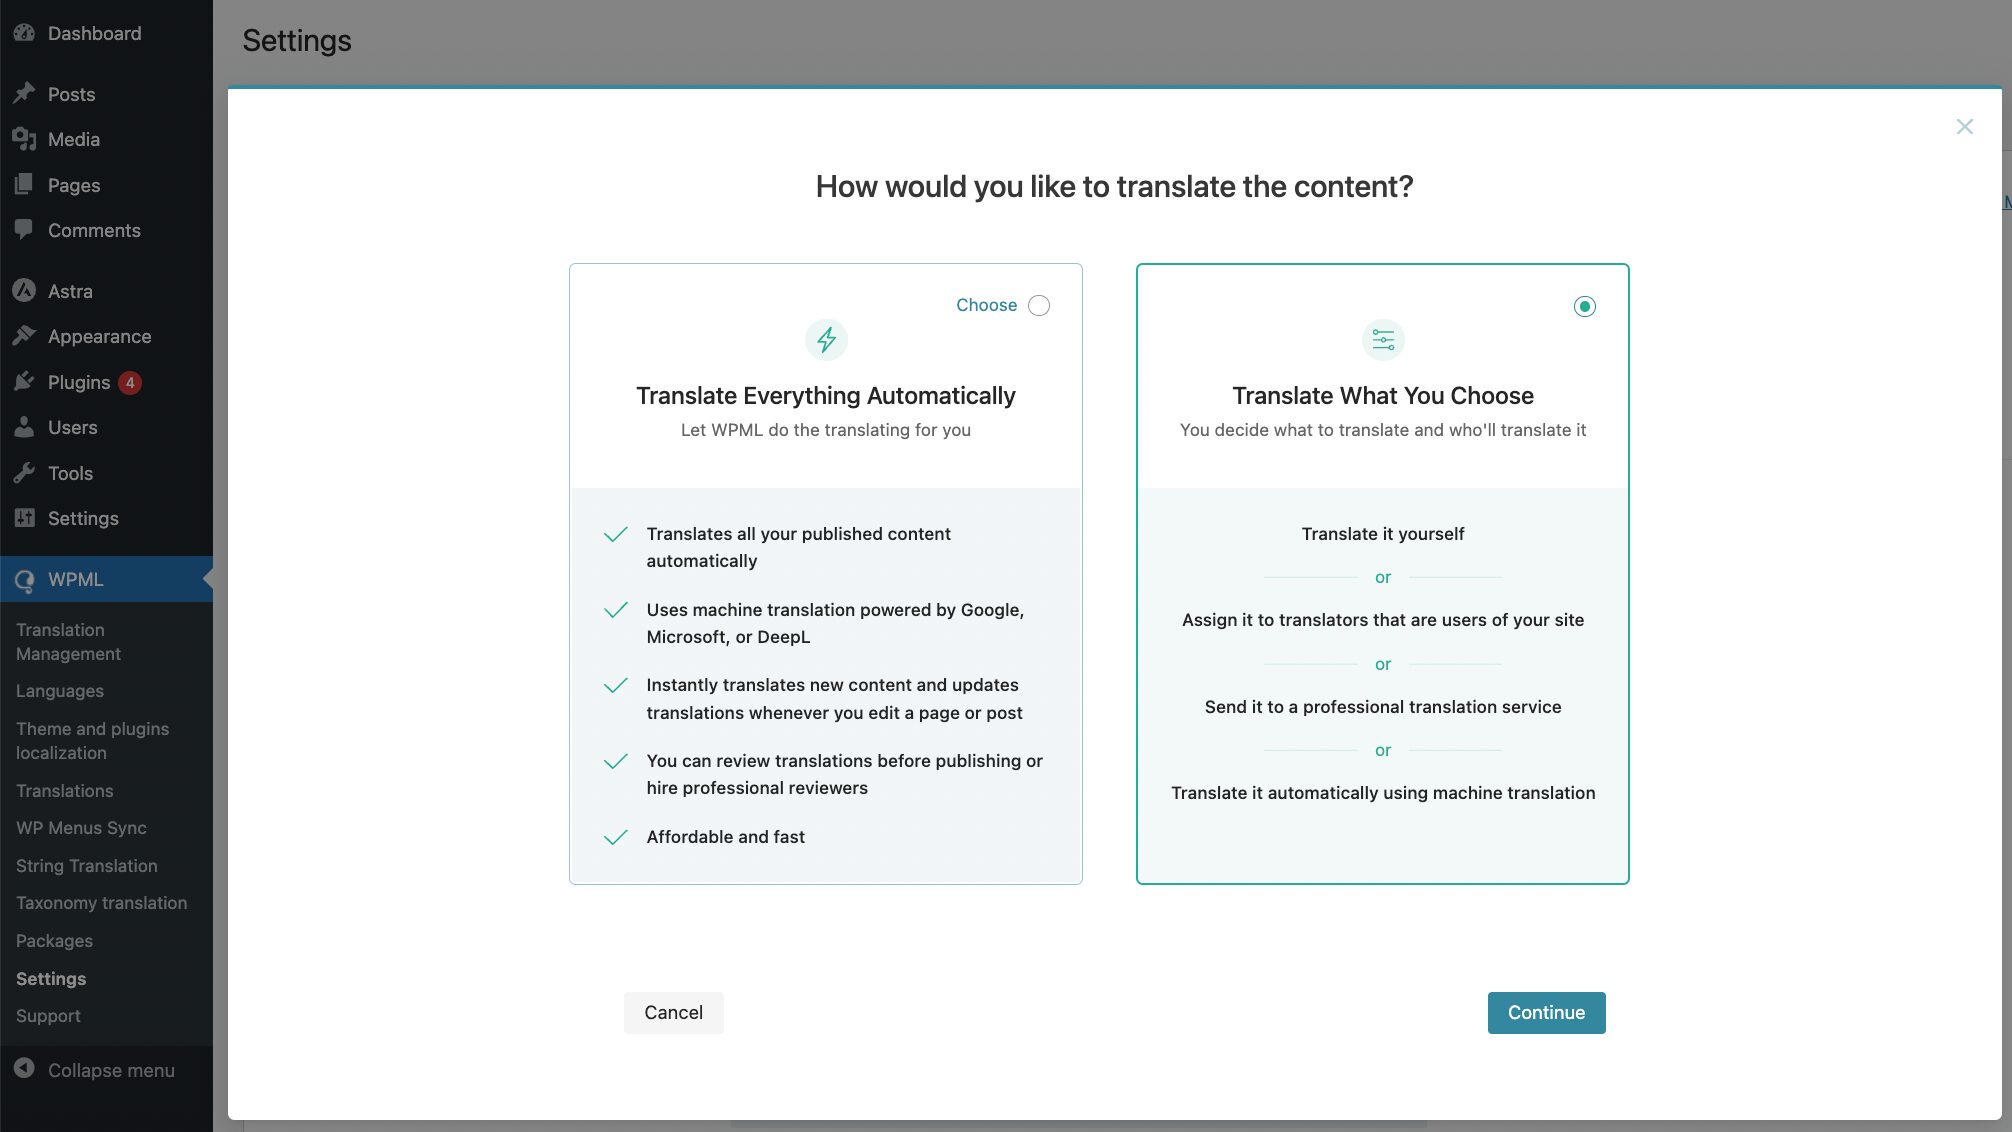
Once you’ve finished setting up your site’s languages and added a language switcher to your site, it’s time to start translating! With WPML, you can choose between two translation modes:
1. Translate Everything Automatically
You can translate your site’s published content automatically. This includes posts, pages, custom post types, WooCommerce products, taxonomies, and more. The machine translations are powered by DeepL, Google Translate, or Microsoft Azure.
Depending on your preferences, you can choose to review and edit the translations before or after publishing.
2. Translate What You Choose
You can decide what you translate and how you translate it.
With this translation mode, you can translate content by yourself, with the help of translators, or send content to professional translation services. You can even choose to translate content automatically in bulk.
You can select the translation mode while going through the setup wizard or by going to WPML → Settings.
To use the automatic translation feature, you need to select a payment option:
- Assign translation credits to your site – Every WPML CMS or Agency account type comes with a package of automatic translation credits included. If you haven’t used them yet, you can assign them to the site you want to use them on. Once you finish the credits, you can buy more.
- Sign up for pay-as-you-go – Get 2,000 translation credits for free every month and then only pay for the credits you use. This is the most affordable option.
Step 4: Translate Your Site’s Posts and Pages
Now, it’s time to start translating your site’s content!
If you selected to Translate Everything Automatically, you can sit back and let WPML do all the work for you.
Below, we’ll show you how to use the Translate What You Choose option to translate a post:
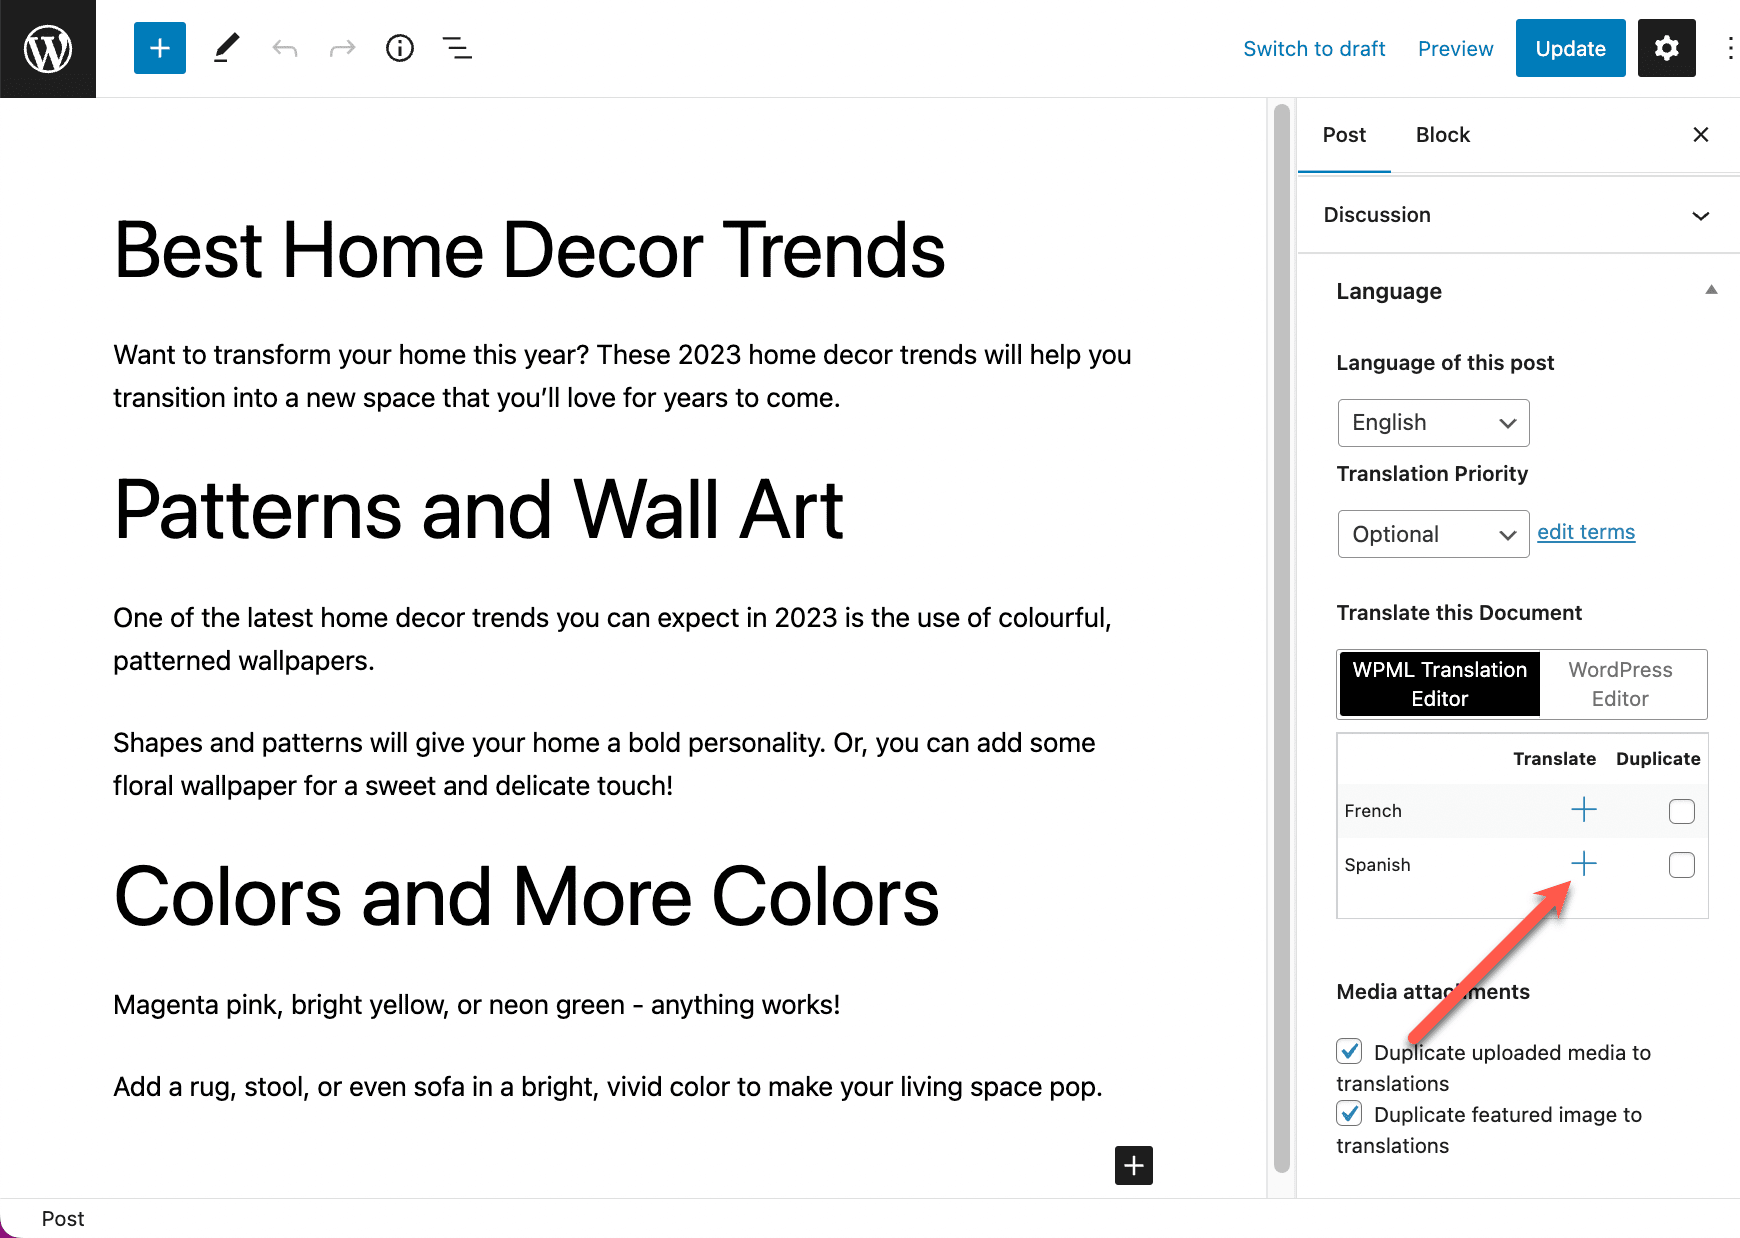
1. Edit the post you want to translate. From the Language box, click the plus icon next to the language you want to translate the post into.
2. You will be taken to the Advanced Translation Editor. If you have translation credits, you can translate the content automatically. If not, enter the translations for each line and click Complete when you’re done.
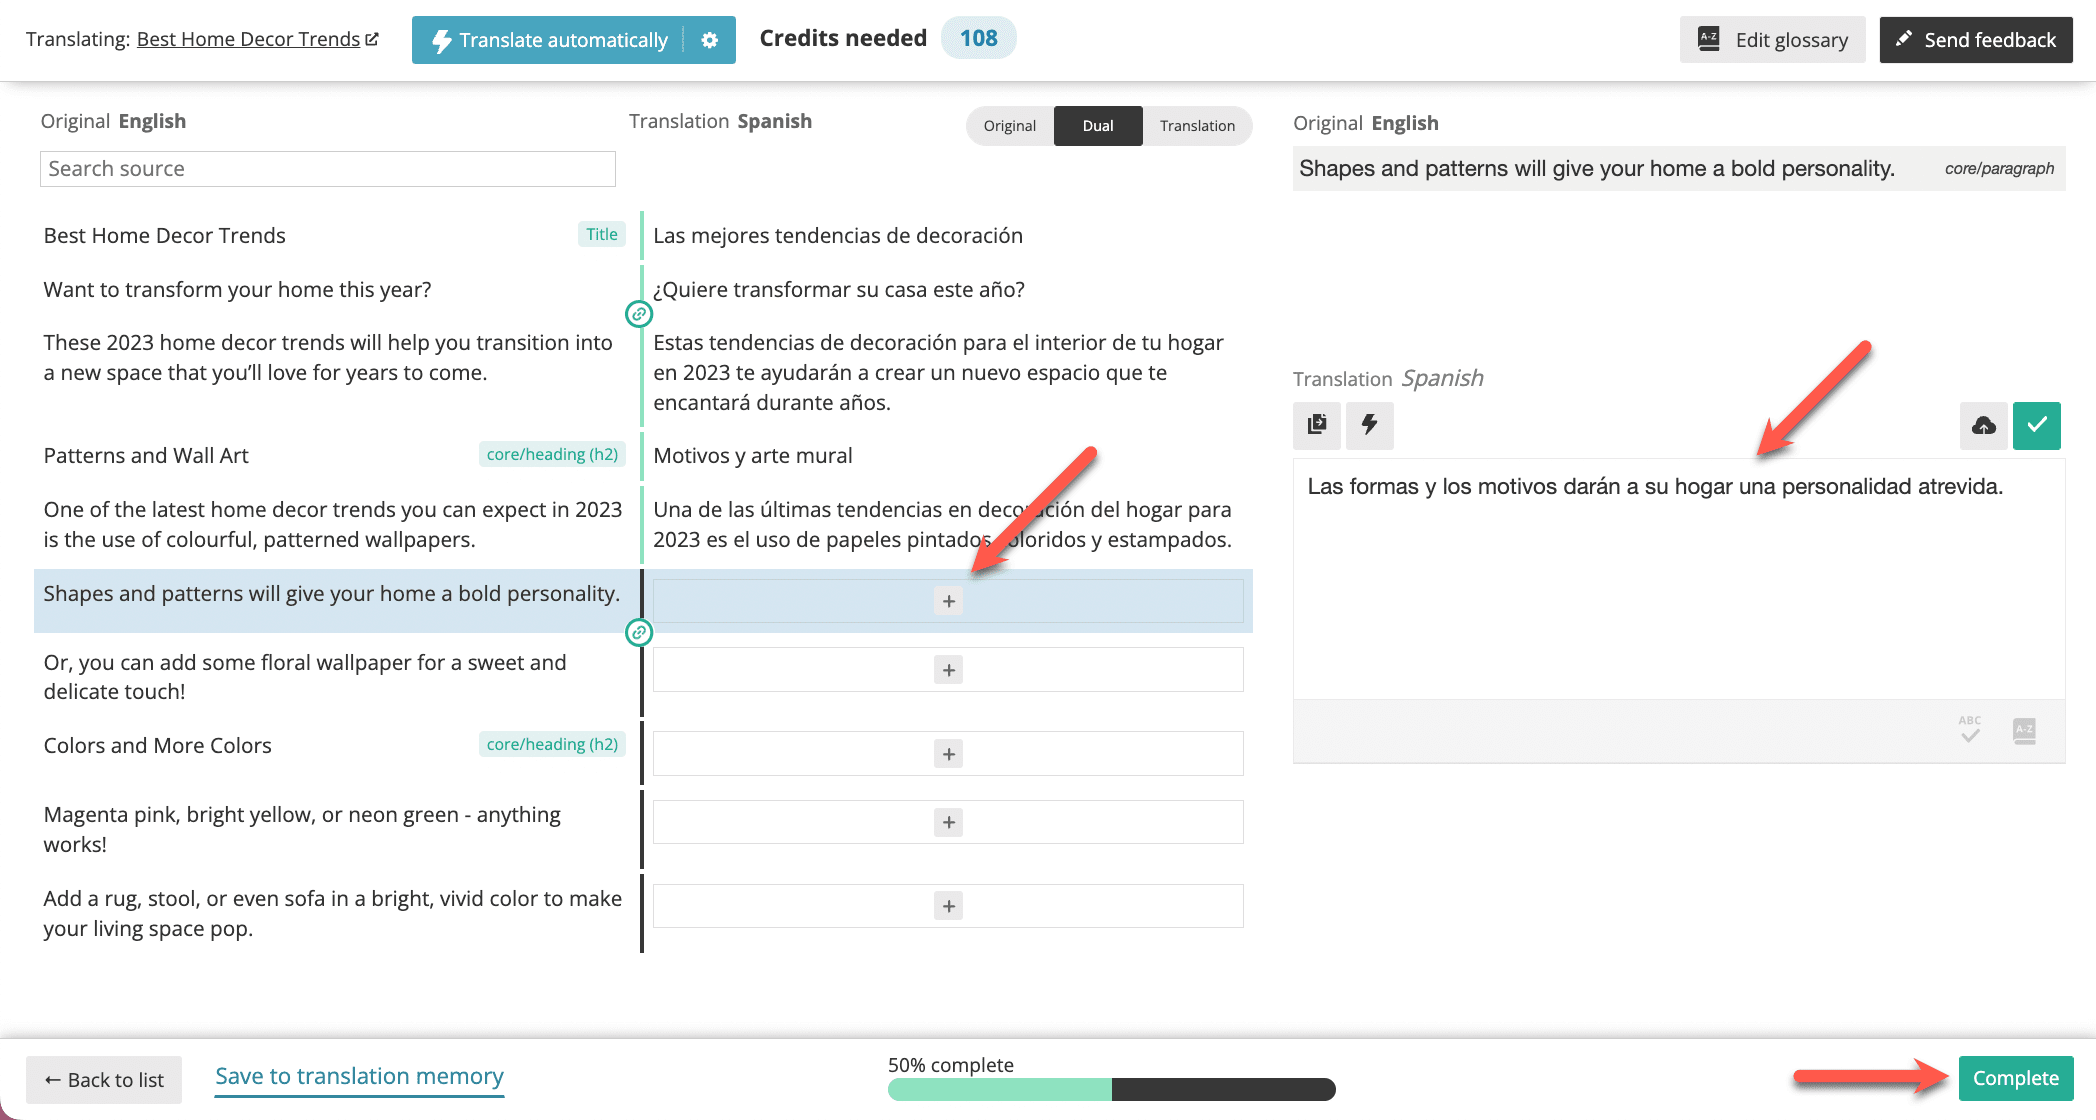
If you have a lot of posts or pages to translate, you can go to the Translation Management dashboard and send them for translation in one batch.
Or, you can automatically translate multiple posts, pages, and strings in bulk.
Step 5: Translate Additional Texts
Your WordPress site is made up of more than just posts and pages. There are also texts from other themes and plugins installed on your site.
As an example, let’s say your WordPress theme comes with a footer widget area that you can edit and customize. You can add information about your website or links in this area – but since they aren’t a part of any specific post or page, how can you translate them?
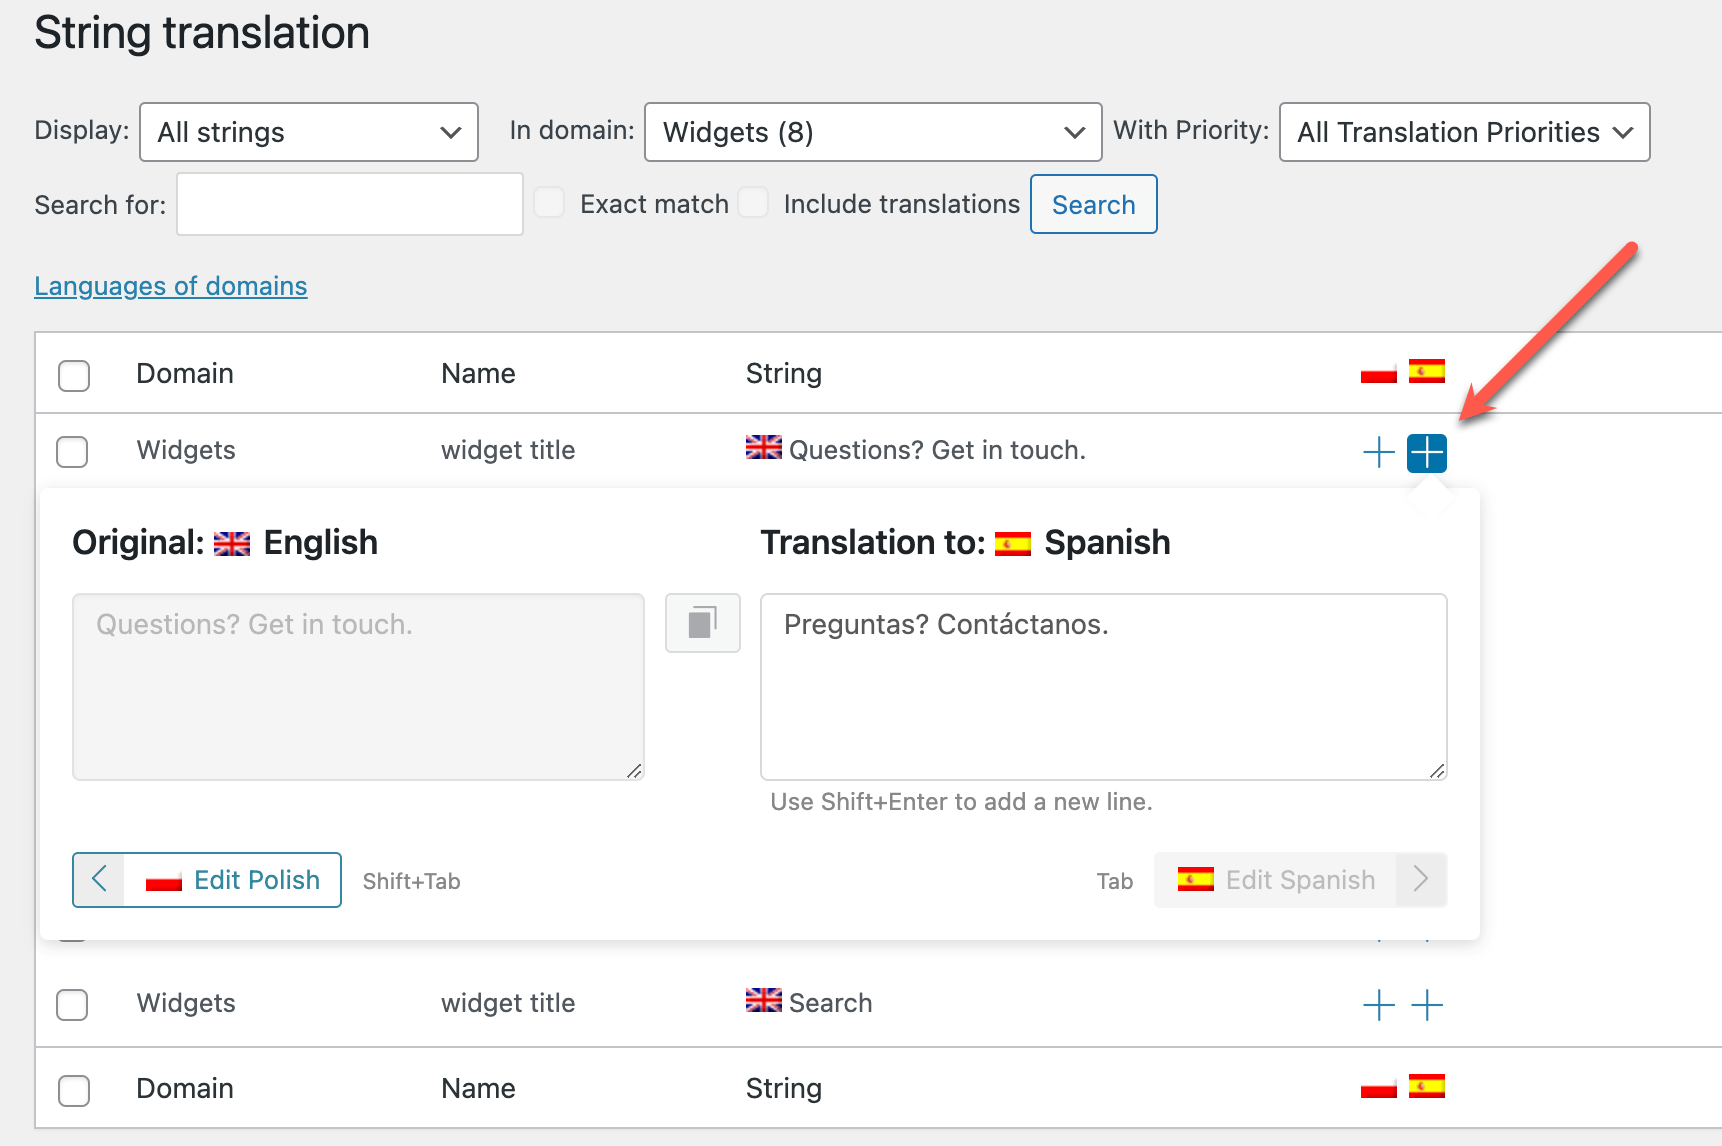
With WPML’s String Translation, you can translate these texts in just a few simple steps:
1. Go to WPML → String Translation and use the display filter at the top of the String Translation page to determine which strings to show. For this example, we need to select In domain: Widgets.

2. Click the plus icon next to the text you want to translate and then hit enter to save the translation.
Conclusion
WPML is the top translation plugin on the market. It offers all the features you need to build a fully-functional multilingual website.
Contact US | ThimPress:
Website: https://thimpress.com/
Fanpage: https://www.facebook.com/ThimPress
YouTube: https://www.youtube.com/c/ThimPressDesign
Twitter (X): https://x.com/thimpress_com


