Sometimes, while wandering around the Internet, you can come across a live video of a grand opening event or just an introduction of a new product on YouTube that attracts thousands of views. Particularly for those who are running a business, it is very essential to create live streaming on YouTube.
This is one of the fastest ways to spread your information, news, or products to reach a broad range of audiences in real-time. However, not so many people know how to start to have streaming videos. Therefore today, we’re going to show you a very easy step-by-step tutorial with detailed images. We are sure that after this post, you can create your own streaming video. Let’s get started!
You can totally live stream via both desktop and YouTube mobile apps.
Start With Desktop Devices First
1. Make sure your account has been verified or has no live streaming restriction
The most important thing if you want to have live streaming right on YouTube is a verified account. The purpose of this verification is to guarantee your identity and to avoid spam and abuse. This is also a good way to protect the whole community, so don’t mind doing it with only 2 easy steps.
Go to https://www.youtube.com/verify, select your country and the method you want to get the verification code.
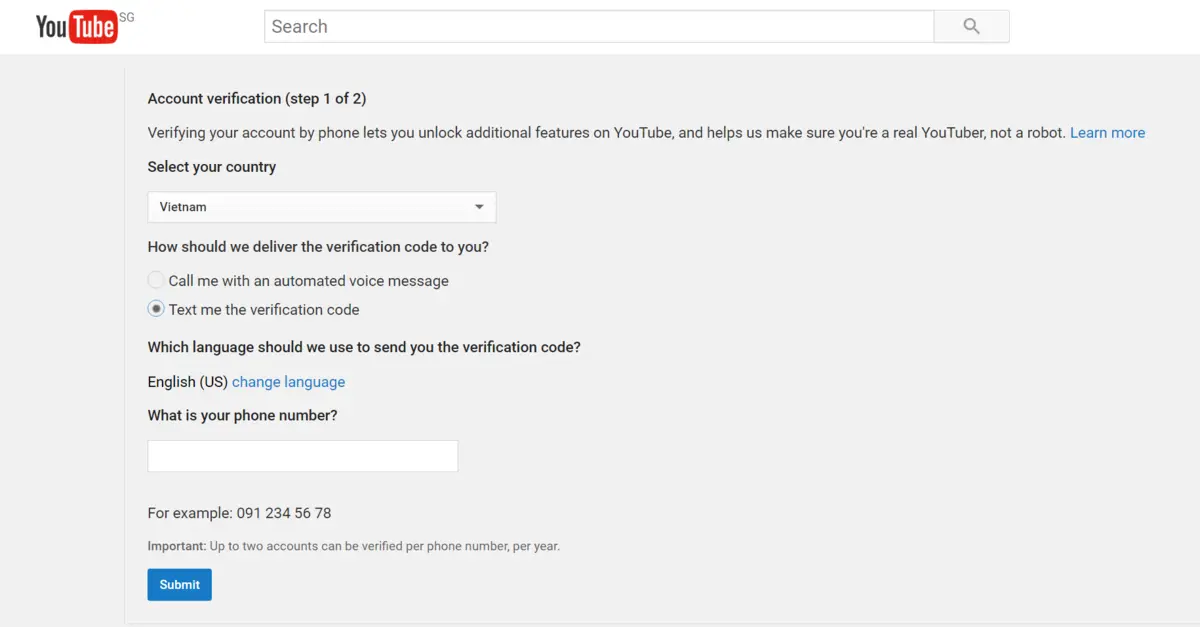
After submitting your phone number, you will receive a text message or a voice call. Just fill the code in the box, and you’re done with this step.

Besides having the right to live stream, a verified account is also allowed to upload videos longer than 15 minutes.
Regarding live streaming restrictions, please read more details a https://support.google.com/youtube/answer/2853834
2. Enable live streaming
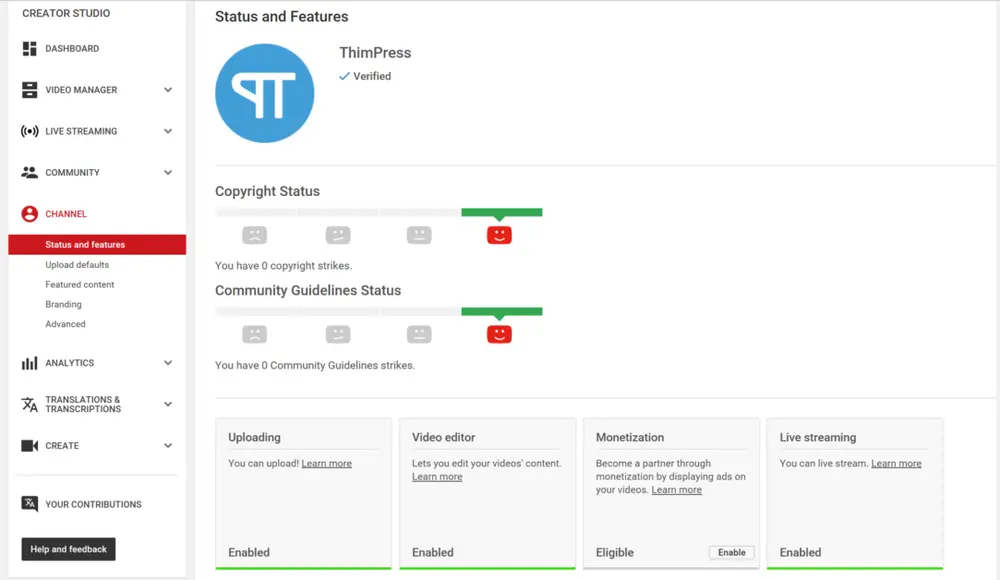
Get access to https://www.youtube.com/dashboard -> Channel on the control panel on your left side. Make sure you get the Live Streaming function enabled.
3. Set up your live streaming encoder
Before starting streaming, you need to prepare for yourself an encoding software. This software helps to transcode your video and audio into a format that YouTube can send it to all your viewers. YouTube only supports their verified streaming software. You can choose from the list at https://support.google.com/youtube/answer/2907883?hl=en.
Completed some required configurations in that software to connect it to your YouTube account. Hold on because we nearly reach the final step.
4. Now… Start streaming!
On the YouTube dashboard, go to Live Streaming. You can select Stream now or Event. It’s all up to you.
Stream now: This is the simplest way to stream but with low resolution. YouTube will detect the stream resolution and frame rate automatically for you.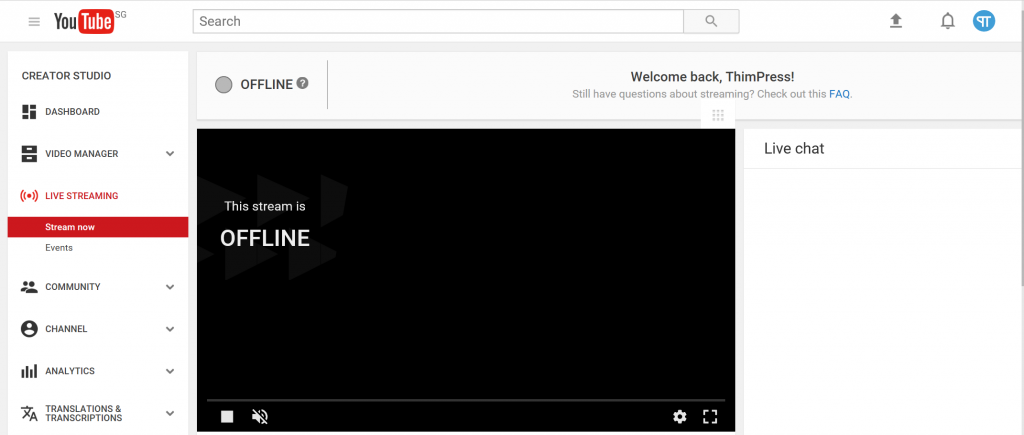
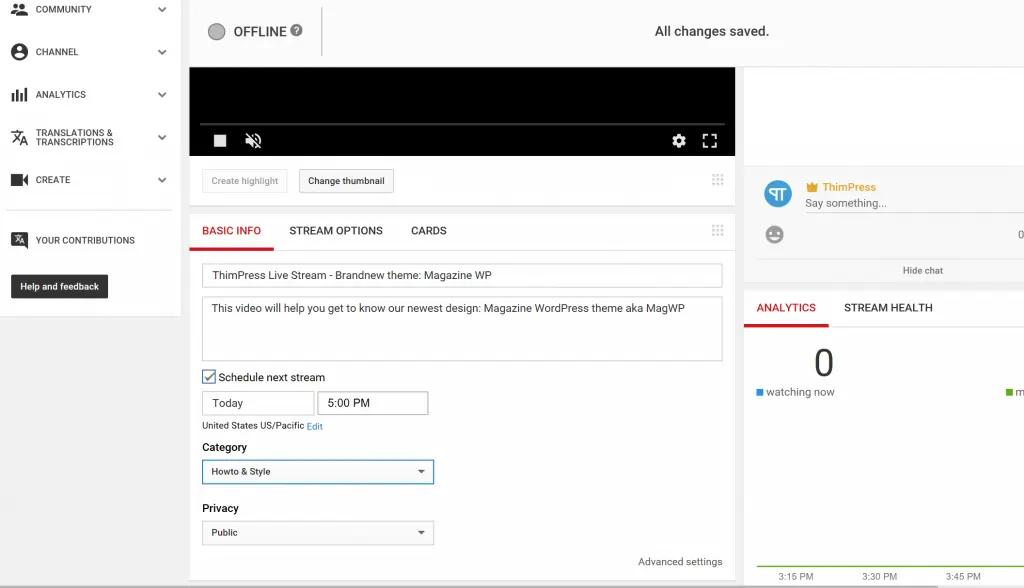
Fill in the necessary information of your streaming video in BASIC INFO tab, including the title, description, schedule (optional), category and privacy as you want.
On the STREAM OPTIONS tab, you can choose whether your video goes with Low Latency (described as “optimize for interaction”, which means closer to real-time) or Highest Quality (which provides smoother video but requires some delays).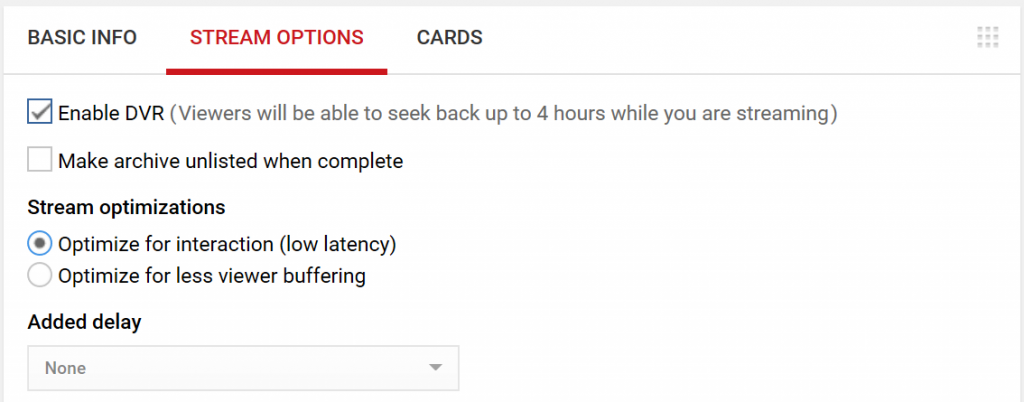
You can add a Fan Funding card on the CARD tab to earn money from your streaming video. You can also learn more about cards here.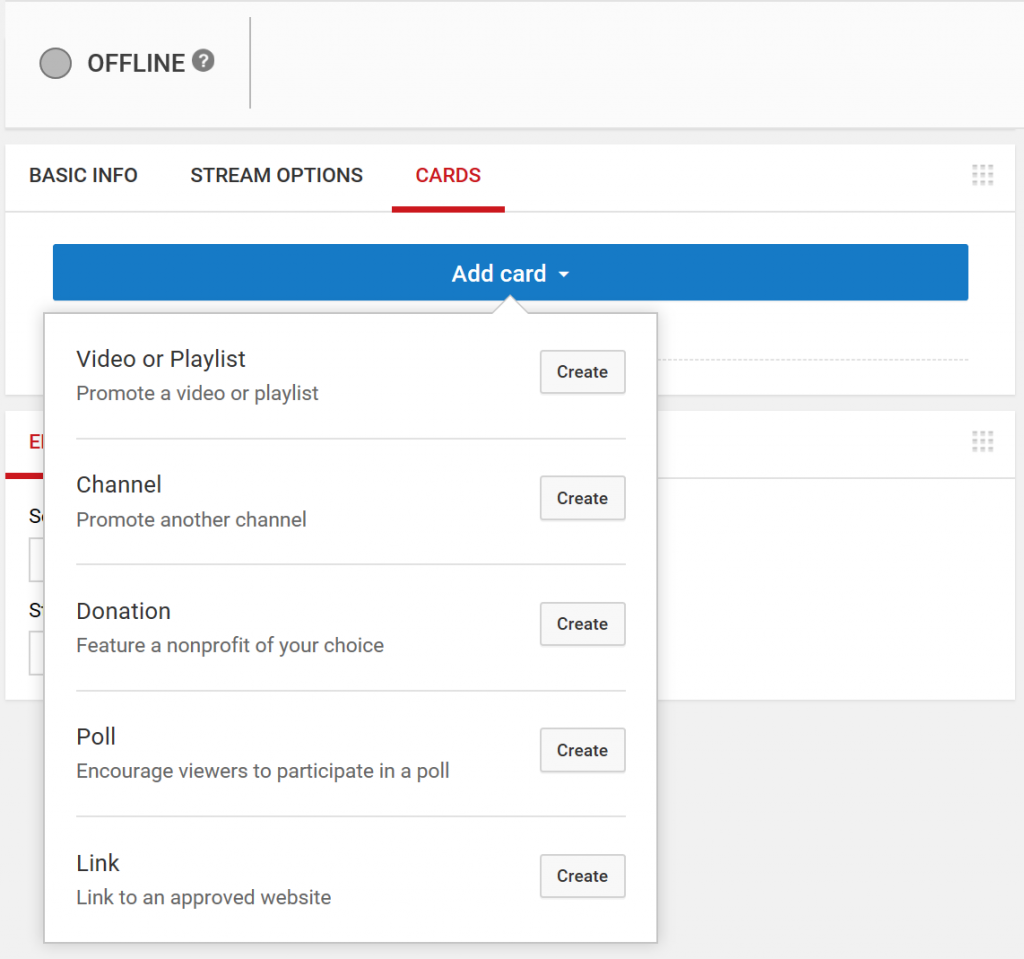
In-Stream now option, your audiences can interact with you by live chat. The chat box will appear on the right of the video while streaming. Viewers cannot post special characters, URLs, HTML tags, or over 200 characters each time they enter to chat. They are allowed to send 3 submissions every 30 seconds maximum.
Once you stop sending the signal from the encoder, YouTube will disconnect the stream. Your video will need about 12 hours to show up in the Video Manager of your channel. One piece of advice: You should have a local backup for your video.
Event: This selection gives you more control over your video in choosing privacy options, setting start time and more.
Select “New live event” in the top right corner.
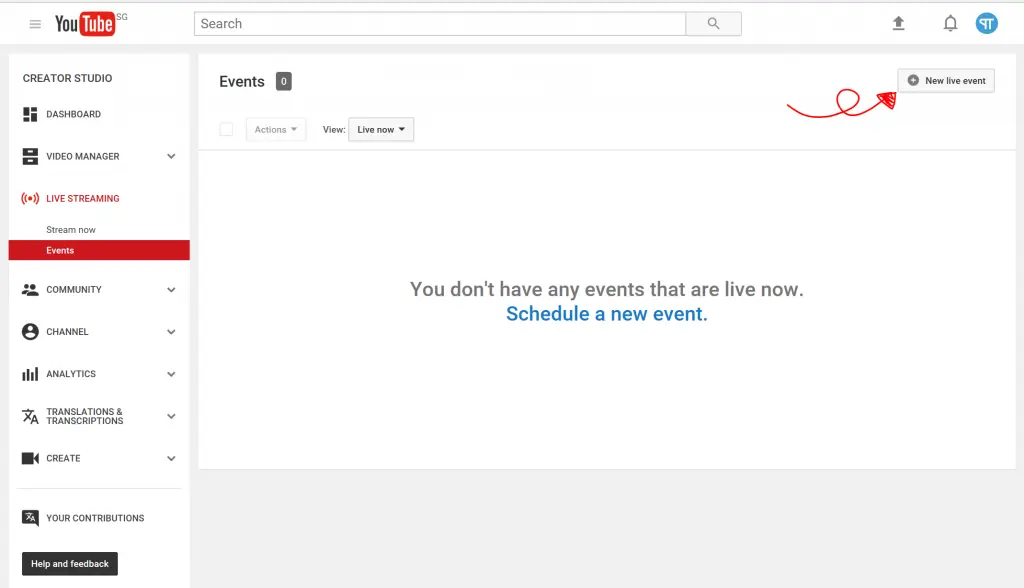
After adding basic info, you can Go live now. Tips: you can also share your stream via Google+, Twitter or other social networks to spread broadly.
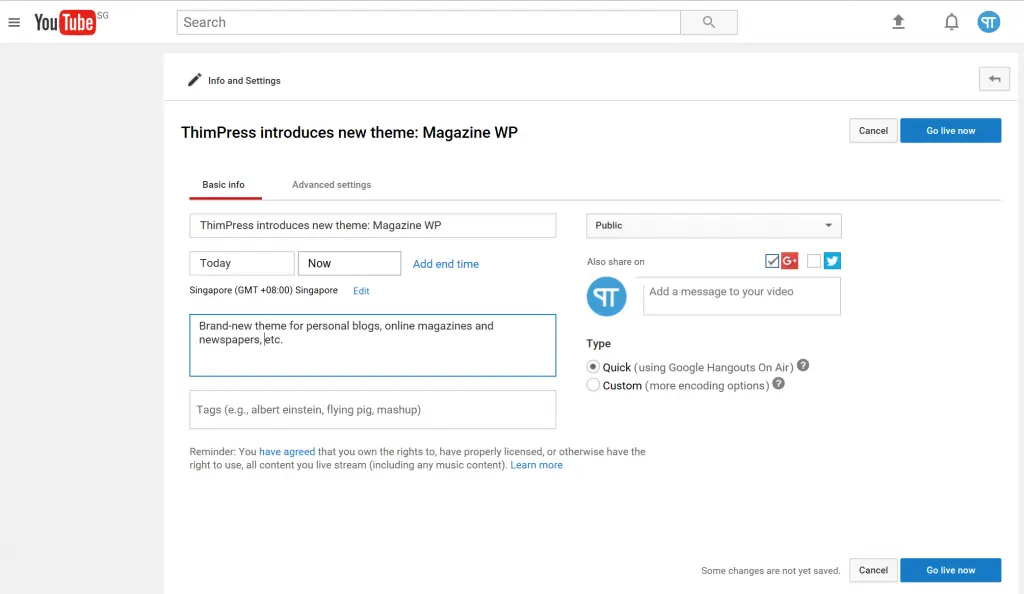
The rest of the work is similar to the Stream now option.
For mobile streaming
You must meet some requirements:
- Your account is verified or has no streaming restriction for 90 days.
- More than 10,000 accounts subscribe your channel.
- Your mobile device’s operation system must be Android 6+ or iOS 8+.
1. Enable streaming for the first time
Get your device the latest version of YouTube app, then select the camera button. Allow the app to have permission to access your device’s camera, mic and storage. Then select GO LIVE.
2. Go streaming!
Like on the desktop version, you must complete the basic info of your video, then you can GO LIVE.
If you want to end the stream, select FINISH, then OK. YouTube will add an archive of the live stream on your channel after the stream finishes.
So, basically, that’s it! It’s time to go live on your own.
Read More: 10 Best Video Blog WordPress Themes that make your page unique
Contact US | ThimPress:
Website: https://thimpress.com/
Fanpage: https://www.facebook.com/ThimPress
YouTube: https://www.youtube.com/c/ThimPressDesign
Twitter (X): https://x.com/thimpress_com


