A multi-language website can help you reach new audiences across the globe. Out-of-the-box, WordPress only supports one language at a time. So what should you do if you want to offer your site’s content in different languages?
Used on more than one million sites worldwide, the WPML (WordPress Multilingual) plugin is the most popular and reliable solution.
WPML lets you translate every part of your website in a matter of minutes. You can choose from different translation methods, including automatic translation. Your site’s visitors can then easily switch languages on the front-end.
We’ll show you just how easy it is to set up and start using the WPML plugin.
What is WPML?
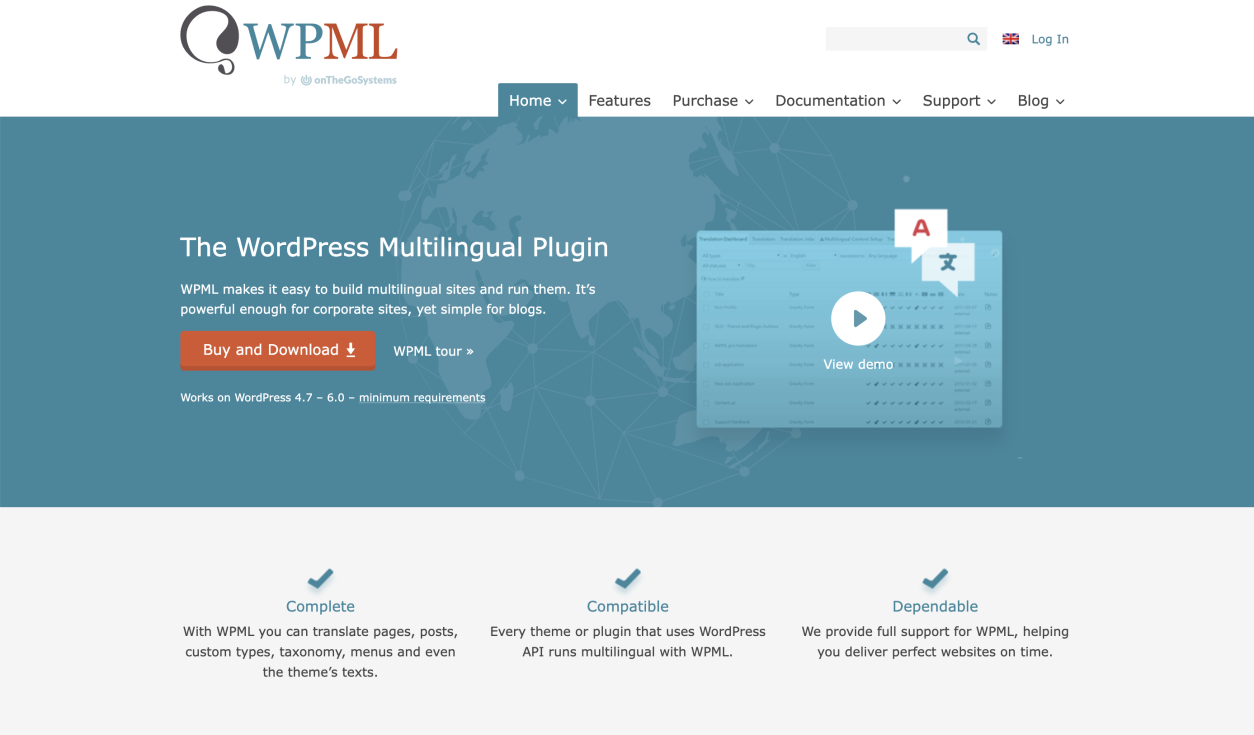
Simply put, the WPML (WordPress Multilingual) plugin lets you build WordPress sites in multiple languages.
WPML, which was introduced in 2007, is the most widely used WordPress multilingual plugin. Compared to other plugins, it offers the most features – at the most competitive price.
To use WPML, you don’t need to know how to code. And, there’s no need to import translation files. You can translate all your content directly from your WordPress site.
With WPML’s built-in Translation Management feature, you can send and manage translation jobs from one dashboard. You also have access to advanced translation management features, like setting up translators or translation services for your site.
The Advantages of Using WPML
Besides being popular and easy to use, WPML comes with some impressive features. With WPML, you can:
- Translate every part of your site, including posts, pages, custom post types, menus, widgets, as well as texts from themes and plugins.
- Choose between translating by yourself, sending content to translators, or using automatic translation.
- Translate your WooCommerce-powered online store with the WooCommerce Multilingual & Multicurrency add-on.
- Optimize the content on your site for different languages.
- Get timely and accurate support in 9 languages, 6 days a week.
Of course, WPML is also compatible with well-known themes and plugins such as Yoast SEO, Elementor, Divi, Gravity Forms, and WooCommerce.
What Makes Up the WPML Plugin?
Before you start using WPML, it’s worth knowing more about what makes up this multilingual plugin. We’ll focus on the components that come with the Multilingual CMS and Agency account types.
OTGS Installer
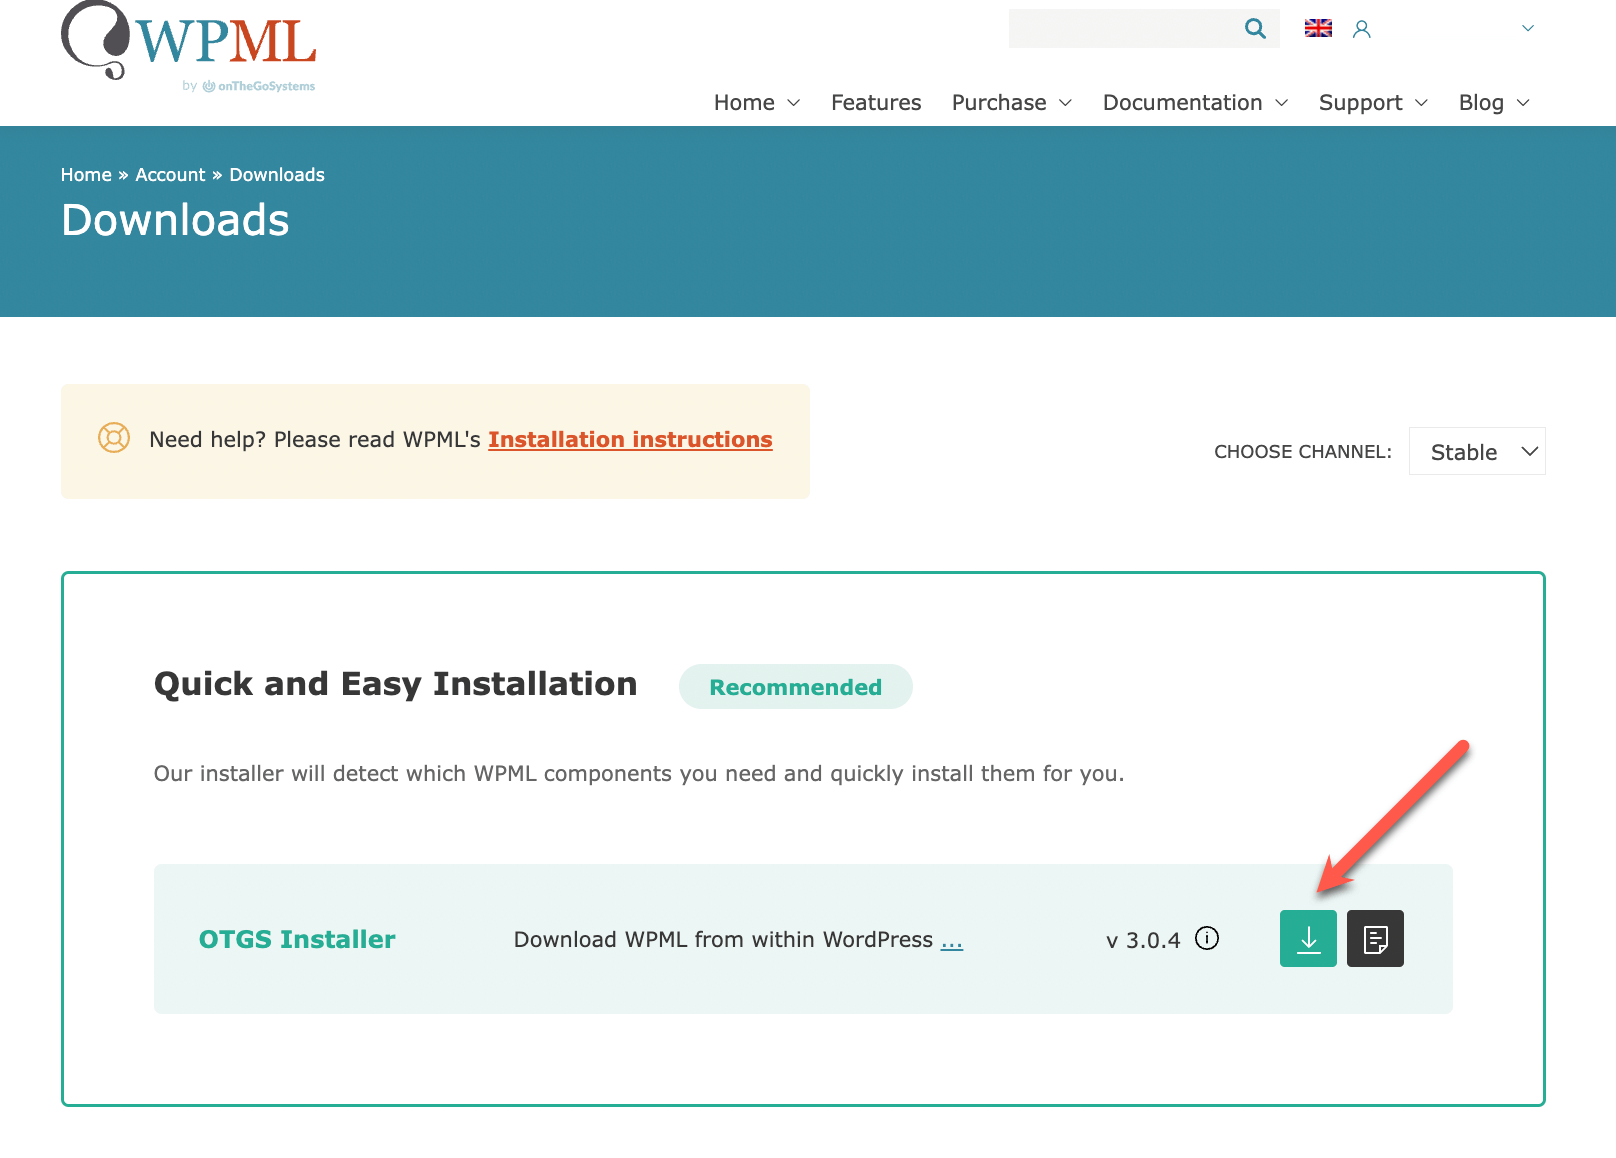
If you are using WPML for the first time, you can go to your WPML Downloads page and download the OTGS Installer plugin.
The OTGS Installer takes care of installing all the WPML components required for your site, so you can be sure your website has all it needs to become fully multilingual.
If you want to manually upload and install individual WPML components, make sure you start with WPML Multilingual CMS. This is the core plugin, and it also includes the Translation Management module.
String Translation
This add-on lets you translate texts that are not in posts or pages, like admin texts, your site’s tagline, and widget titles. It is a recommended addition for every site looking to go multilingual.
Media Translation
With the WPML core plugin, you can translate image information like captions, alt texts, and title attributes.
If you want to use different images in content in different languages, you need to install the Media Translation add-on.
Other Glue Plugins
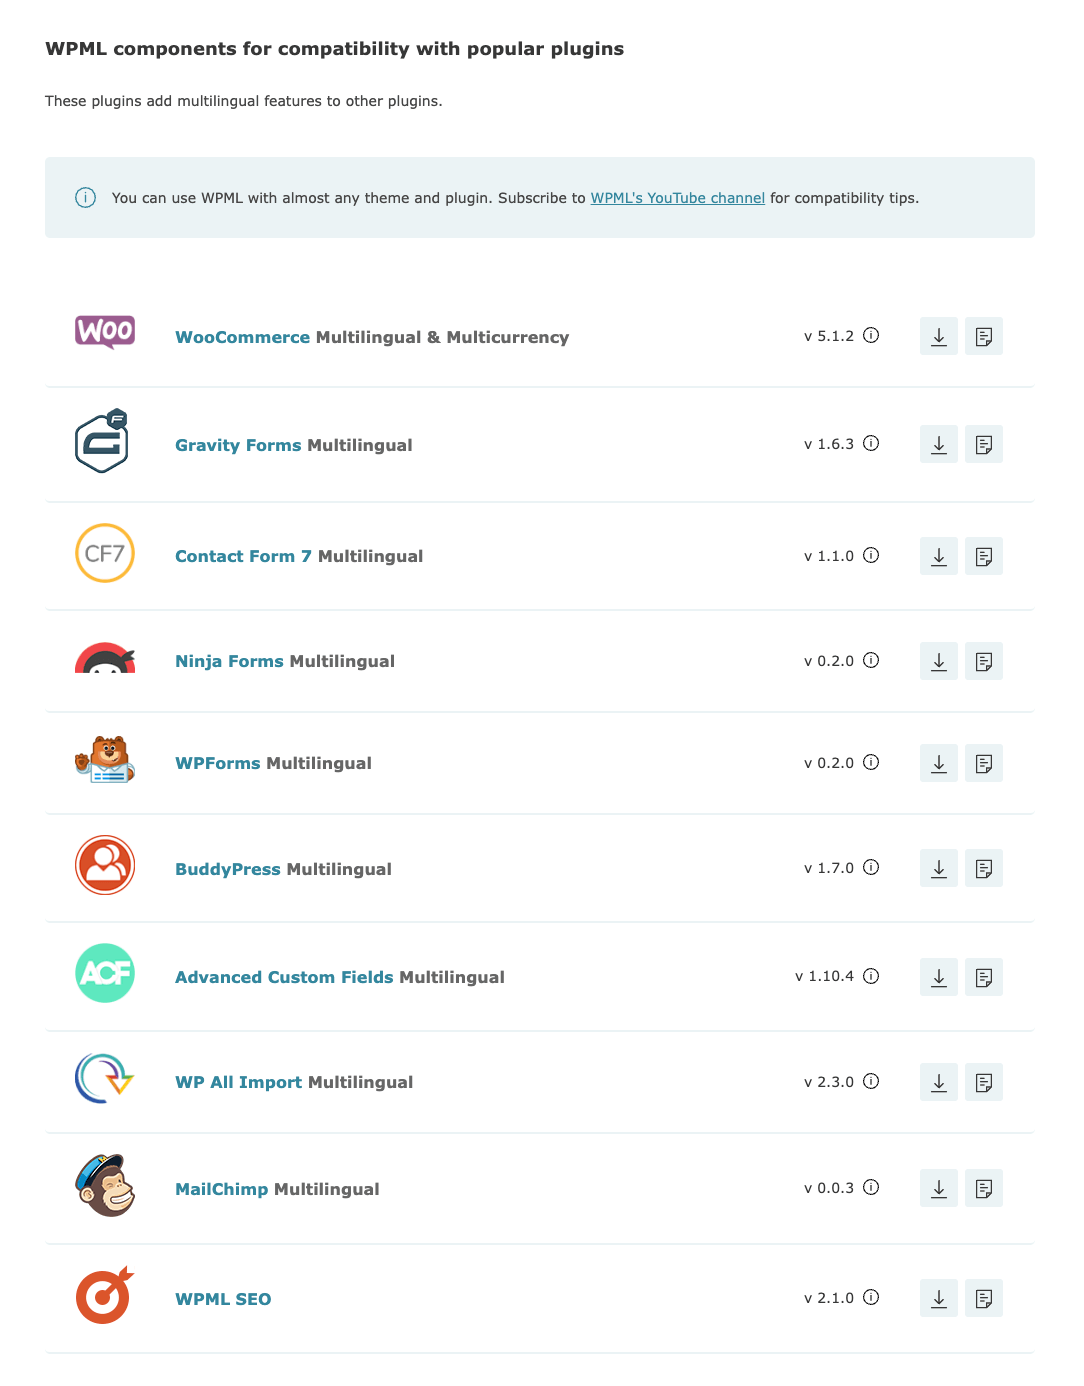
The multilingual plugin has many “glue” plugins, which add multilingual features and make popular WordPress themes and WordPress plugins fully compatible with WPML. For example, with the WooCommerce Multilingual & Multicurrency plugin, you can translate your WooCommerce store and make your products available in multiple currencies.
A 6-Step Guide to Configuring WPML
After you upload the OTGS Installer or the WPML core plugin to your WordPress site, a wizard will guide you through the setup process.
We’ve set up a demo website to walk you through the steps.
To begin, click the Configure WPML button from your site’s dashboard.
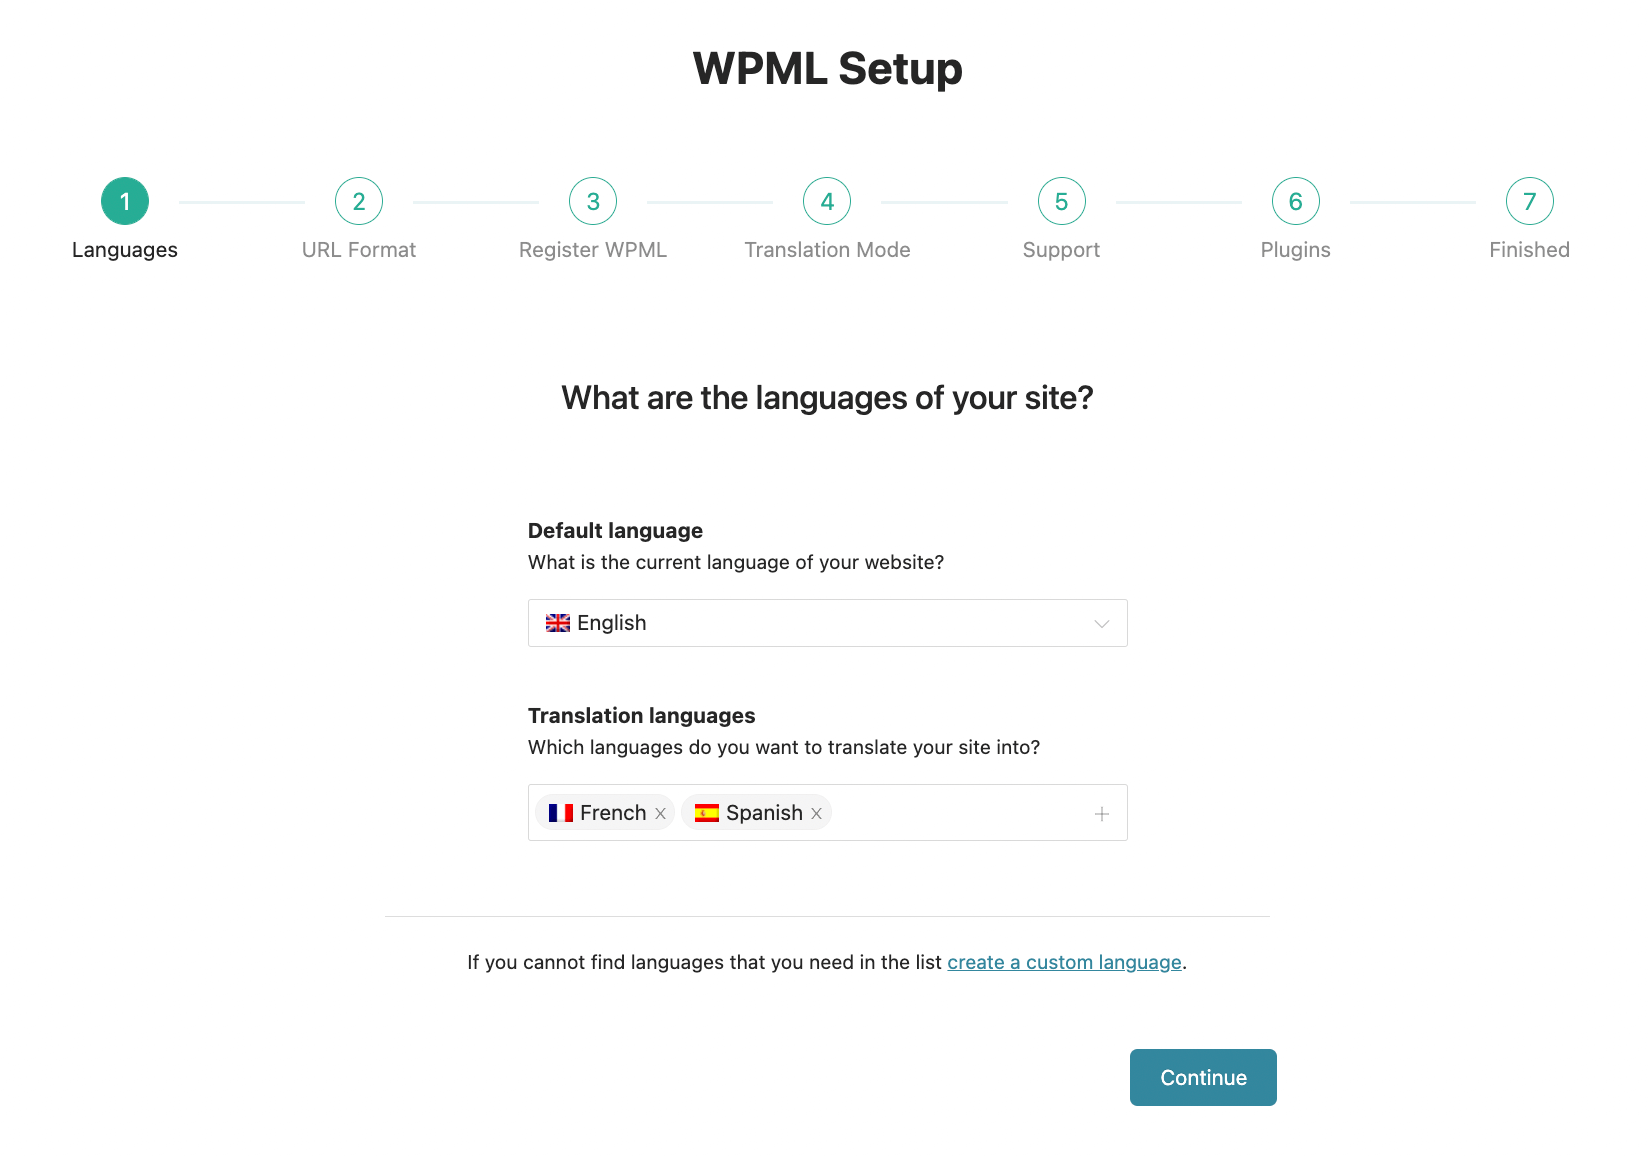
Step 1: Select your site’s languages
Your first step is deciding on your site’s default language and the languages you want to translate your site’s content into.
WPML lets you translate your site into 65 pre-configured languages, ranging from English and Spanish to Welsh and Quechua.
If you can’t find a language, you can add custom languages. This is a great option if you want to add country-specific languages, like Canadian French.
Of course, you can always add or remove languages later.
For now, we’ll choose to translate our demo website into French and Spanish.
Step 2: Choose the URL format
When you set out to translate your website, you first think of the languages you want to translate your content into. But, what about your URL structure? After all, deciding on a URL format is a key step in building a multilingual website. With WPML, you can choose between three different language URL formats.
This way, you can take factors like cost, whether you’re targeting a language or region, and your international SEO strategy into account. Then, you can choose the best URL format for your multilingual site’s needs.
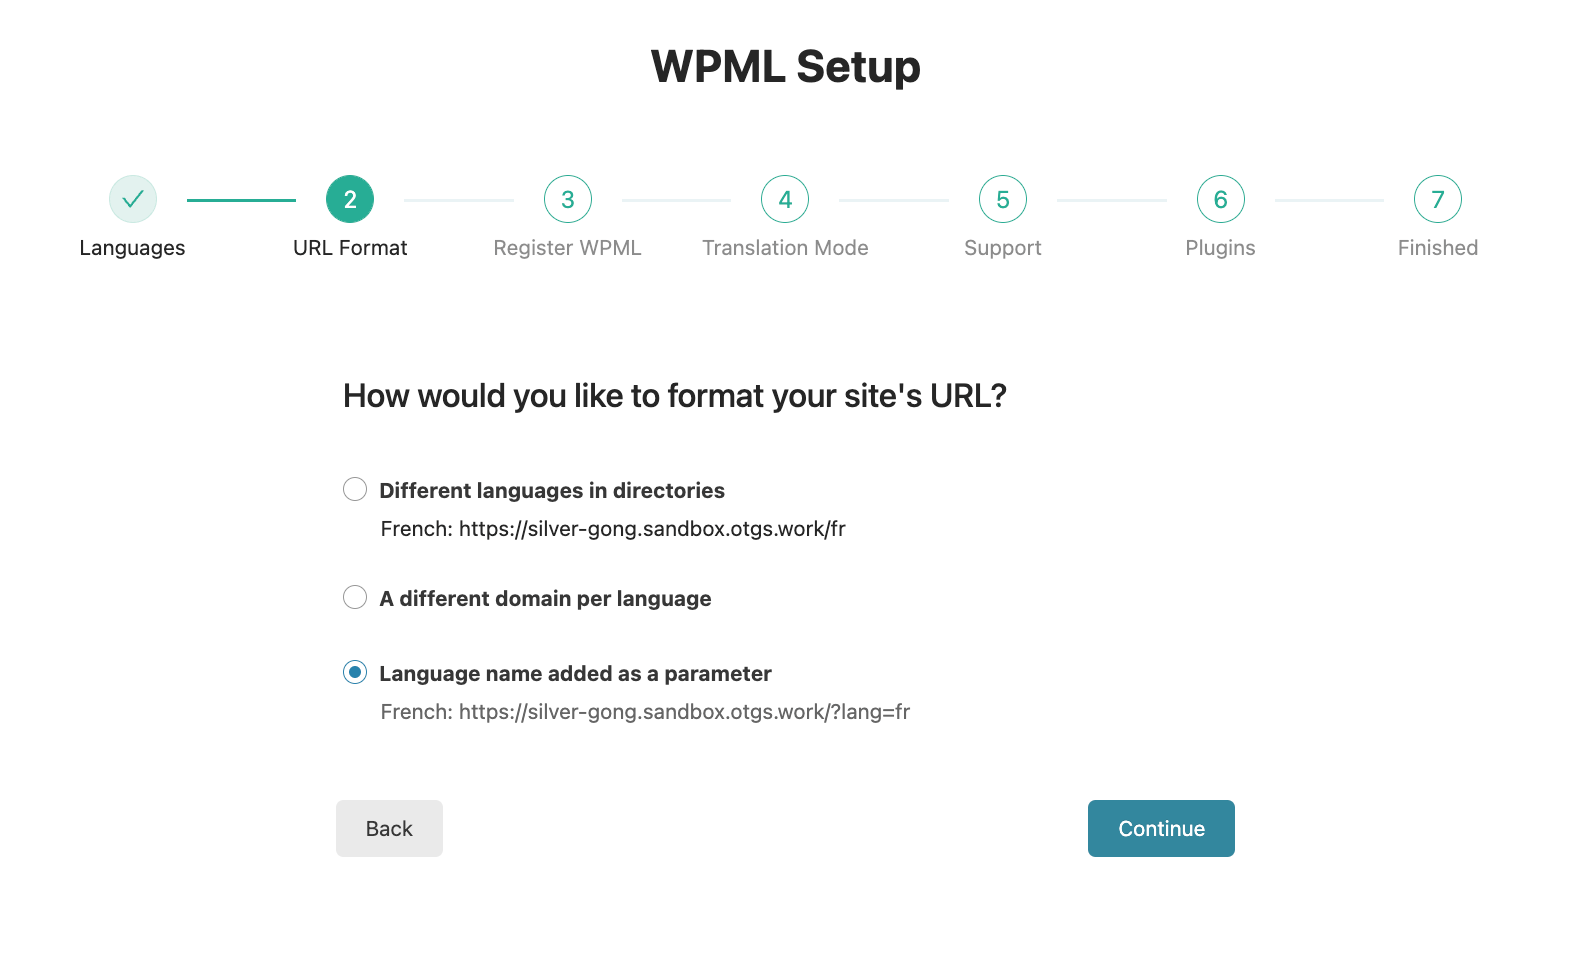
Note: After you complete the setup, you can go to WPML → Languages to change the language URL format or access advanced settings.
Step 3: Register WPML
Now, you need to enter the site key from your WPML account. This is a required step, and it allows you to receive automated updates directly to your WordPress admin. Click Get a key for this site, and WPML will generate one for you in your WPML.org account.
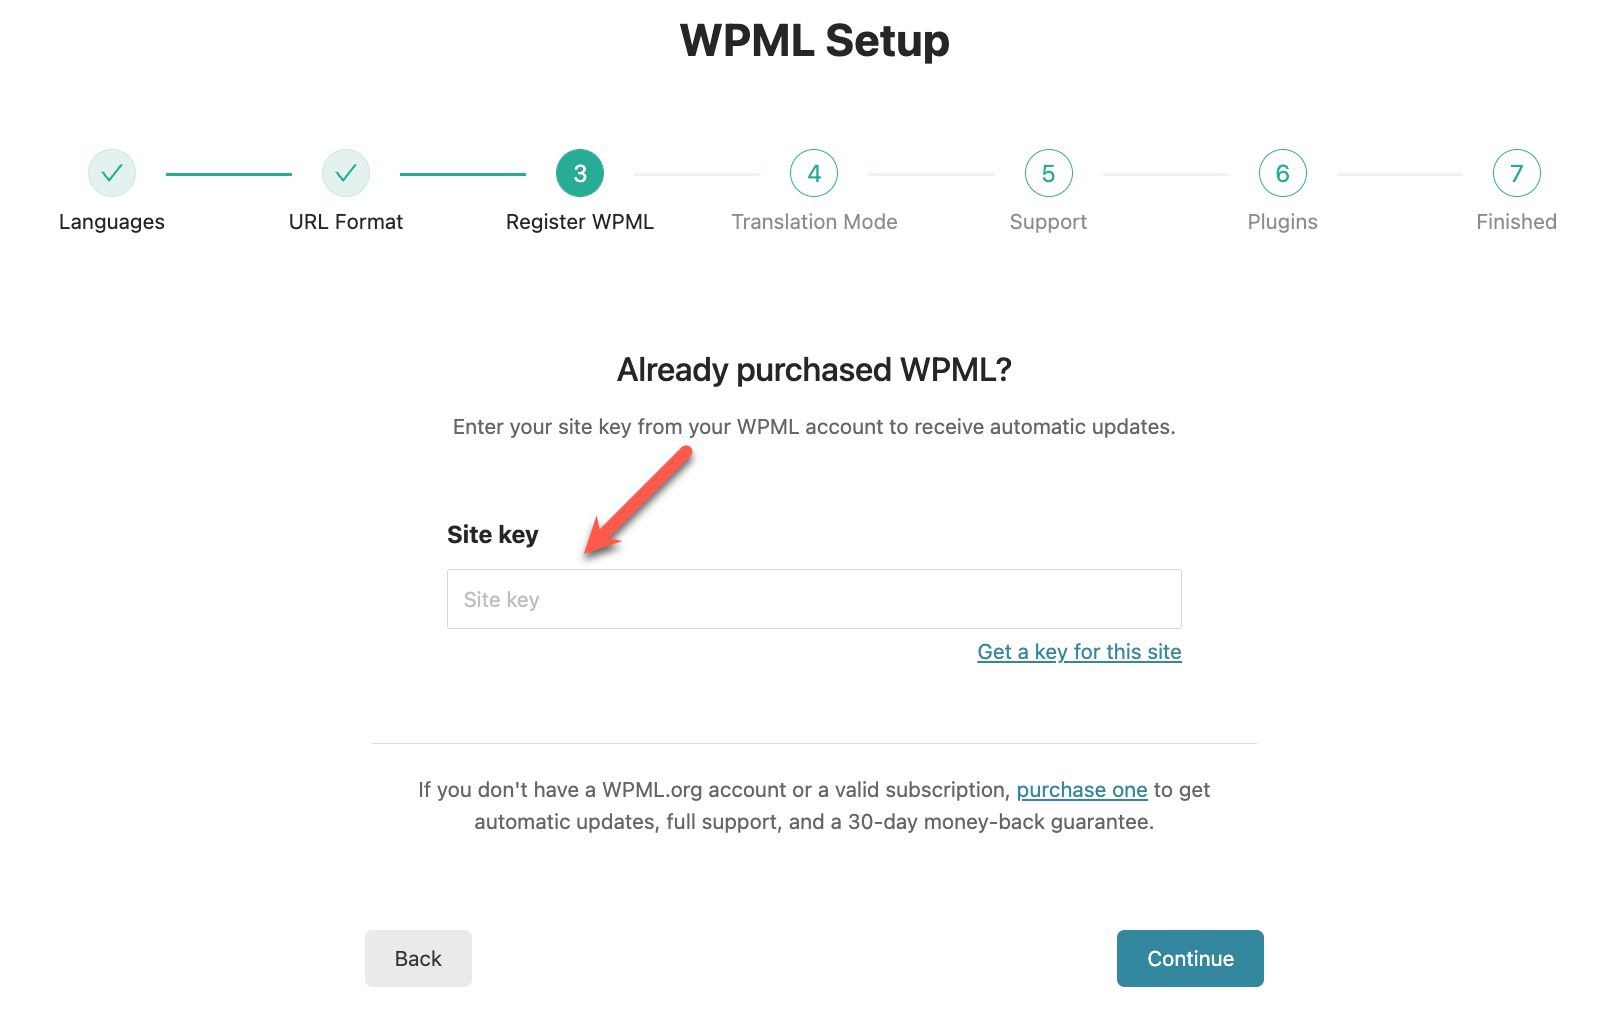
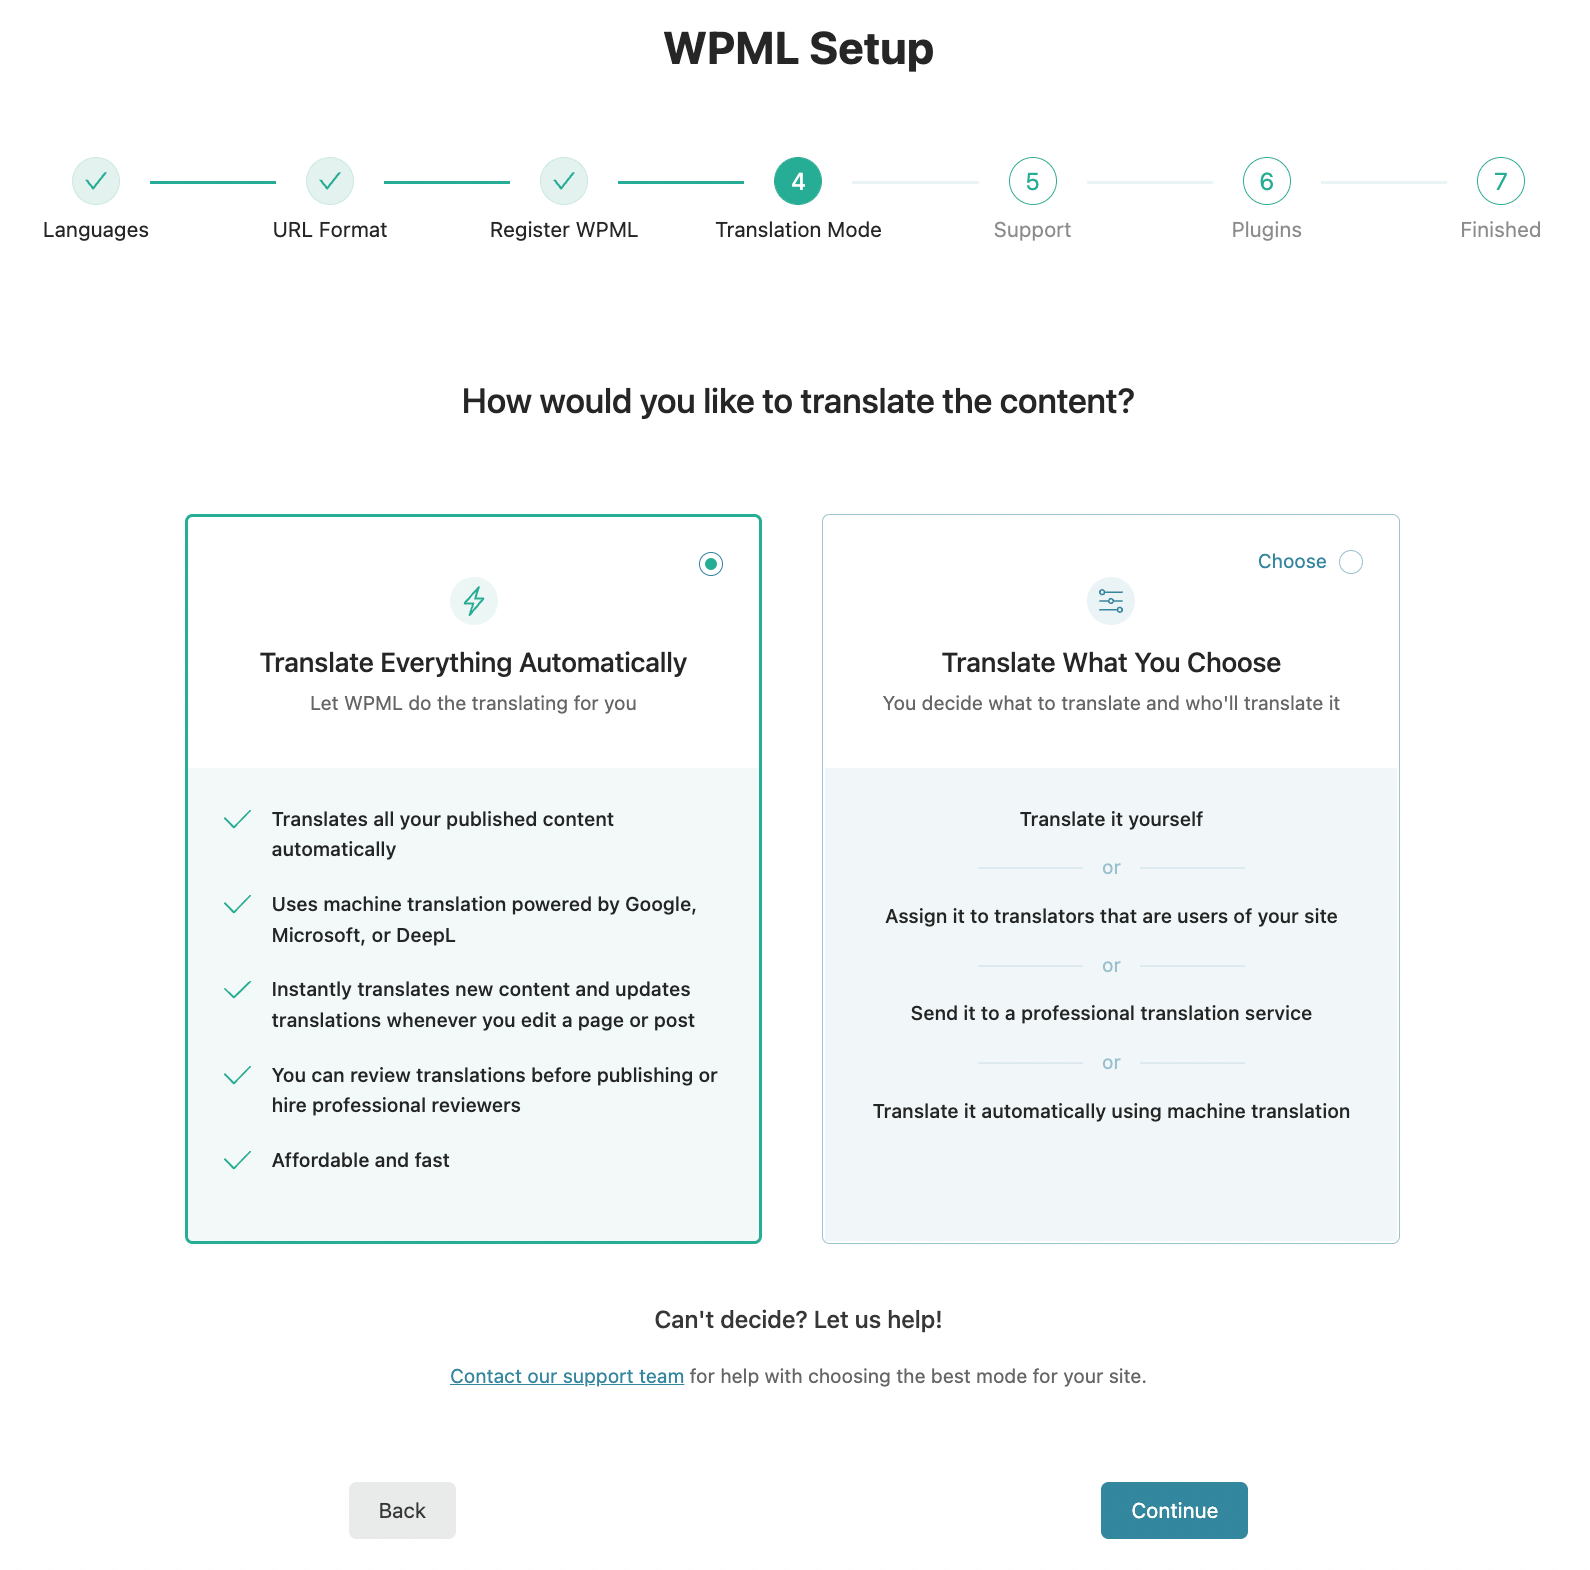
Step 4: Choose a translation mode
You have two options for translating your site:
- Translate Everything Automatically – Use machine translation powered by DeepL, Google Translate, or Microsoft Azure to translate your published content automatically. This requires you to add automatic translation credits to your site.
Translate What You Choose – Decide what content to translate.
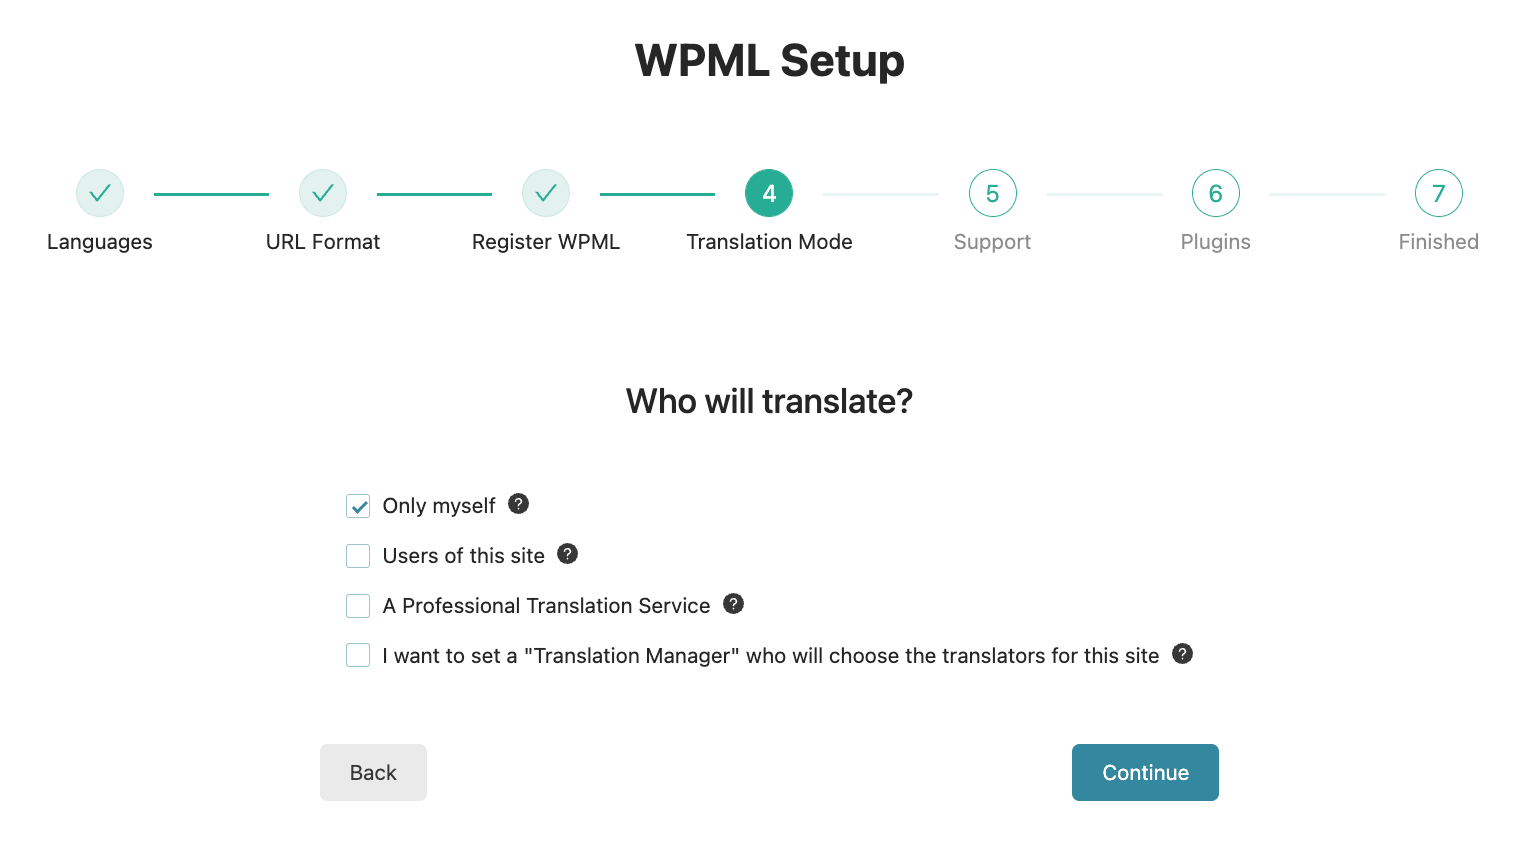
If you select Translate What You Choose, you can also decide who will translate your content. You can translate by yourself, add translators, or work with a professional translation service. You can even give a user the Translation Manager role, allowing them to choose the translators for your site.
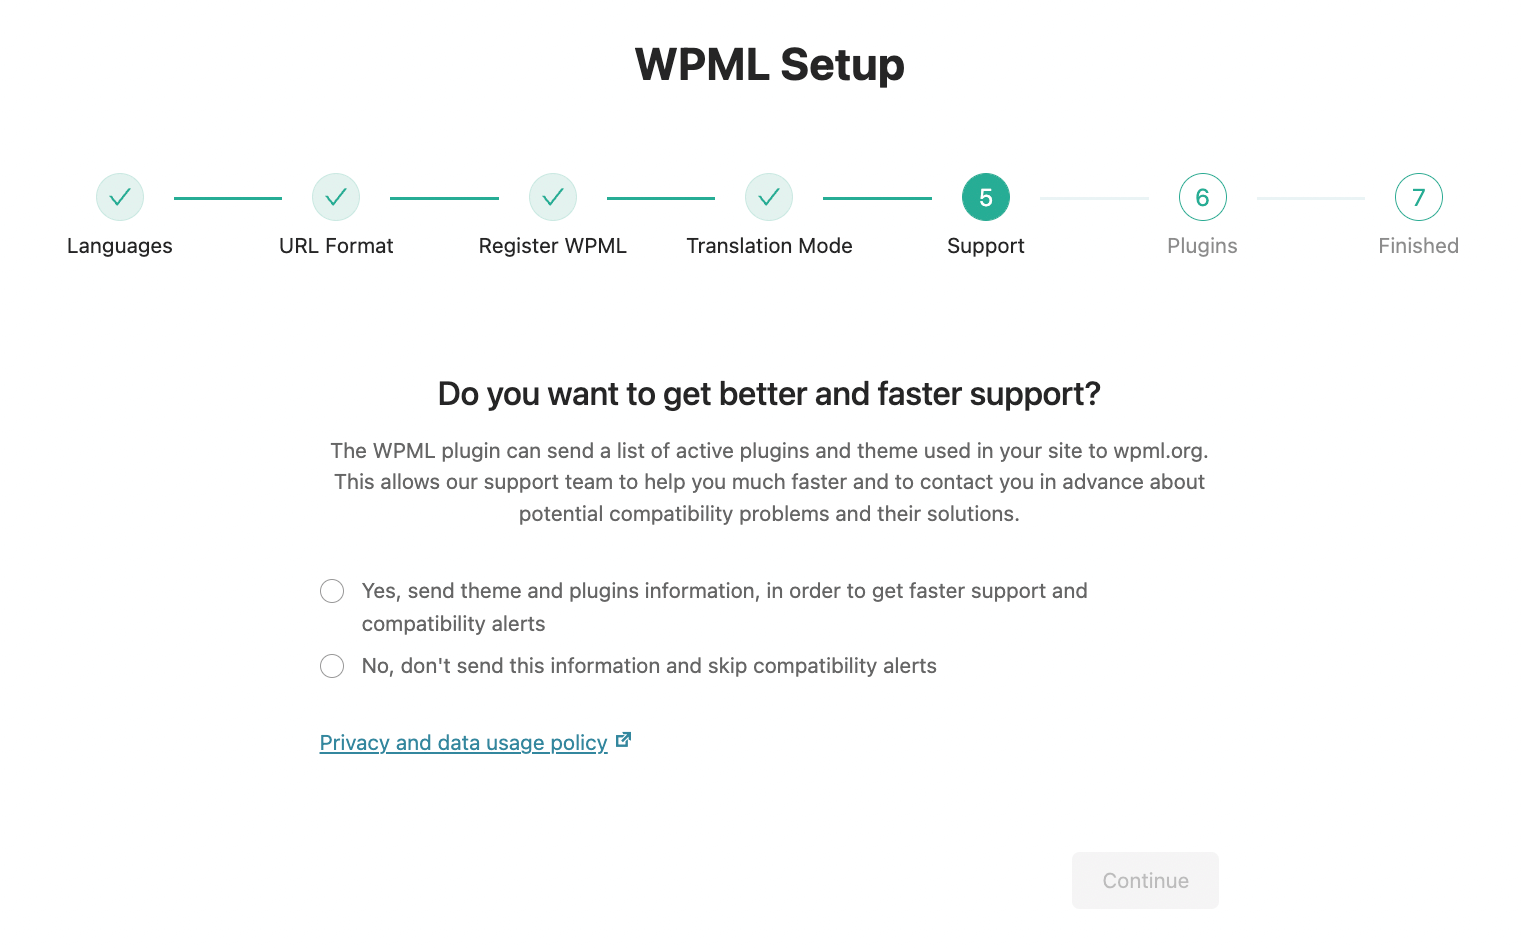
Step 5: Send theme and plugin information
WPML is compatible with most plugins and themes, but sometimes compatibility issues happen.
In case of issues with WPML, the WPML team works hard to resolve them quickly. If the problem is in another theme or a plugin, the WPML support team offers temporary workarounds. In this step, you can choose to share information about the plugins and themes installed on your site. This way, you can get faster support and news about compatibility issues in advance.
Step 6: Activate additional WPML components
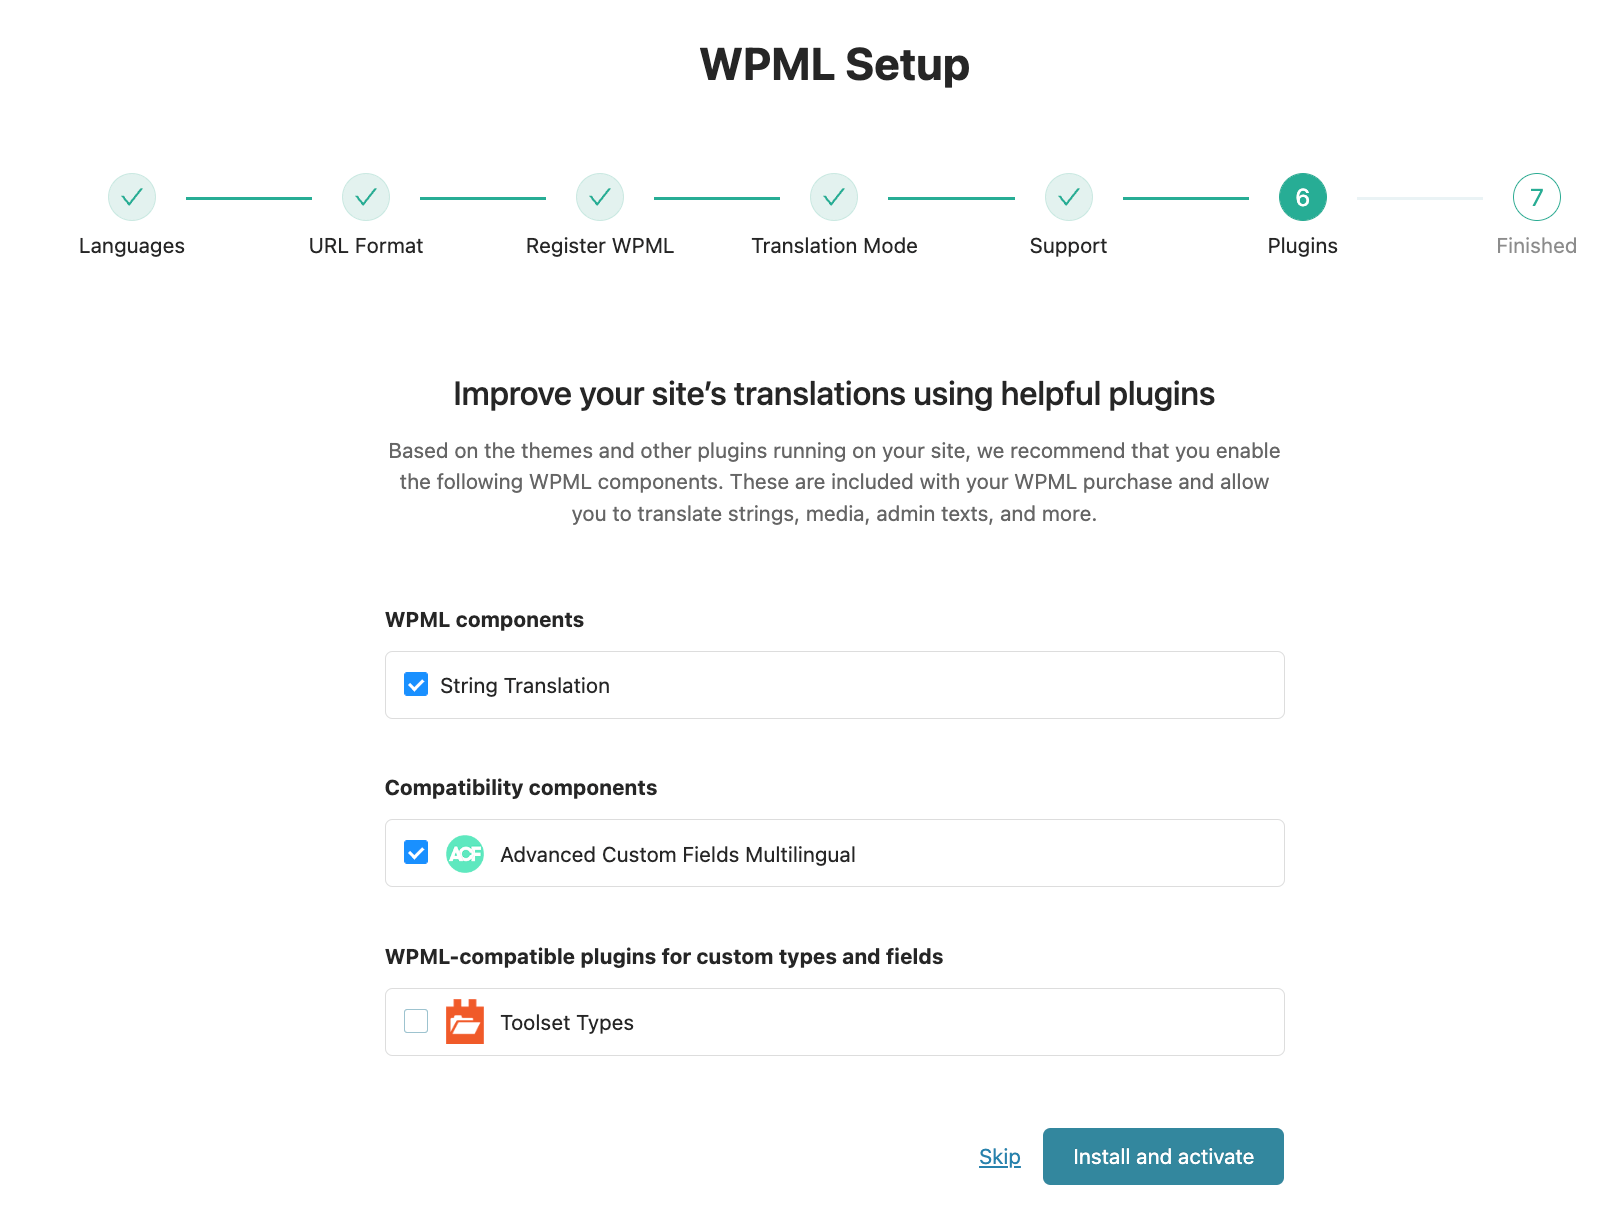
In the last step, WPML suggests which add-ons you should install based on the plugins you have on your site. As we mentioned earlier, a WPML component you should always install is String Translation.
If your site has a third-party plugin that requires a WPML extension to be multilingual, you’ll see it listed here. For example, if you have Advanced Custom Fields on your site, you’ll see a suggestion to install WPML’s Advanced Custom Fields Multilingual.
An Overview of the WPML Menu
That’s it – you’ve successfully installed and activated WPML on your WordPress website. So, what happens next?
From the WPML menu in your site’s dashboard, you can :
- Go to Languages to add or remove languages and enable different styles of the language switcher.
- Go to Translation Management to send content for translation and manage translation jobs.
- Go to String Translation to translate widget texts, admin texts, and more.
- Go to Taxonomy translation to categories, tags, and custom taxonomies by going
- Sync menus across languages in WP Menu Sync.
- and more!
Conclusion
It’s hard to find a better multilingual plugin than WPML. With an easy-to-use interface and different translation methods, it has all the features you need to create a website in multiple languages. You now have a thorough understanding of how to get started with the WPML plugin. Of course, there’s still a lot more to learn!
Follow ThimPress and WPML on all available platforms to stay up-to-date with news about compatibility and new features.
Read More: WordPress Image Sizes: 5 Best Tips for SEO Optimization
Contact US | ThimPress:
Website: https://thimpress.com/
Fanpage: https://www.facebook.com/ThimPress
YouTube: https://www.youtube.com/c/ThimPressDesign
Twitter (X): https://x.com/thimpress_com
