Is your website’s SSL certificate nearing its expiration date? Don’t worry! Renewing your SSL certificate is essential for keeping your website’s data secure and maintaining that trust-building padlock icon in your browser.
In most cases, web hosts and registrars make renewing your SSL certificate a breeze, often automating the entire process. But if you’re with a host that doesn’t offer this convenience, we’ve got you covered.
In this blog post, we’ll guide you through the simple steps to renew SSL certificate manually. We’ll cover everything you need to know, including when to start the renewal process, provider-specific tips based on your hosting platform, and the potential costs involved.
So, let’s dive in and ensure your website stays secure!
Eduma – Education WordPress Theme
We provide an amazing WordPress theme with fast and responsive designs. Let’s find out!
What Is an SSL Certificate?
An SSL (Secure Sockets Layer) certificate is a digital certificate that authenticates a website’s identity and enables an encrypted connection. It acts like a digital passport, verifying a website’s credentials and allowing sensitive information to be transmitted securely over the internet.
Why Do SSL Certificates Expire?
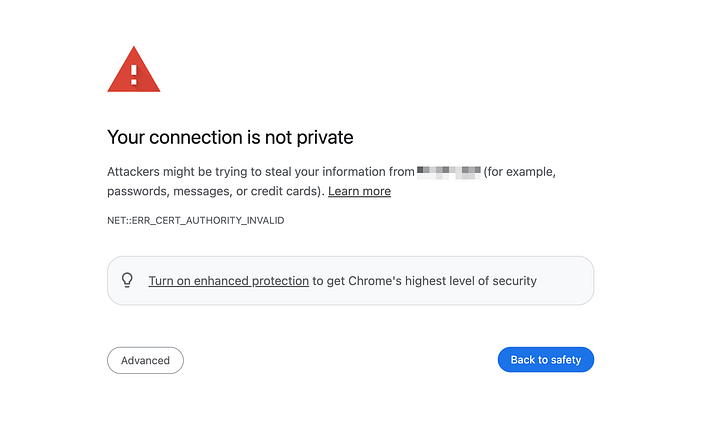
SSL certificates are digital files that secure websites. They contain important information like a public key, a digital signature, details about the website or organization, information about the cryptographic algorithms used, and a validity period.
SSL certificates expire for several reasons:
- Security: New certificates use the latest security measures, similar to changing passwords regularly.
- Key Renewal: New cryptographic keys are generated with each SSL certificate renewal, reducing the risk of compromise.
- Ownership Verification: Renewal confirms the owner still controls the website.
- Problem Mitigation: If a certificate is stolen, it won’t work forever.
When an SSL certificate expires, visitors may see warnings not to visit the site, which can lead to:
- Visitors leave the site, especially if they are unfamiliar with it.
- Trust issues, even for returning visitors.
- Decreased traffic.
- No encryption of data between the site and visitors, creates a security risk.
The expiration period for SSL certificates has changed over time. Initially, certificates lasted 3-5 years, then 2 years. Since September 2020, the recommended period is 13 months, but some certificates expire in as little as 90 days. This encourages automation and eliminates the need for manual renewals.
How to Handle SSL Expiration Notices/ Emails
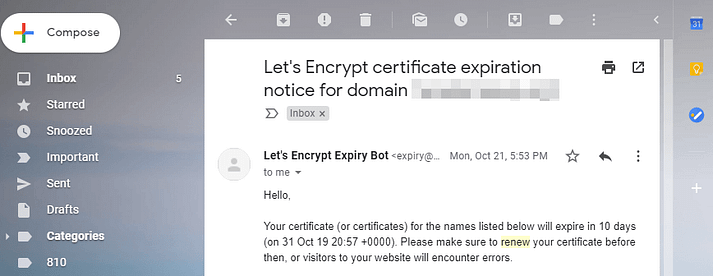
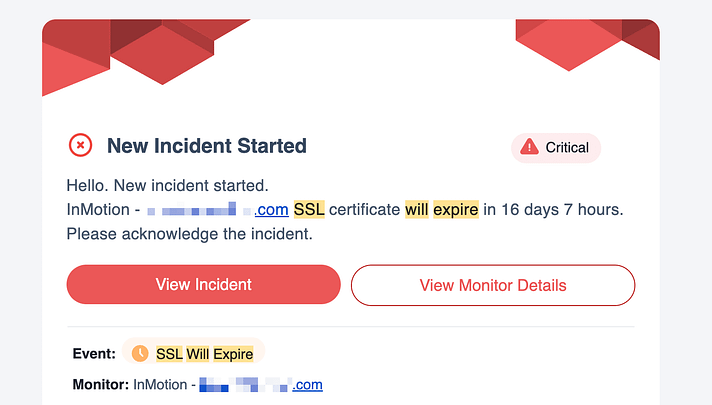
Receiving an email or notice about your SSL certificate expiring can be alarming, but don’t panic. Resolving this issue is simpler than you might think, and no harm has occurred yet. Here’s what you need to do:
Verify if your certificate is from Let’s Encrypt:
Let’s Encrypt is a free, automated certificate authority that simplifies SSL certificate acquisition. If you’re using an entry-level hosting plan with an SSL certificate, it’s likely from Let’s Encrypt. Let’s Encrypt certificates auto-renew, and most hosts support this feature.
To check, navigate to cPanel, go to SSL/TLS Status, and click “View Certificate” next to your domain name.
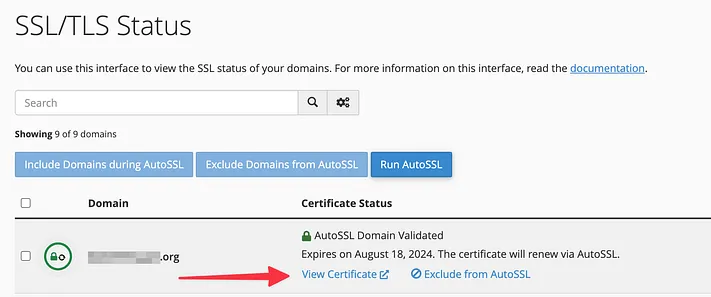
If it mentions “Let’s Encrypt,” you can disregard the rest of this guide as your certificate will renew automatically. If unsure, contact your hosting support.

Check if your web host provides automated SSL renewals:
Many hosts automate SSL renewals for all certificates. Popular hosting providers like SiteGround, WP Engine, IONOS, DreamHost, Flywheel, Kinsta, InMotion, A2 Hosting, Hostinger, HostGator, Namecheap, and GoDaddy offer this. If your host is among them, your certificate will auto-renew near its expiration date.
For Bluehost users, auto-renewal depends on your plan and SSL type (free or premium). Some free SSLs might require manual renewal. Check the Bluehost dashboard’s Hosting > Security > View SSL Logs section in cPanel.
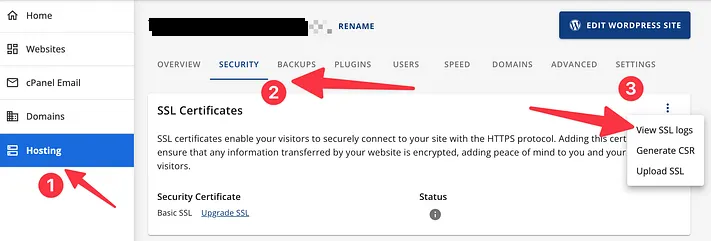
If it mentions automatic renewal, you’re good to go.
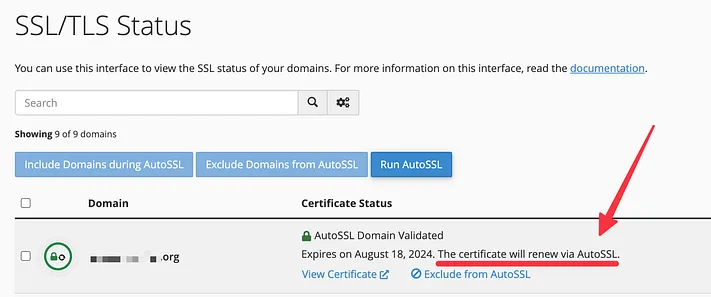
If you’re unsure about auto-renewals, contact your hosting support. They can clarify the process and help you enable auto-renewals if possible.
If you cannot automate the process, manual renewal is necessary. The most common method, applicable to most cPanel-based web hosts, will be explained next.
How to renew SSL certificate
The process of renewing your website’s SSL certificate can vary depending on your web host and certificate authority. However, the general steps remain consistent:
- Generate a Certificate Signing Request (CSR)
- Obtain a new certificate from a certificate authority
- Install the renewed certificate on your hosting platform.
To illustrate this process, we’ll use a standard cPanel hosting environment as an example. While specifics may differ, the underlying principles apply to most setups.
Step 1: Generate a New CSR
Begin by generating a CSR through your web host. This CSR acts as a digital application, verifying your server’s identity and containing essential information about your website.
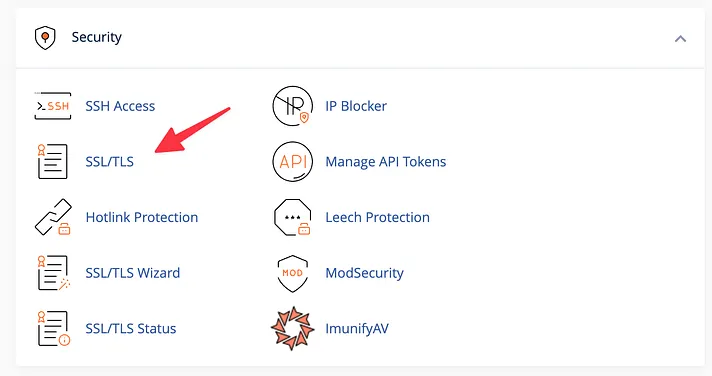
In cPanel, navigate to the “Security” tab and locate the “SSL/TLS” option.
Click on the “Certificate Signing Requests (CSR)” link.
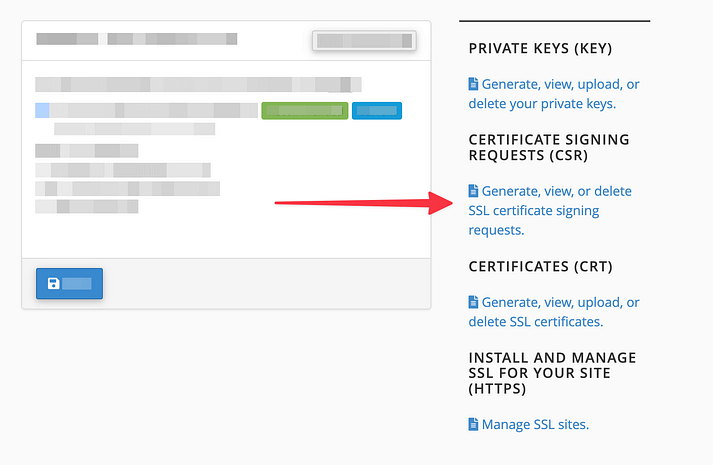
Under “Generate a New Certificate Signing Request,” fill out the required information, ensuring accuracy.
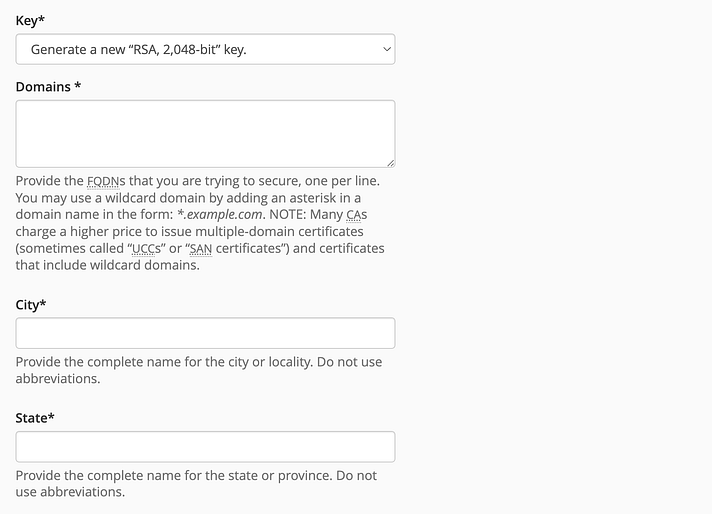
Once completed, cPanel will generate a CSR code. Save this code for later use.
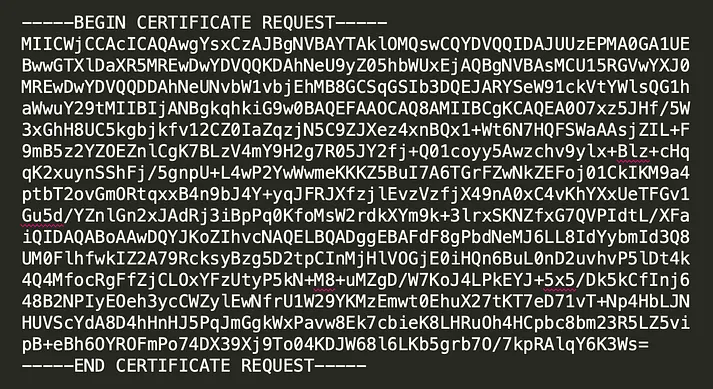
Step 2: Submit CSR to Your Chosen Certificate Authority
The certificate authority is the organization that issues your SSL certificate. Popular options include DigiCert, SSL.com, Comodo, and GlobalSign.
- Select your preferred certificate authority.
- Follow their specific instructions for submitting your CSR code.
- Provide all necessary information, including your CSR code.
- Upon approval, the certificate authority will issue a new SSL certificate for your website.
Step 3: Install Your Renewed SSL Certificate
Installing your renewed certificate will depend on your hosting provider’s interface. Here’s how to do it in cPanel and Bluehost:
For cPanel:
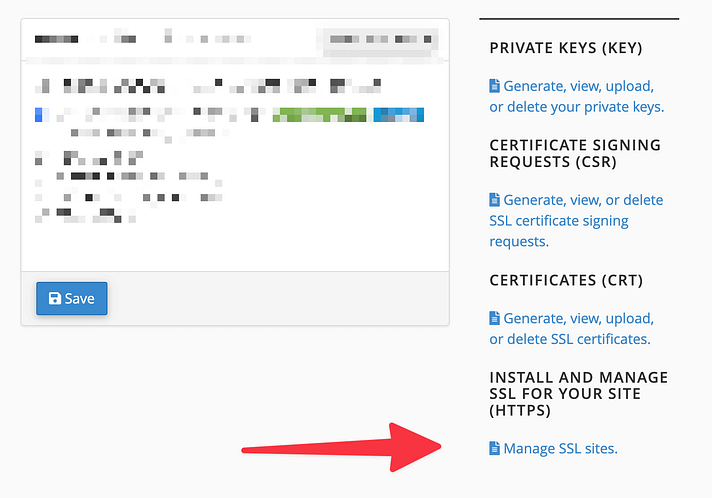
In cPanel, go to “SSL/TLS” and select “Manage SSL sites.“
Upload the certificate files provided by your certificate authority. Usually, you’ll need the certificate itself and the CA bundle.
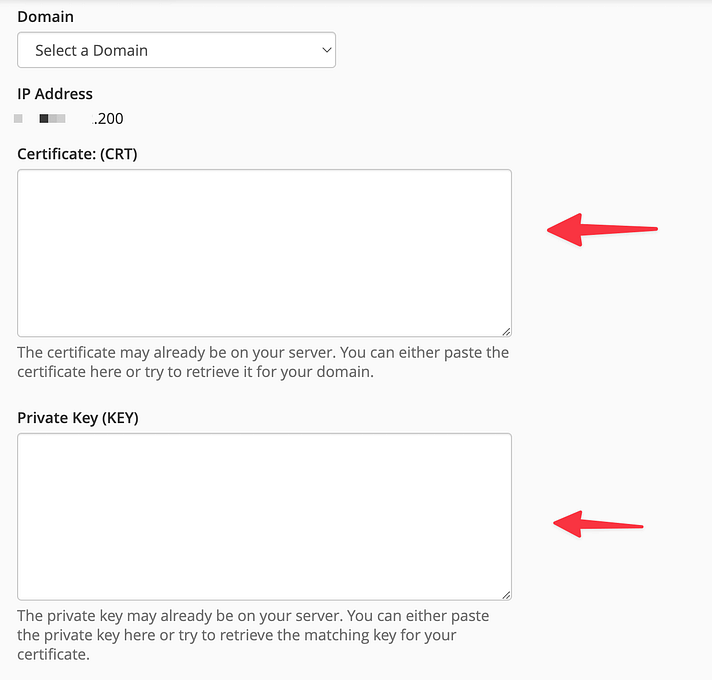
Click “Install Certificate” to complete the process.
For Bluehost:
From your Bluehost dashboard, navigate to “Hosting” > “Security.” Click on “Upload SSL.“

In the cPanel interface, copy your SSL certificate details into the provided field.
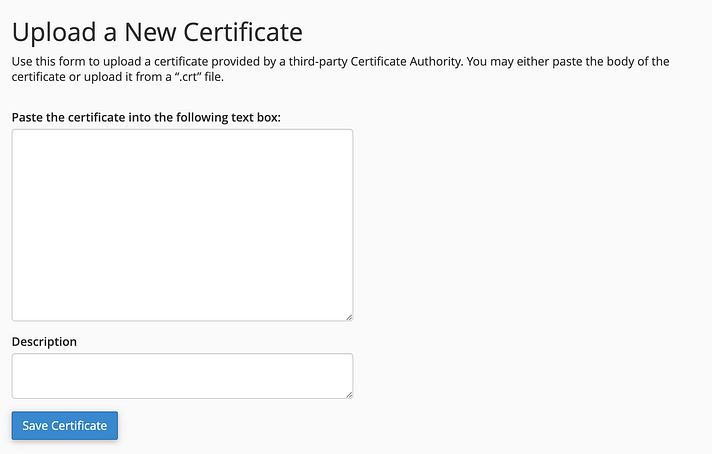
Click “Save Certificate.“
While this guide focuses on cPanel, the overall process is similar across different hosting platforms. If you encounter difficulties, consult your hosting provider’s documentation or support resources for assistance.
Final Thoughts
In conclusion, SSL certificates are essential for modern websites. They enhance your website’s search engine optimization and protect your users’ data from potential risks. Fortunately, obtaining and installing an SSL certificate is straightforward and cost-effective, making it a necessary step for website owners.
However, the renewal process can vary depending on the certificate authority. Let’s Encrypt certificates renew automatically, requiring no action on your part. Check your cPanel settings for other providers to see if auto-renewal is enabled. If manual renewal is necessary, you must generate a certificate signing request (CSR), activate it with your provider, and install it on your hosting setup.
Read More: The WordPress Plugin for Adding Code Snippets: 7 Top Picks
Contact US | ThimPress:
Website: https://thimpress.com/
Fanpage: https://www.facebook.com/ThimPress
YouTube: https://www.youtube.com/c/ThimPressDesign
Twitter (X): https://x.com/thimpress_com


