In the previous post, we told you how to set up a course using LearnPress. Today, we will go further in setting up an online course with our premium themes with LearnPress course setting options.
Now, we will go to the Course Settings part. There are 5 LearnPress course setting tabs, as you can see:
- General.
- Pricing.
- Extra Information.
- Assessment.
- And Author.
General Tab In Course Settings
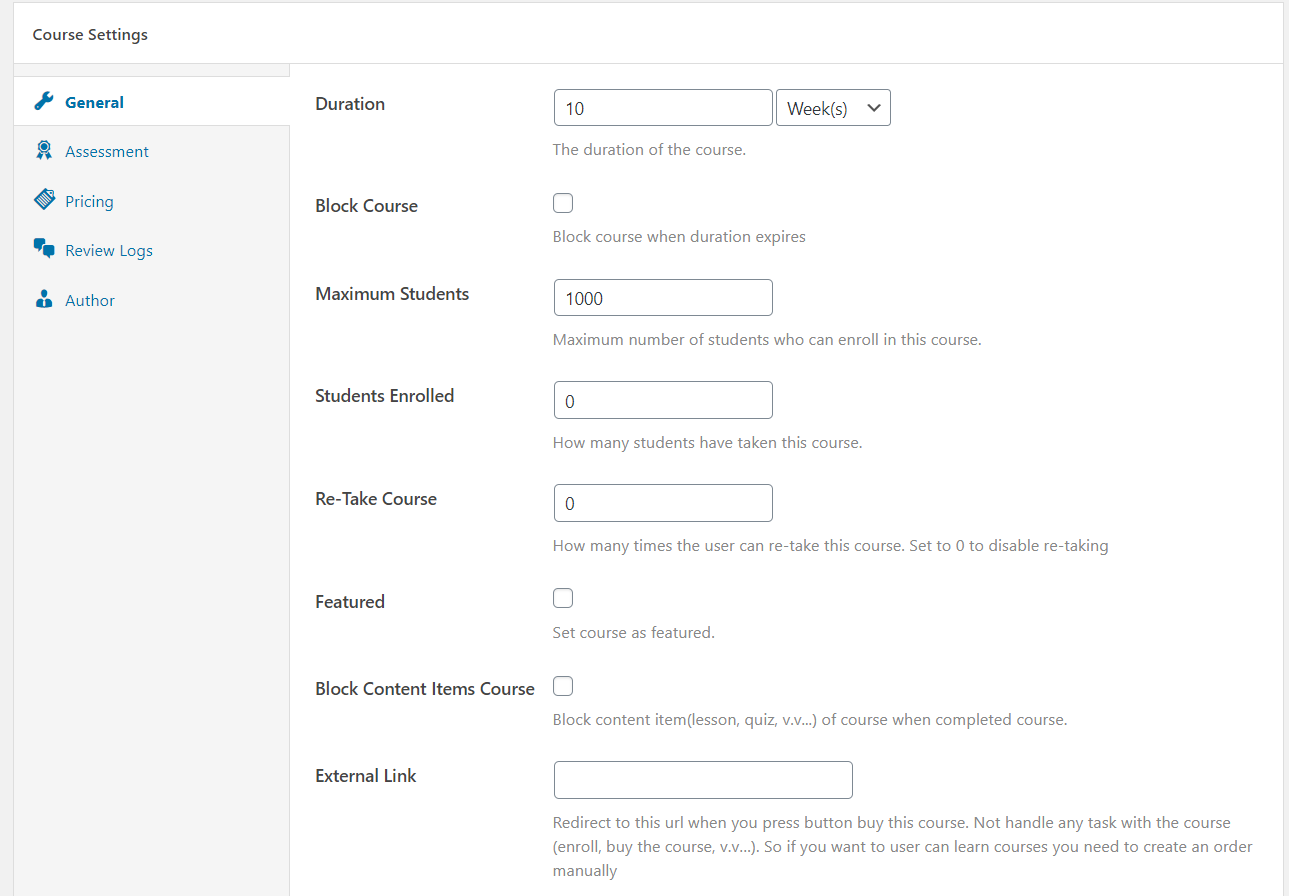
First, we will explore the General tab in LearnPress course settings.

In the General tab, you can:
- Set your course duration with the “Duration” feature.
- Enable or disable the “Block content” feature when your course duration expires or after the student finishes the course.
- Enable or disable the “Allow repurchasing” feature of the course when the course is blocked or finished or after the retakes run out.
- You can choose a Difficulty level and the number placeholder of students enrolled in the course.
- Max Student means you can set the maximum number of students who can join your course.
- It’s possible to set the number of times a student can retake the course with the “Re-take course” feature.
- If you enable the “Finish button” feature, the student needs to complete all items to finish the course.
- If you disable the “Finish button” feature, the student must pass the course assessment to finish the course. With the featured list, if you enable it, it will show Featured banners on course thumbnails.
- Besides, you can write short reviews to promote the course in this featured review box.
Important Note: while you can include external links for additional resources, please be aware that some platforms may not allow direct purchases from external sites. If you add an external link, a “More info” button might be displayed instead of a direct purchase option, which will redirect students to the linked webpage.
Pricing In Course Settings
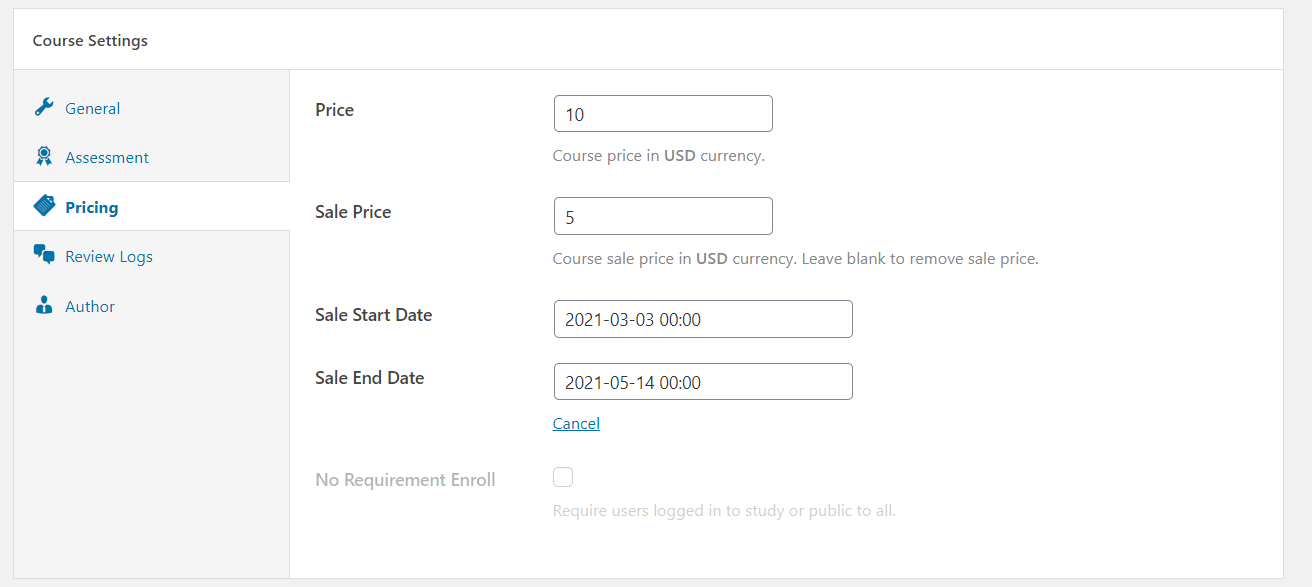
Now, let’s move to the Pricing tab.

Inside the Pricing tab:
- You can set the Regular price for your course here.
- Click “Schedule” to select the time for the sale price.
- With the “No requirement enroll” feature, students can see the content of all course items and do the quiz without logging.
Extra Information In Course Settings
Here, you can add some extra information as:
- Requirements
- Target Audience
- Key features
- FAQs
In the Extra Information section, you should provide information that can attract learners, some advice from ThimPress:
- Be specific: Clearly outline any prior knowledge, skills, or software that students need.
- Offer resources: If possible, provide links to free resources or tutorials where students can brush up on essential skills if they don’t fully meet the requirements.
- Explain benefits: Briefly describe how your course will help your target audience achieve their goals or solve specific problems they face.
Assessment Tab In Course Settings

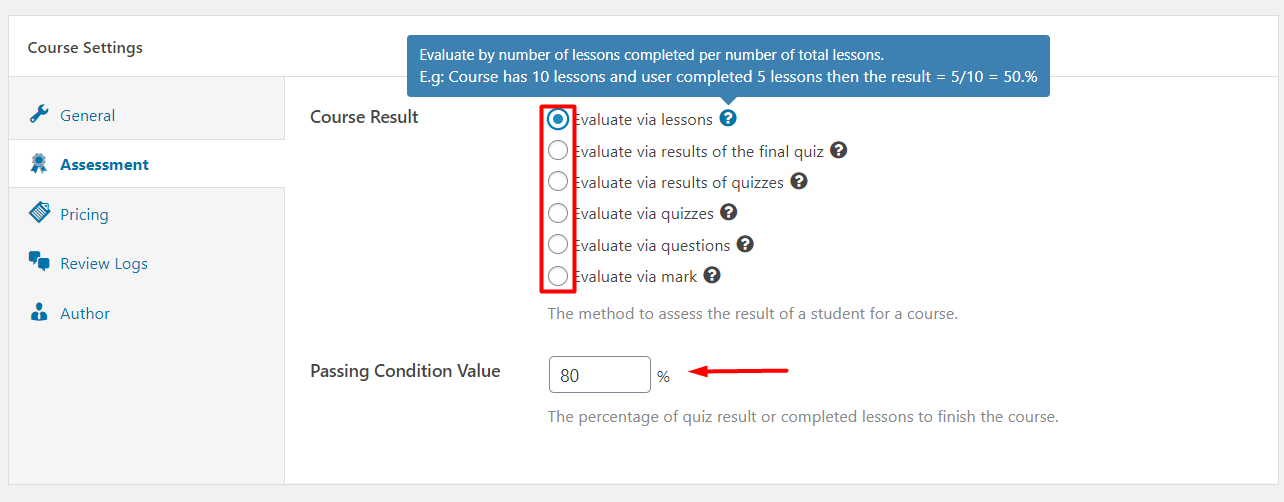
With the Assessment Tab, you can choose how to evaluate your students’ results and passing grades such as:
- Evaluate via lessons.
- Evaluate via results of the final quiz.
- Evaluate via results of quizzes.
- Evaluate via quizzes.
- Evaluate via questions.
- Evaluate via mark.
To better understand these options, you can hover over the “?” at the end of the selection.
Finally, you can set “Passing Grade” for the course as a percentage.
Suggestion: you should allow students to pass your online course with a score ranging from 75 – 80%.
Author In Course Settings
As an admin, you can change the course’s author, you can assign the course to another instructor. LearnPress only supports setting one author for a course.
In case you want to assign more than one instructor to a course, you can use our LearnPress Add-on “Co-instructor add-on for LearnPress”.
Note: You might find our post on setting up the Co-instructor add-on helpful if you’re just getting started.
Course Overview In Course Settings

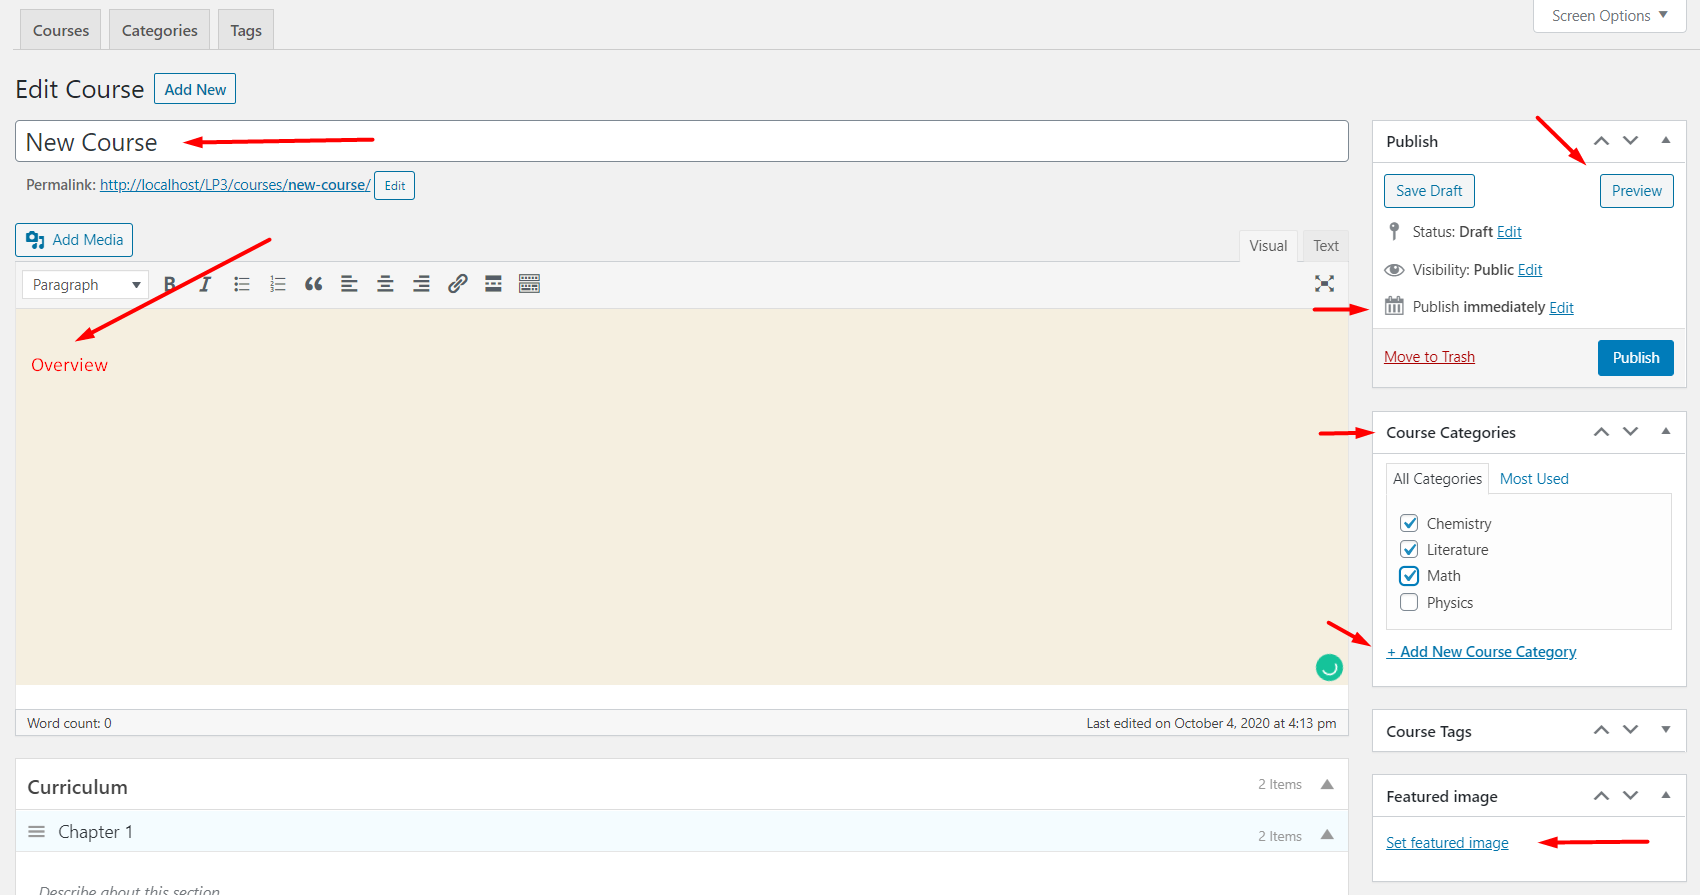
In the Course Overview section, you can set the name and introduction to the course, what you wrote will be displayed in the Overview tab on the single course page:
- In the Course Categories section, you can choose or add a new course category for the course.
- Of course, it’s based on your needs. However, you should create categories that is reasonable, consistent with the content your website provides, and at the same time meets the needs of your students.
- Moreover, below the Course Categories section is the Course Tags section. You can add tags or choose from the most used tags. In addition, remember to separate tags with commas.
- On the other side, the next block is the featured image. In there, click on the Set featured image to upload an image.
- Lastly, scroll up to the Publish box. You can choose status and visibility as public or set a password and time to publish the course. You can click on the “Publish” button to publish your course.
Don’t forget to try Eduma, the WordPress theme that will transform your online learning experience. With its powerful features and intuitive design, Eduma is the perfect platform for creating an engaging and effective online learning environment.
Read more:
- How to Create an Online Course with LearnPress Plugin.
- Installing Eduma Theme on WordPress: Step-By-Step Guide.
- How To Create Quizzes and Questions in Eduma.
Contact US | ThimPress:
Website: https://thimpress.com/
Fanpage: https://www.facebook.com/ThimPress
YouTube: https://www.youtube.com/c/ThimPressDesign
Twitter (X): https://twitter.com/thimpress


