For years, WordPress users have used familiar formats like PNG vs. JPG for their images. Then came WebP, offering smaller file sizes without sacrificing quality.
And now, there’s a new next-gen one: AVIF. With WordPress 6.5 adding support for AVIF image format, it’s natural to wonder what the difference is and which is better between AVIF vs. WebP.
In this blog post, we’ll answer all the questions you are wondering and show you two simple ways to use these modern image formats on your WordPress site, so you can take advantage of their benefits.
Eduma – Education WordPress Theme
We provide an amazing WordPress theme with fast and responsive designs. Let’s find out!
AVIF vs. WebP: A Short Introduction
WebP, introduced by Google in 2010, has been around for a while and is supported by most browsers.
It’s a good choice for colorful photos and offers good compression compared to JPEG (around 34% smaller files).
AVIF, the new kid on the block (established in 2019), uses even more advanced technology to achieve even tinier file sizes (up to 50% smaller than JPEG).
It’s great for photos where a little quality loss isn’t a big deal. However, fewer browsers can handle AVIF yet.

So, which one should you use? We’ll explore their key differences to help you decide.
AVIF vs. WebP: 4 Key Differences
To get a quick overview of the key differences between AVIF and WebP, check out our comparison table first.
| Feature | AVIF | WebP |
| Compression & File Size | Newer format, supported by Chrome, Firefox, and Opera (not Safari or Edge) | Good compression, smaller files than JPEG, but may show artifacts |
| Image Quality & Color Depth | Versatile for photos, illustrations, and logos, supports transparency & animation | Lower resolution limit, 8-bit depth, less vibrant colors |
| Browser Compatibility | Newer format, supported by Chrome, Firefox, Opera, Safari, Edge (not IE or Opera Mini) | More established format, supported by most major browsers (not IE) |
| Ideal Usage Scenarios | High-quality photos, graphics, text-heavy images | Versatile for photos, illustrations, logos, supports transparency & animation |
AVIF vs. WebP: Compression and File Size
When it comes to squeezing the most quality out of the smallest file size between AVIF vs. Webp, AVIF reigns supreme. This translates to faster loading times and a smoother user experience for your website visitors.
While WebP offers a significant improvement over JPEG by providing similar quality at a smaller size, it can still introduce compression artifacts like blockiness and color banding.
AVIF takes compression a step further, achieving even smaller file sizes while maintaining sharper, more detailed images with minimal to no visible artifacts.
This makes it ideal for high-precision graphics and text-heavy images where clarity is crucial.
AVIF vs. WebP: Image Quality and Color Depth
Both AVIF vs. WebP have limitations in terms of maximum image size. However, AVIF boasts significantly higher resolution capabilities compared to WebP. This allows for capturing finer details in larger images, especially when using a technique called “independent tile encoding.”
Beyond size, AVIF offers superior color reproduction with its support for 10-bit depth, allowing for a wider range of colors displayed compared to WebP’s 8-bit depth.
This translates to richer, more vibrant images, particularly noticeable in photographs utilizing High Dynamic Range (HDR).
Additionally, AVIF’s chroma subsampling allows for efficient storage of color information without sacrificing perceived quality.
AVIF vs. WebP: Browser Compatibility
WebP currently has the upper hand in terms of being viewable by most users. Major browsers like Chrome, Firefox, Edge, and Opera all recognize WebP. Safari even recently joined the party.
AVIF, being a newer format, isn’t as widely supported yet. While Chrome, Firefox, and Opera can display AVIF images, Safari and Edge still lack this functionality.
However, with its clear advantages, AVIF adoption is expected to rise in the future.
AVIF vs. WebP: Ideal Usage Scenarios
The best image format depends on what you’re using them for. AVIF shines for high-quality photos where preserving details and accurate colors is crucial.
This is thanks to its advanced compression and ability to handle more color information. Images with large areas of flat color are another win for AVIF, as its compression works particularly well in those cases.
WebP offers more flexibility and works well for various image types, including photos, illustrations, and even logos.
It provides both lossy and lossless compression options, supports transparency, and can even handle animations. This versatility makes WebP a strong contender for many use cases.
2 Steps To Use AVIF vs. WebP in WordPress
WordPress offers built-in support for WebP images (as of version 5.8 and above). This means you can upload WebP files directly, like any other image format.
However, if you’re using an older WordPress version or want to leverage both WebP vs. AVIF formats, popular WordPress plugins like Optimole come in handy.
Here’s a quick guide:
Step 1: Install & Activate Image Optimization by Optimole
Optimole is a comprehensive image optimization plugin for WordPress. It takes care of storing, compressing, and scaling your images, all while being cloud-based to avoid server strain.
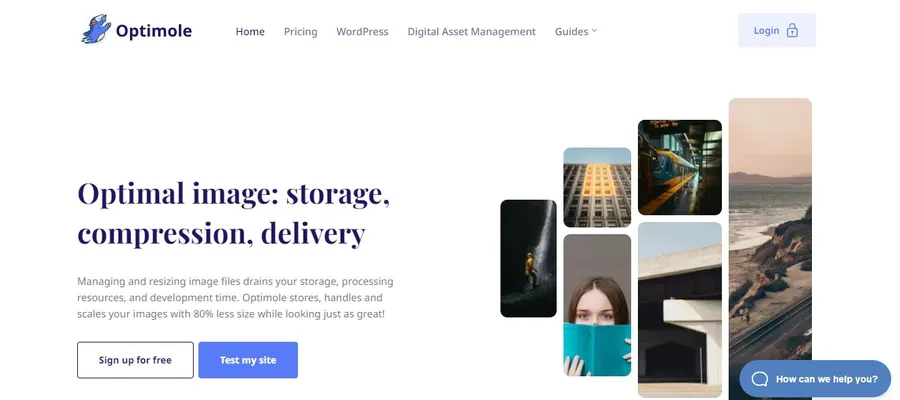
Here’s what makes Optimole stand out:
- Smart Image Sizing: Optimole delivers the optimal image size based on the user’s device and screen size.
- Performance Boosters: It utilizes lazy loading and a content delivery network (CDN) for faster image delivery.
Optimole offers a free plan that serves images to around 5,000 monthly visitors. Upgrading to a paid plan unlocks higher visit limits, additional support, and advanced features.
Installing Optimole:
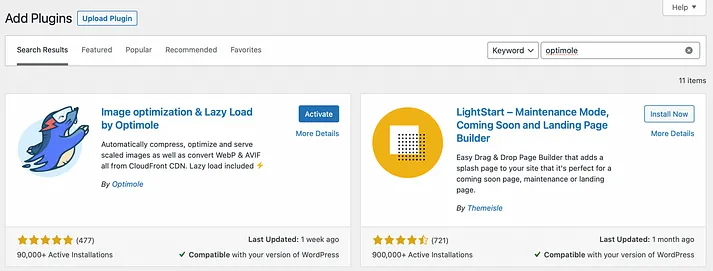
- Go to your WordPress dashboard and navigate to Plugins > Add New.
- Search for “Optimole” (if using the free version).
- Click Install Now followed by Activate.
For the premium version:
- Download the plugin zip file from Optimole’s website.
- Go to WordPress dashboard > Plugins, choose Upload, and locate the downloaded file on your computer.
Step 2: Enabling AVIF Conversion
Once Optimole is activated, WebP support is automatically enabled. You don’t need to adjust any settings to use WebP images.
However, AVIF images require an additional step. Here’s how to enable AVIF conversion in Optimole:
- In your WordPress dashboard, find Media > Optimole > Settings.
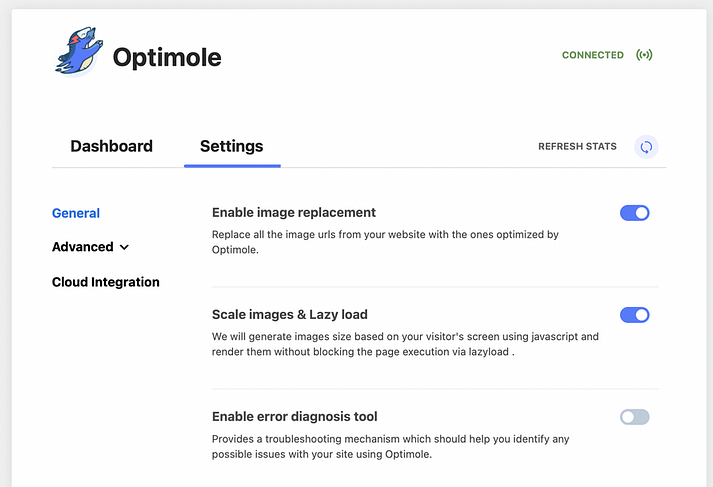
- Go to General Settings and click on Advanced > Compression.
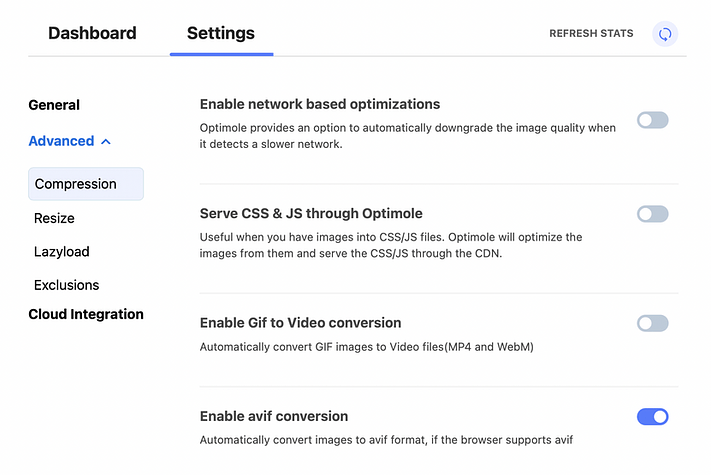
- Here, you’ll find various compression-related options. Locate Enable AVIF conversion and activate it.
Important Note: Optimole leverages real-time image optimization to ensure only AVIF images are served to browsers that support the format. This ensures optimal performance for your visitors.
Read More: WordPress Image Sizes: 5 Best Tips For SEO Optimization
Contact US | ThimPress:
Website: https://thimpress.com/
Fanpage: https://www.facebook.com/ThimPress
YouTube: https://www.youtube.com/c/ThimPressDesign
Twitter (X): https://x.com/thimpress_com


