Wanna Embed a Bunny CDN Video into LearnPress?
If you own a WordPress website or work on one, you would like to have your site feature nice and high-quality videos without costing too much bandwidth. If you are still concerned, then Bunny CDN (or Bunny.net) will be a great and affordable solution for your needs.
In this article, we will guide you on how to embed a video from Bunny.net.
What is Bunny.net?
Bunny CDN is a content delivery network website that offers fast and reliable video hosting, streaming, and encoding. You can host, edit, & deliver your videos very efficiently, making sure that your site will deliver the best user experience (UX) to the audience.
Bunny CDN Pricing
You can always refer to the Bunny CDN pricing plans or use the Bunny CDN Calculator to estimate the money you may have to pay for the wanted services. In case you use more than 1PB per month, please contact sales for better plans.
Bunny CDN Advantages
Bunny CDN is simple to use and has an easygoing interface. It lets users upload videos to the platform quickly, usually in seconds. Talking about user experience, Bunny CDN can handle any type of traffic & loads without reducing your site’s performance, maintaining your site’s loading speed and stability and improving SEO rankings.
The price of Bunny.net is very cheap as it functions as a “pay-as-you-go” model, which means every business can hire the wanted amount of space monthly or annually to store videos. In other words, you pay for what you use, and no other costs are required.
Moreover, you can integrate this platform with other platforms like WordPress, Shopify, or else. However, it still maintains highly-cautions security functions like DDoS protection, token authentication, or SSL/TLS encryption. Some other great features are a powerful cache control system, real-time insights & analytics, detailed documentation, and various APIs.
Bunny CDN Disadvantages
Although you can find a lot of good stuff here, there are still some drawbacks you should notify yourself. We have noted before that you can live stream your videos on Bunny CDN without harshness but the mid-range speed is a little bit low and you get no firewall for web applications & live streaming.
How Does It Work?
Basically, Bunny CDN keeps your videos and caches deliver nice content through a network of geographically physical servers around the world. Then, the audience will receive the content from the nearest edge server, which will increase your page-loading speed significantly. Simple, yeah?
Alright, enough basic knowledge, let’s find out how to embed a Bunny CDN to LearnPress.
Steps to Embed a Bunny CDN Video on Your LearnPress Website
Before embedding a Bunny CDN Video to LearnPress, you should know about the Storage zone & Pull zone.
Set Up Bunny CDN Storage Zone
Storage Zone or Storage is the section where you can store and manage your static data including images, texts, videos, etc. You can integrate the Storage Zone with Bunny CDN’s content delivery network to deliver it worldwide.
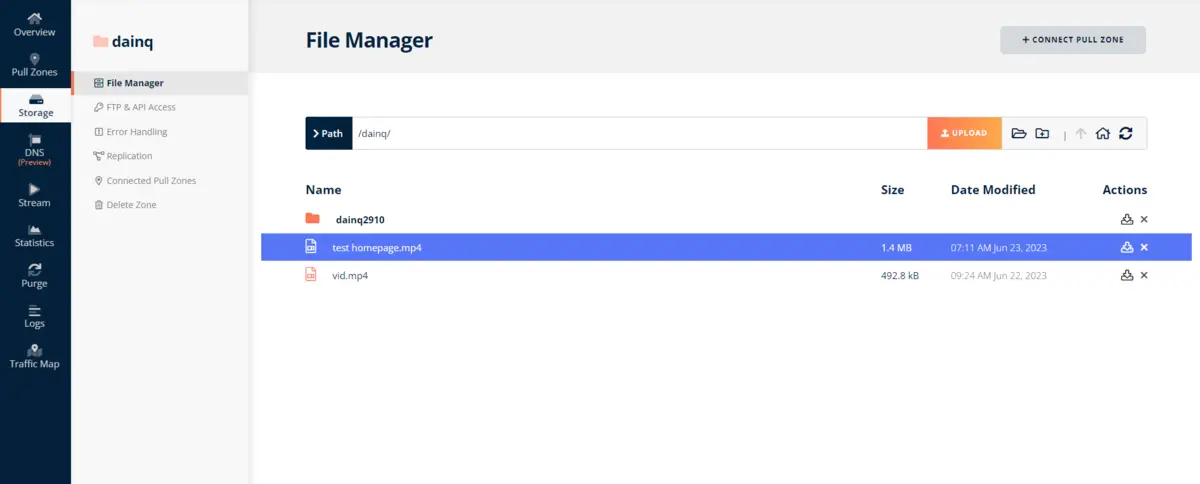
In a storage zone, you can edit the static files, allow API/FTP access, handle errors, manage replication, and connect to Pull zones.
In the left-side menu, you will choose Storage > Add Storage Zone.
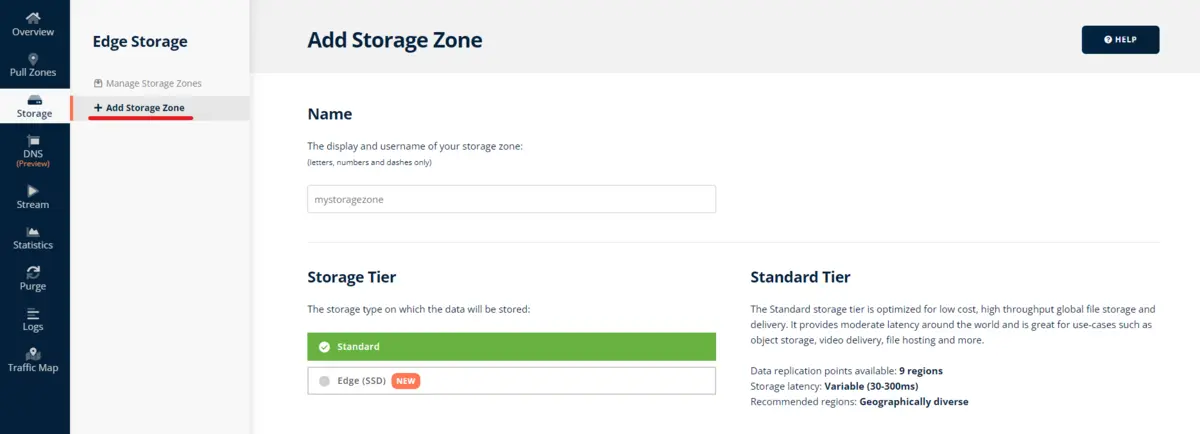
Then, you can set the name to the storage zone, select the storage type (Standard or Edge), choose the main storage region (currently 9 places around the world), and set up GEO replication. Click “Add Storage Zone” to finish.
P/S: Remember to check for the total price per month.
Add Pull Zone on Bunny CDN
Pull Zone is born for you to control how your content in storage zones is served to end-users. A pull zone will work as a bridge between the Bunny CDN network and your storage zone or your own server. When you request a file, the Pull zone decides where to draw the content from and how to cache it on the CDN.
By using a Pull zone, you can manage your content across multiple worldwide servers easily, which will improve the page-loading speed & performance of your site. Moreover, the user experience will be improved since they will receive the static files from the nearest edge server instead of your server, reducing waiting time. It will reduce the load and space spent on videos on your server, too.
In the dashboard or the left-side menu, choose Pull Zone > Add Pull Zone. Then, the choices of name, origin type, origin URL, host header, and tiers, are all yours!
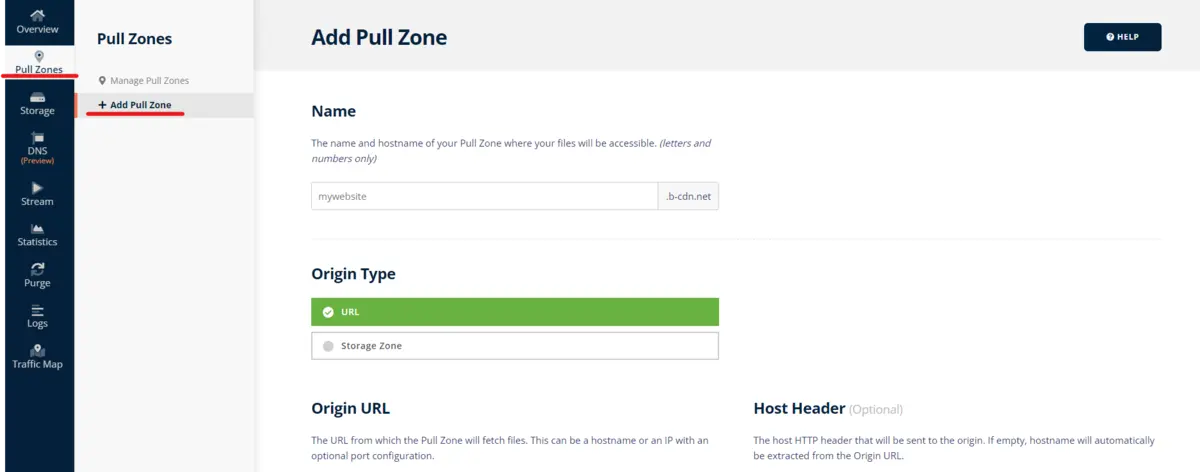
How to Embed a Bunny CDN Video into LearnPress
To embed videos from Bunny CDN, you will have to install and activate the Bunny CDN plugin on your website. This plugin is the ticket to connect Bunny CDN to your LearnPress site. This plugin will automatically convert the current static content links with CDN links to enhance your site’s speed.
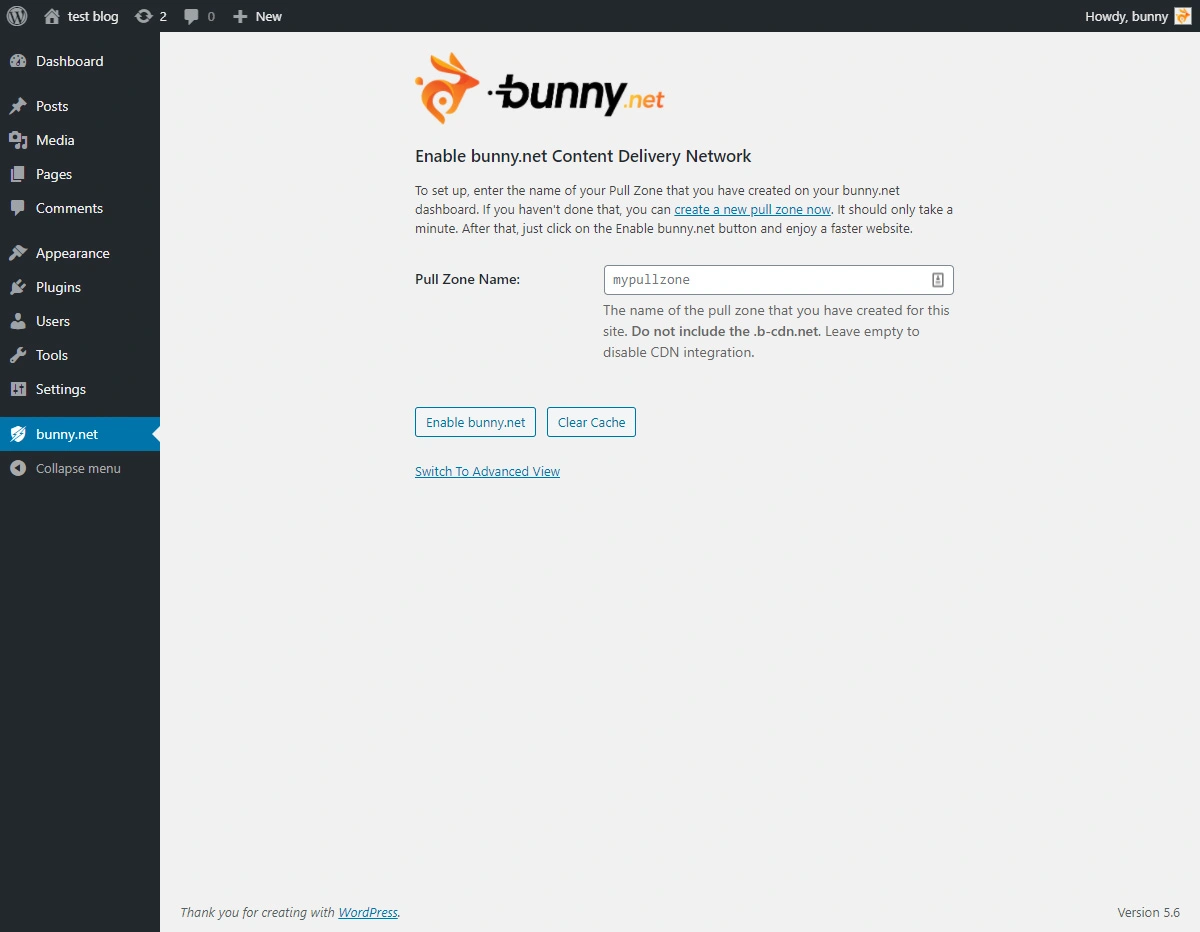
The system requirements of this plugin are simple, just WordPress v3.8 or more, and PHP v5.3 or more.
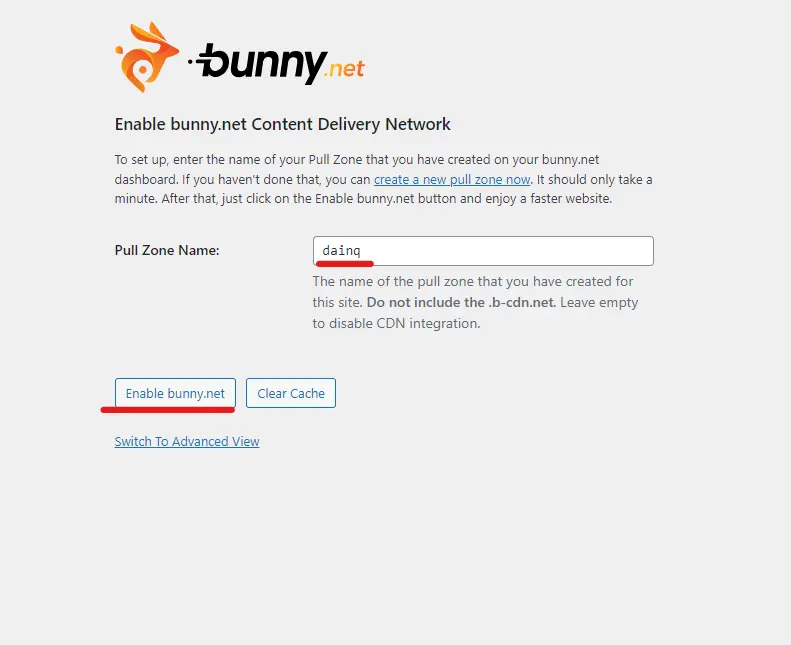
Then, in the Bunny CDN plugin dashboard, enter your Pull zone’s name and click on “Enable bunny.net”.
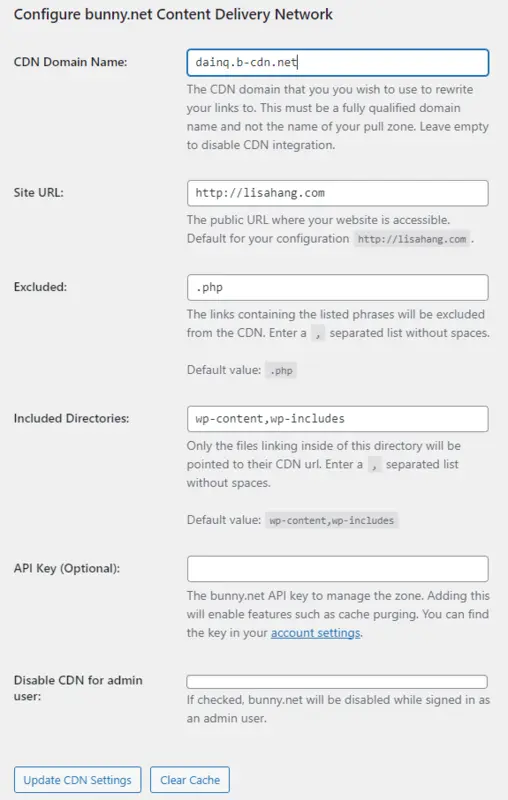
If you want to change more to fit your needs, open the advanced view and manage them, then click on “Update CDN Settings”.
Embed a Bunny CDN Video Into a Course
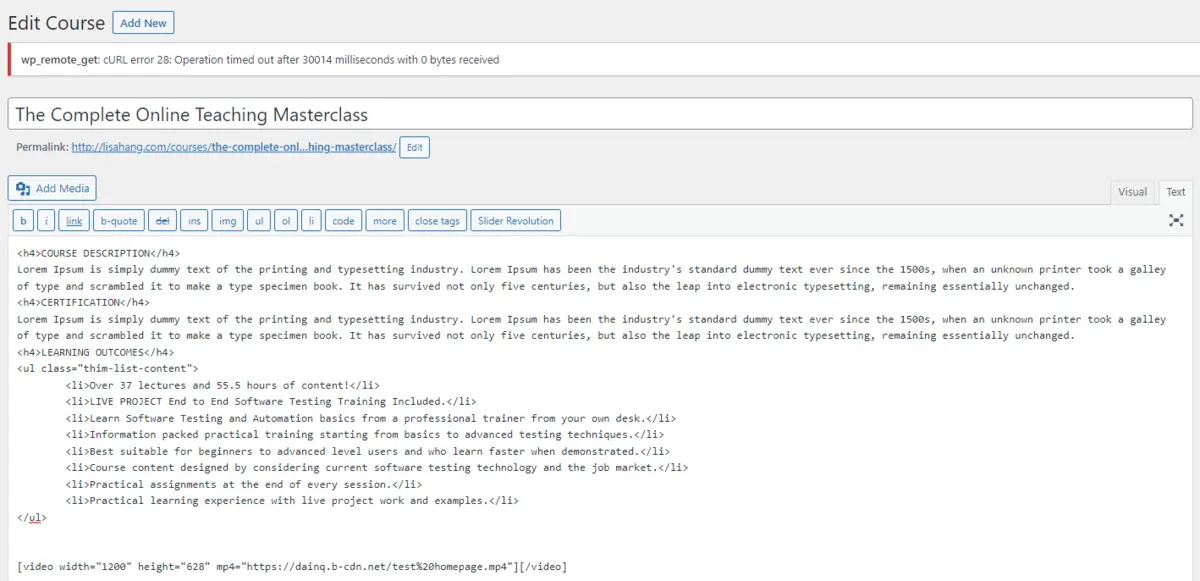
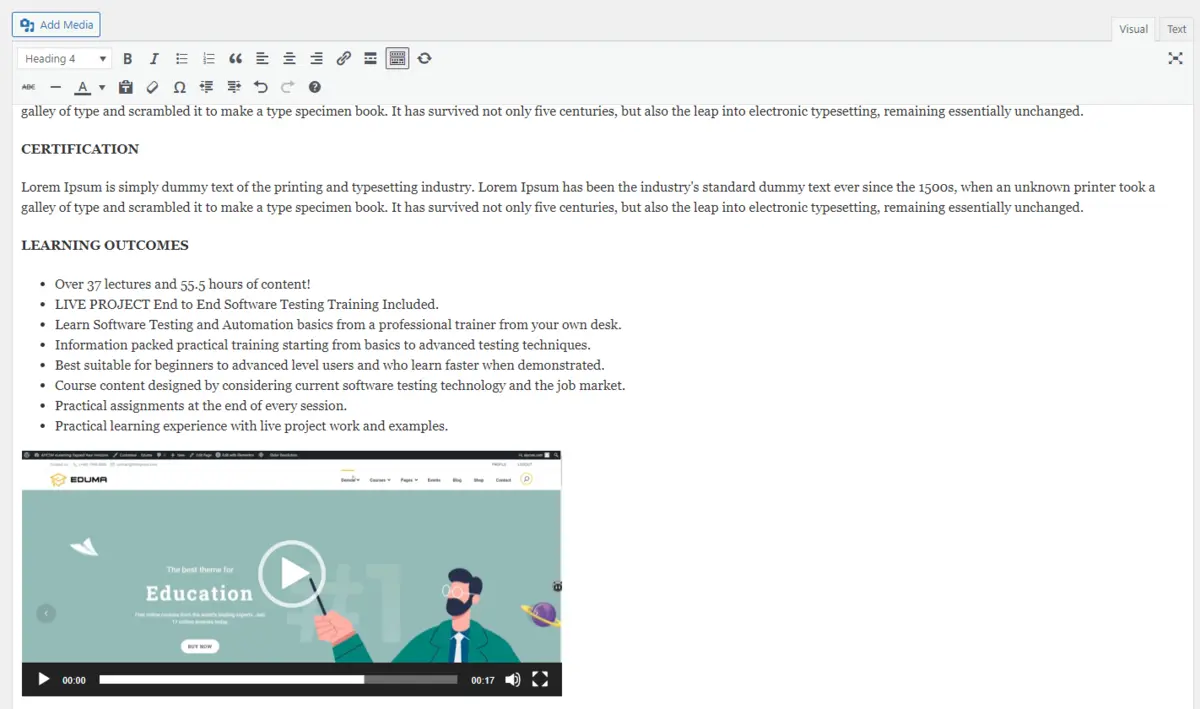
To embed a Bunny.net video into a LearnPress course, access the Storage zone in Bunny CDN, right-click the video you want to embed and click “Copy URL”. Next, type this code in the Text description:
[video width="" height="" mp4=""][/video]You can freely choose the width, height, and link between “” in the code line, for example:
[video width="1200" height="628" mp4="https://dainq.b-cdn.net/test%20homepage.mp4"][/video]The Text description and the Visual description will be like this:
Embed a Bunny CDN Video Into a Lesson
To embed a Bunny CDN video into a LearnPress lesson, you will paste the same video code into the Text description of the lesson:
[video width="1200" height="628" mp4="https://dainq.b-cdn.net/test%20homepage.mp4"][/video]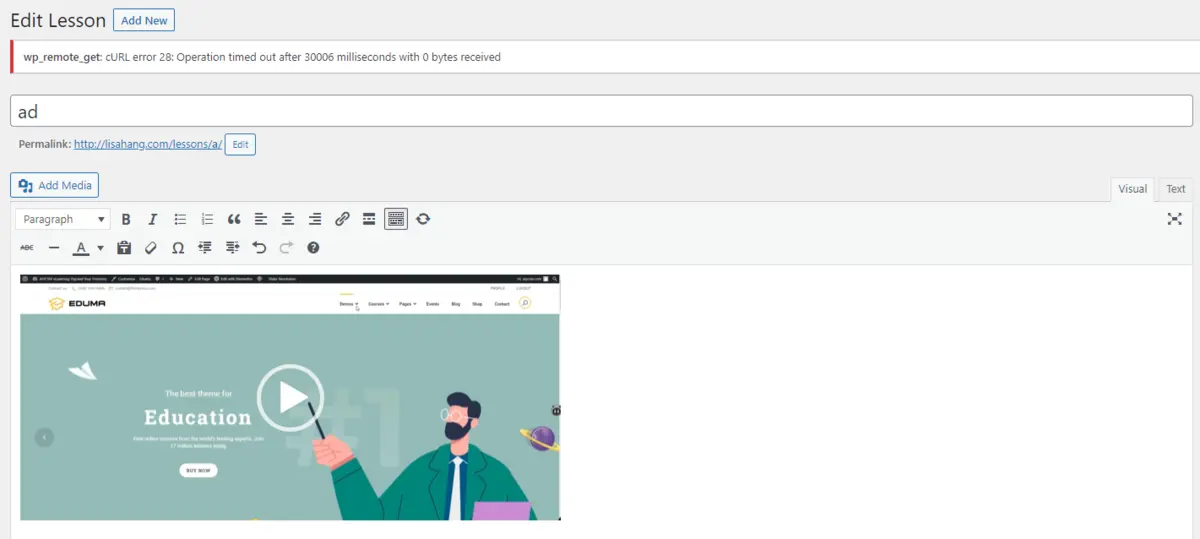
Embed a Bunny CDN Video Into a Quiz
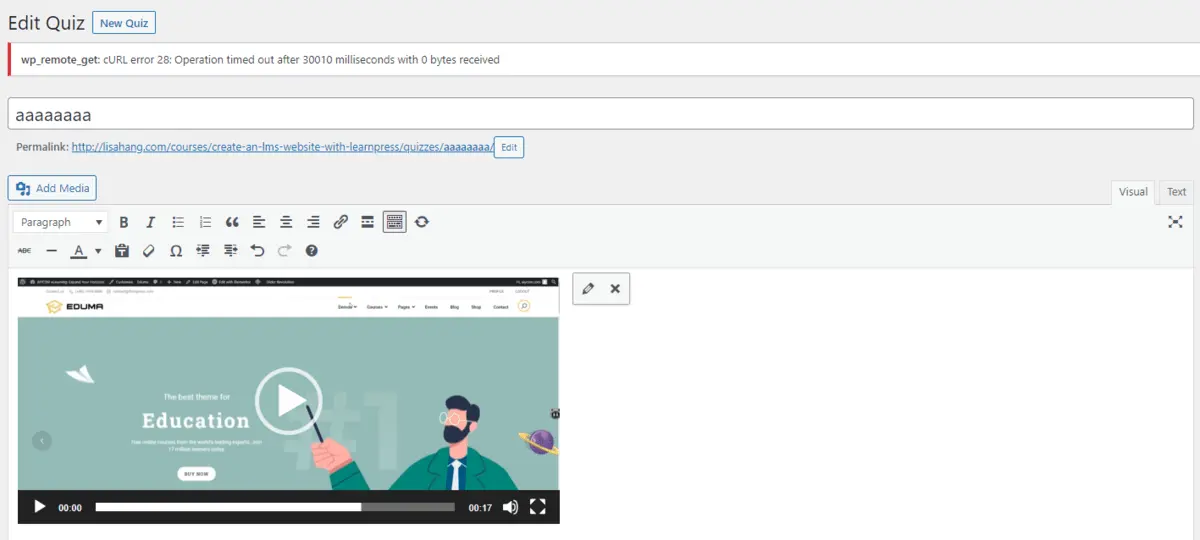
To embed a Bunny CDN video into a LearnPress quiz, you will do the same: open the quiz editor, paste the video code into the Text description, and click Update.
P/s: You can do the same with Questions, Assignments, Products, and Events.
Embed a Bunny CDN Video Into a Blog
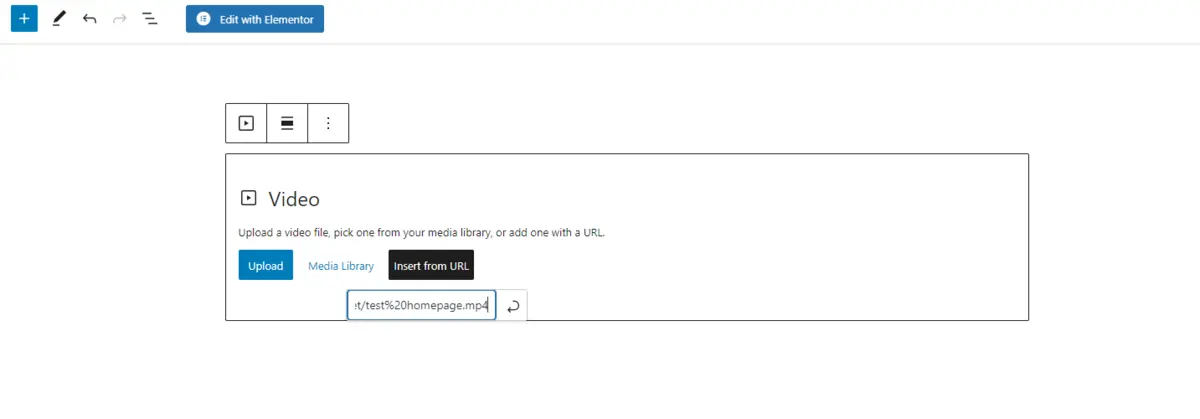
First, copy the video’s link into the Storage zone. Next, open a blog editor from your WordPress dashboard, click the “+” button, select the Video block, choose “Insert from URL”, paste the copied link, and press Enter.
Conclusion
Bunny CDN and LearnPress are both popular faces in their fields: Video-hosting and LMS WordPress. The combination of them will deliver your site a lot of benefits, for both web managers and users.
Should you encounter any issues during installation or while using LearnPress, please feel free to reach out to us or consult the comprehensive LearnPress Tutorial & Guide articles provided by ThimPress.
Read more: Embed Video in WordPress Website: Best Ways to Do
Contact US | ThimPress:
Website: https://thimpress.com/
Fanpage: https://www.facebook.com/ThimPress
YouTube: https://www.youtube.com/c/ThimPressDesign
Twitter (X): https://twitter.com/thimpress


