Are you an Eduma theme user looking to create a unique and professional website without touching a single line of code? The combination of Eduma and the Elementor page builder offers incredible flexibility. However, knowing where to start can be challenging.
This guide will provide a clear, step-by-step walkthrough on how to use Elementor for Eduma, from basic page editing to creating fully customized course archive templates.
Eduma – Education WordPress Theme
We provide an amazing WordPress theme with fast and responsive designs. Let’s find out!
Step 1: Install & Activate Elementor
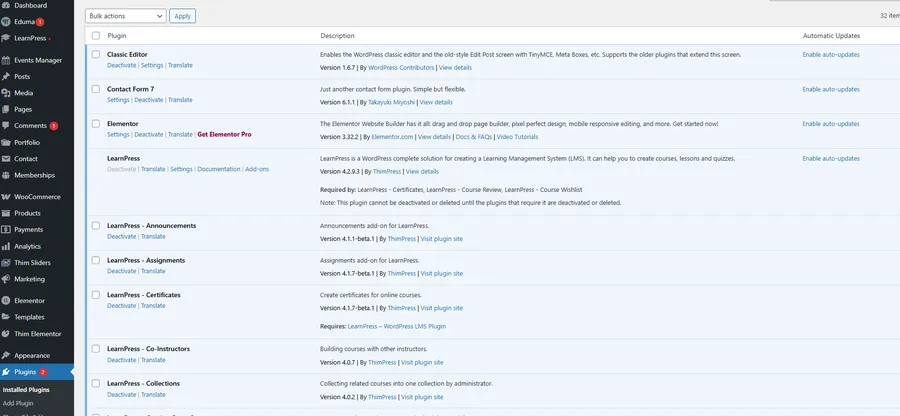
When you install the Eduma theme, it typically prompts you to install required plugins, including Elementor. If you have followed the theme’s setup instructions, Elementor should already be installed and activated on your WordPress site.
You can confirm this by navigating to Plugins → Installed Plugins in your WordPress dashboard. You should see Elementor listed as active.
Step 2: Create or Edit a Page with Elementor
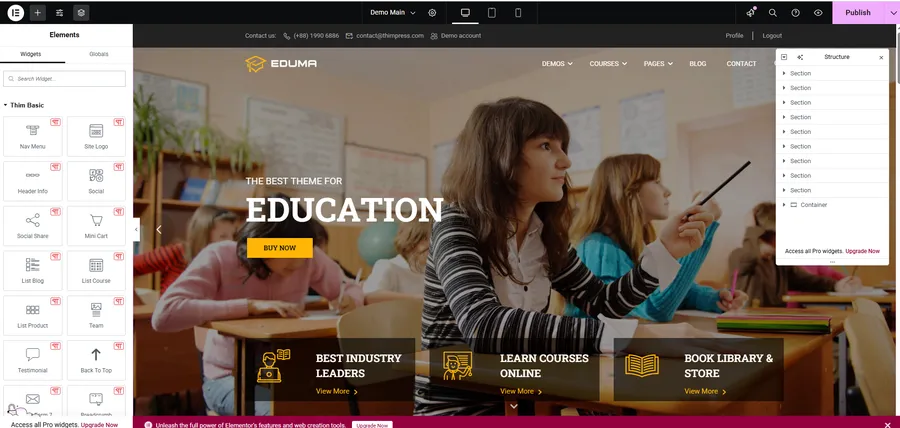
Once Elementor is active, you can use it to build or modify your pages.
- Navigate to Pages → Add New to create a new page, or hover over an existing page (like Home, About, or Contact) and click Edit.
- Inside the page editor, click the prominent “Edit with Elementor” button.
This will launch the Elementor visual editor, which features a live preview of your page on the right and a widget panel on the left.
Step 3: Add and Customize Widgets
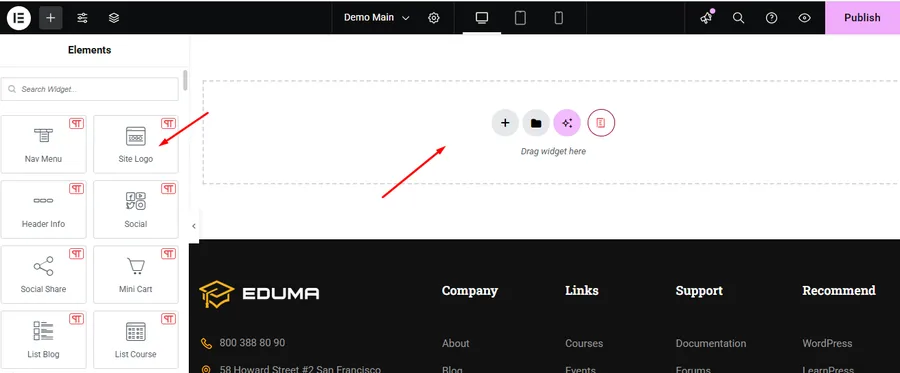
The power of Elementor lies in its drag-and-drop widgets. The left-hand panel contains a list of standard elements like Headings, Text Editors, Images, Buttons, and Videos.
- To add a widget: Simply click and drag it from the left panel into a section on your page preview.
- To customize a widget: Click on the element you just added. The left panel will switch to that widget’s settings, allowing you to change its content (like text or images), style (colors, typography), and advanced settings (margins, padding, motion effects).
For example, you can create a stunning course page by first dragging in a Banner, followed by a Heading, and then using a Course Grid widget to display your courses.
Step 4: Create a Custom Course Archive Page
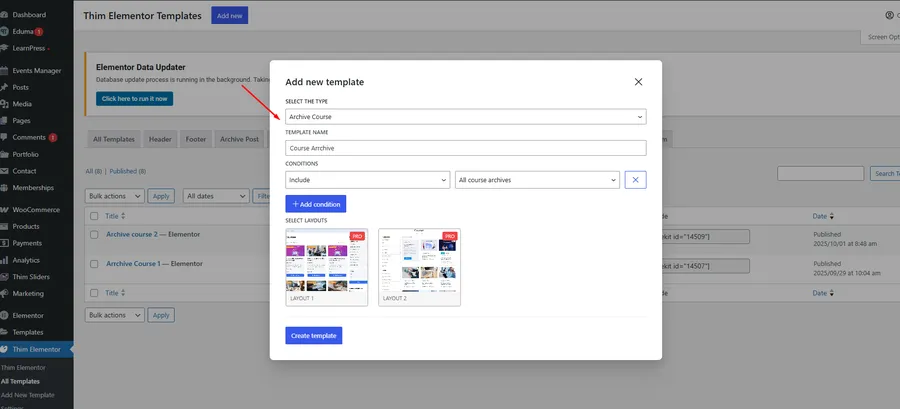
The default course archive page in Eduma is functional, but you may want more control over its layout and design. Standard pages don’t allow this level of customization for archives. This is where the Thim Elementor Kit, bundled with Eduma, becomes essential.
This feature is key to properly use Elementor for Eduma’s course functionality.
- Navigate to Thim Elementor: From your WordPress dashboard, go to Thim Elementor → Add New Elementor.
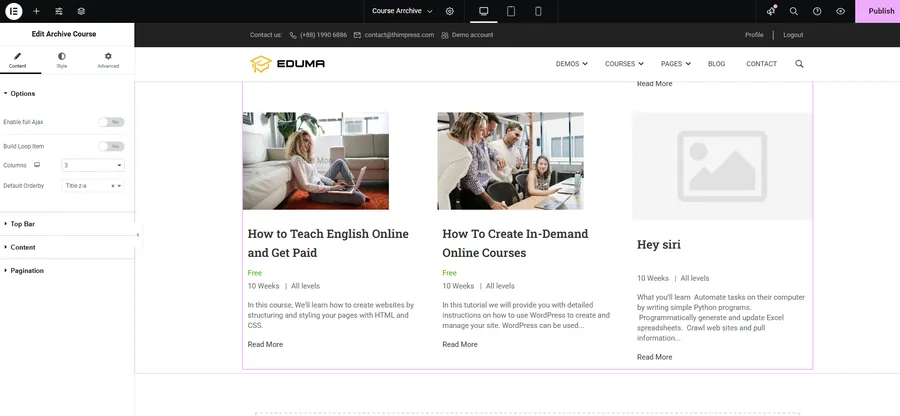
- Select a Template Type: A popup will appear. Choose Archive Course as the template type and give it a name (e.g., “Custom Course Archive”).
- Set Display Conditions: After creating the template, you must tell Eduma where to use it. Click on the arrow next to the “Publish” button and select Display Conditions. Set the condition to Include → All Courses Archive.
- Design with Drag and Drop: You will now be in the Elementor editor for your archive template. You can drag and drop specific course-related widgets to design the page exactly as you want. You can control the number of columns, the default ordering (by Title, Date, etc.), and much more.
- Publish: Once you are satisfied with your design, click Publish. Your new custom design will now replace the default course listing page.
Beyond the Course Archive: Other Custom Templates
The same process outlined in Step 4 can be used to create other custom templates for your site. By navigating to Thim Elementor, you can create and design unique layouts for:
- Single Course pages
- Product pages (if you use WooCommerce)
- Single Product pages
- Headers and Footers
This gives you complete design control over every part of your e-learning website..
Conclusion
Mastering the synergy between Elementor and the Eduma theme is the key to unlocking your website’s full potential. By following the steps outlined in this guide, you’ve learned how to move beyond basic page edits and into the powerful world of custom template creation using the Thim Elementor Kit.
You are no longer limited by default layouts. By learning how to effectively use Elementor for Eduma, you now have the tools and the knowledge to design a custom course archive, single course pages, and even site-wide headers that perfectly match your brand’s vision.
Now it’s your turn. Open the editor, start experimenting with the widgets and conditions, and build the unique and professional e-learning platform you’ve envisioned.
Read more:
How to Operate Countdown in Eduma Theme: A Step-by-Step Guide
How to Easily Remove the ‘Become an Instructor’ Part from Eduma?
How To Make Gallery In Eduma Theme: A Step-by-Step Guide
Contact US | ThimPress:
Website: https://thimpress.com/
Fanpage: https://www.facebook.com/ThimPress
YouTube: https://www.youtube.com/c/ThimPressDesign
Twitter (X): https://x.com/thimpress_com


