Do you want to translate your WordPress website into several languages so you can reach a global audience?
More than 35% of websites on the internet are powered by WordPress. Many of them cater to international or multilingual audiences. This article from ThimPress will demonstrate how simple it is to use Polylang Plugin to develop a multilingual WordPress site. We’ll go over three options so you can pick the Plugin Polylang that best suits your needs.
You can quickly translate your WordPress posts, pages, tags, categories, and themes into as many different languages as you want using each solution.
What is Polylang Plugin?
The Polylang Plugin WordPress has significantly changed since then. Since 2016, it has been developed and maintained by WP Syntex, a business that the same Frederic Demarle co-founded.
There are two options for Polylang Translate Plugin available right now:
- A free version is available for download from the official WordPress directory or through your WordPress administration interface.
- Polylang WordPress Plugin Pro, a premium version, costs €99 per year (about $118).
Additional products:
- A multilingual WooCommerce store can be made using the WordPress Polylang Plugin for WooCommerce plugin (starting at €99/year), which the company also offers.
- Polylang Business Pack, which is available for less money (down from €139/year) and contains the Polylang Plugin Pro as well as Polylang Plugin for WooCommerce plugins
Why is the Polylang WordPress Plugin Website Interesting?
Here are a few quick reminders to set the record straight before continuing about Polylang plugin.
A bilingual or multilingual website offers its visitors access to its content in a number of different languages. A visitor can select his preferred language when he accesses the website in question.
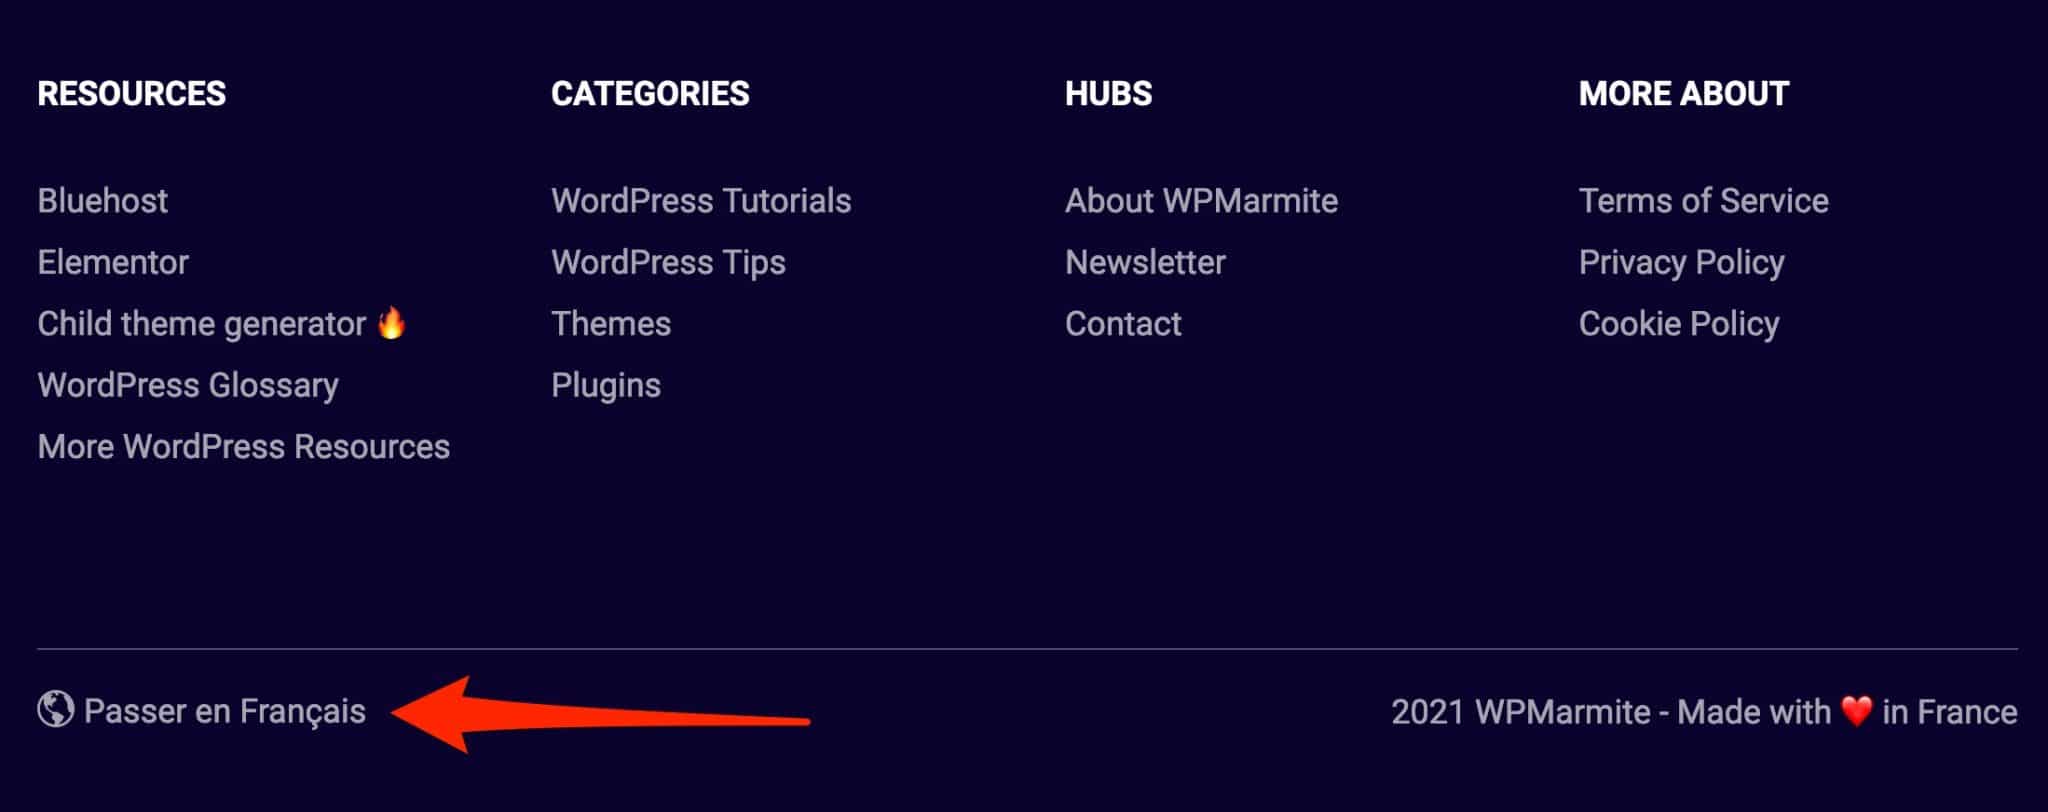
The majority of the time, a language switcher is used for this, typically in the form of a flag or a link that must be clicked to switch from one language to another, as suggested by WPMarmite in its footer, for instance:
A multilingual website is not suitable for everyone, despite its appealing, professional, and aesthetic appearance. Don’t arrange it merely for aesthetic purposes.
In particular, you’ll need it in the situations listed below:
- If you want to expand the audience for your brand and establish a presence abroad.
- If the audience does not speak the language that has been used on your website thus far.
You don’t need to bother making your WordPress site multilingual if your audience is only English-speaking and you have no plans to go global.
Otherwise, be aware that developing a multilingual website has a number of benefits:
- If you run an online store, you can increase your chances of making sales by reaching a larger audience.
- Your website improves in both professionalism and usability, making it easier for more people to read and comprehend.
- You improve and support your SEO Agency WordPress Themes and your chances of getting more visitors to your website.
- By providing a feature that your rivals may not have added to their website yet, you distinguish yourself from the competition.
Does everything here appeal to you, fit your needs and the nature of your online business, and most importantly, appeal to you? Find out right away how Polylang Plugin WordPress can help you create a multilingual WordPress website.
How to install Polylang Plugin WordPress: the Setup Wizard
Activate Polylang Plugin Pro on the WordPress site after purchasing it.
When you’ve finished, the Plugin Polylang will advise you to start the Setup Wizard, which has six steps.
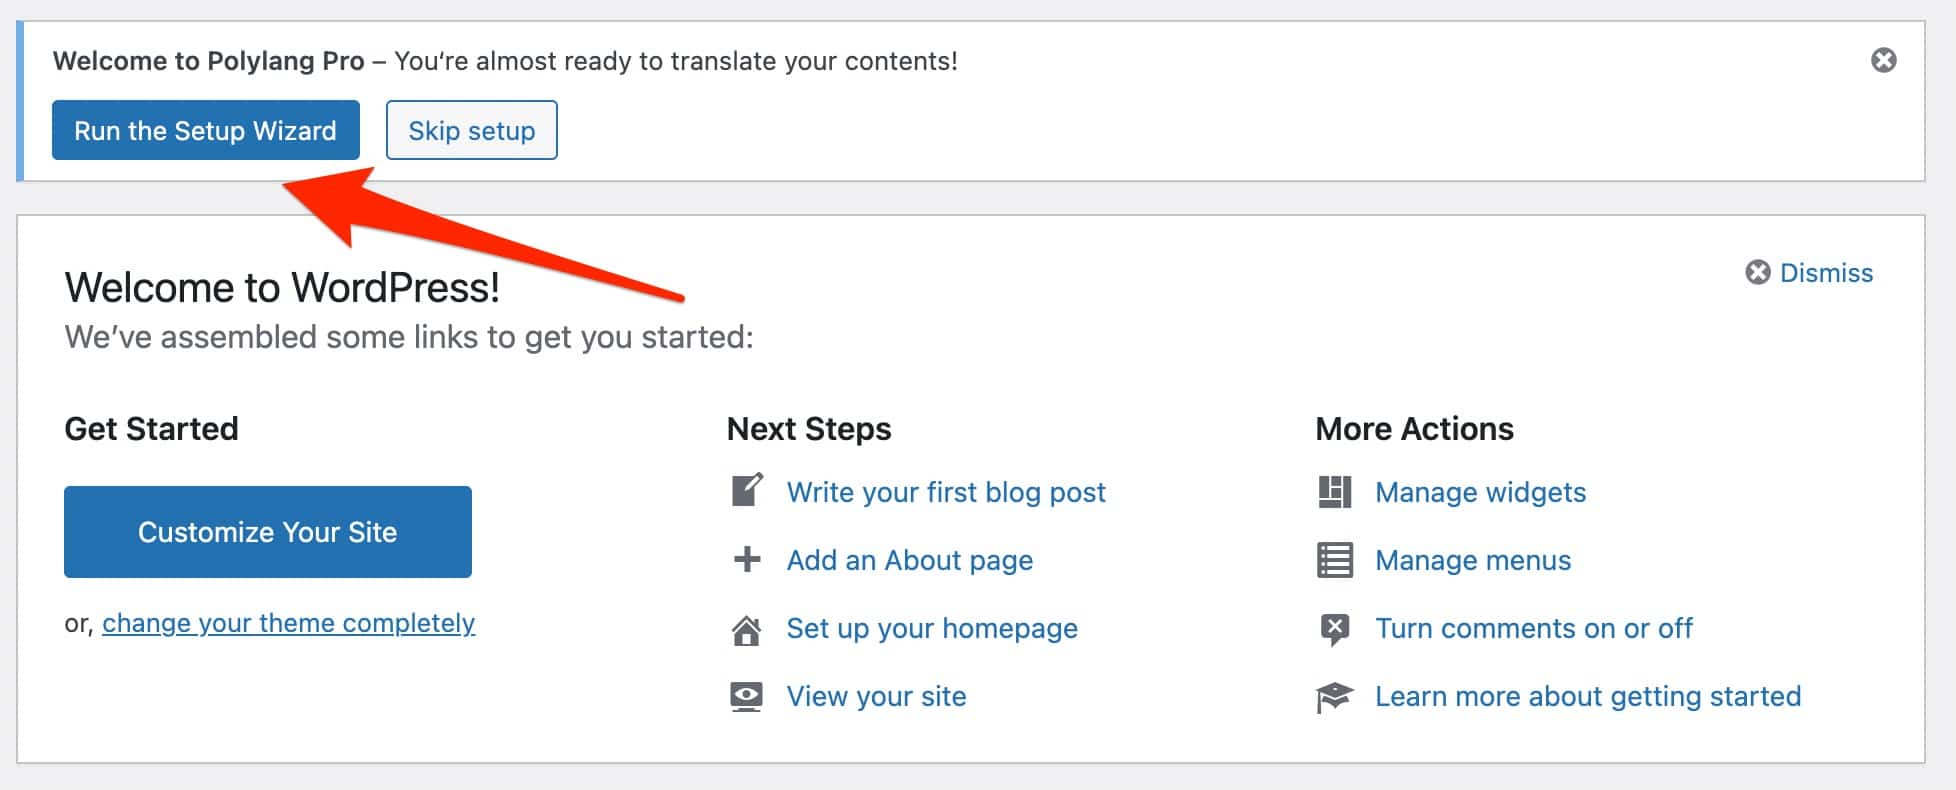
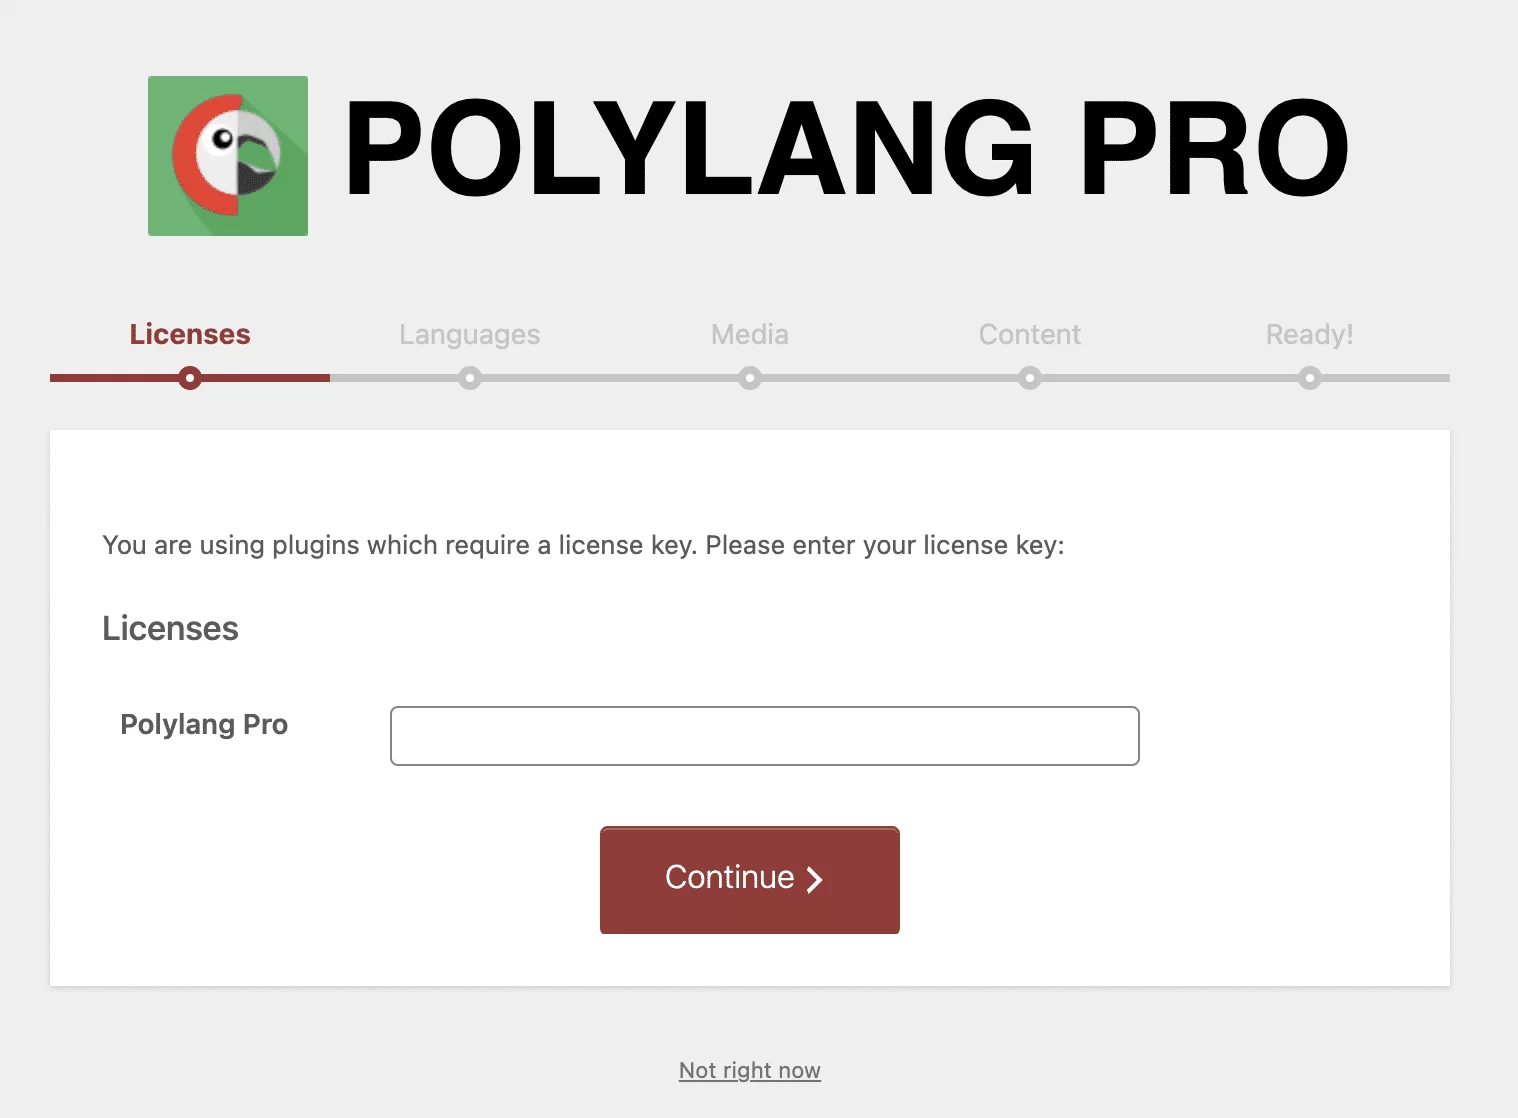
Step 1: Enter your license key
Your license key, which can be found on your account page (under “Account”) on the Polylang website, is required when you first launch Polylang Pro.
Enter it to take advantage of the plugin’s automatic updates.
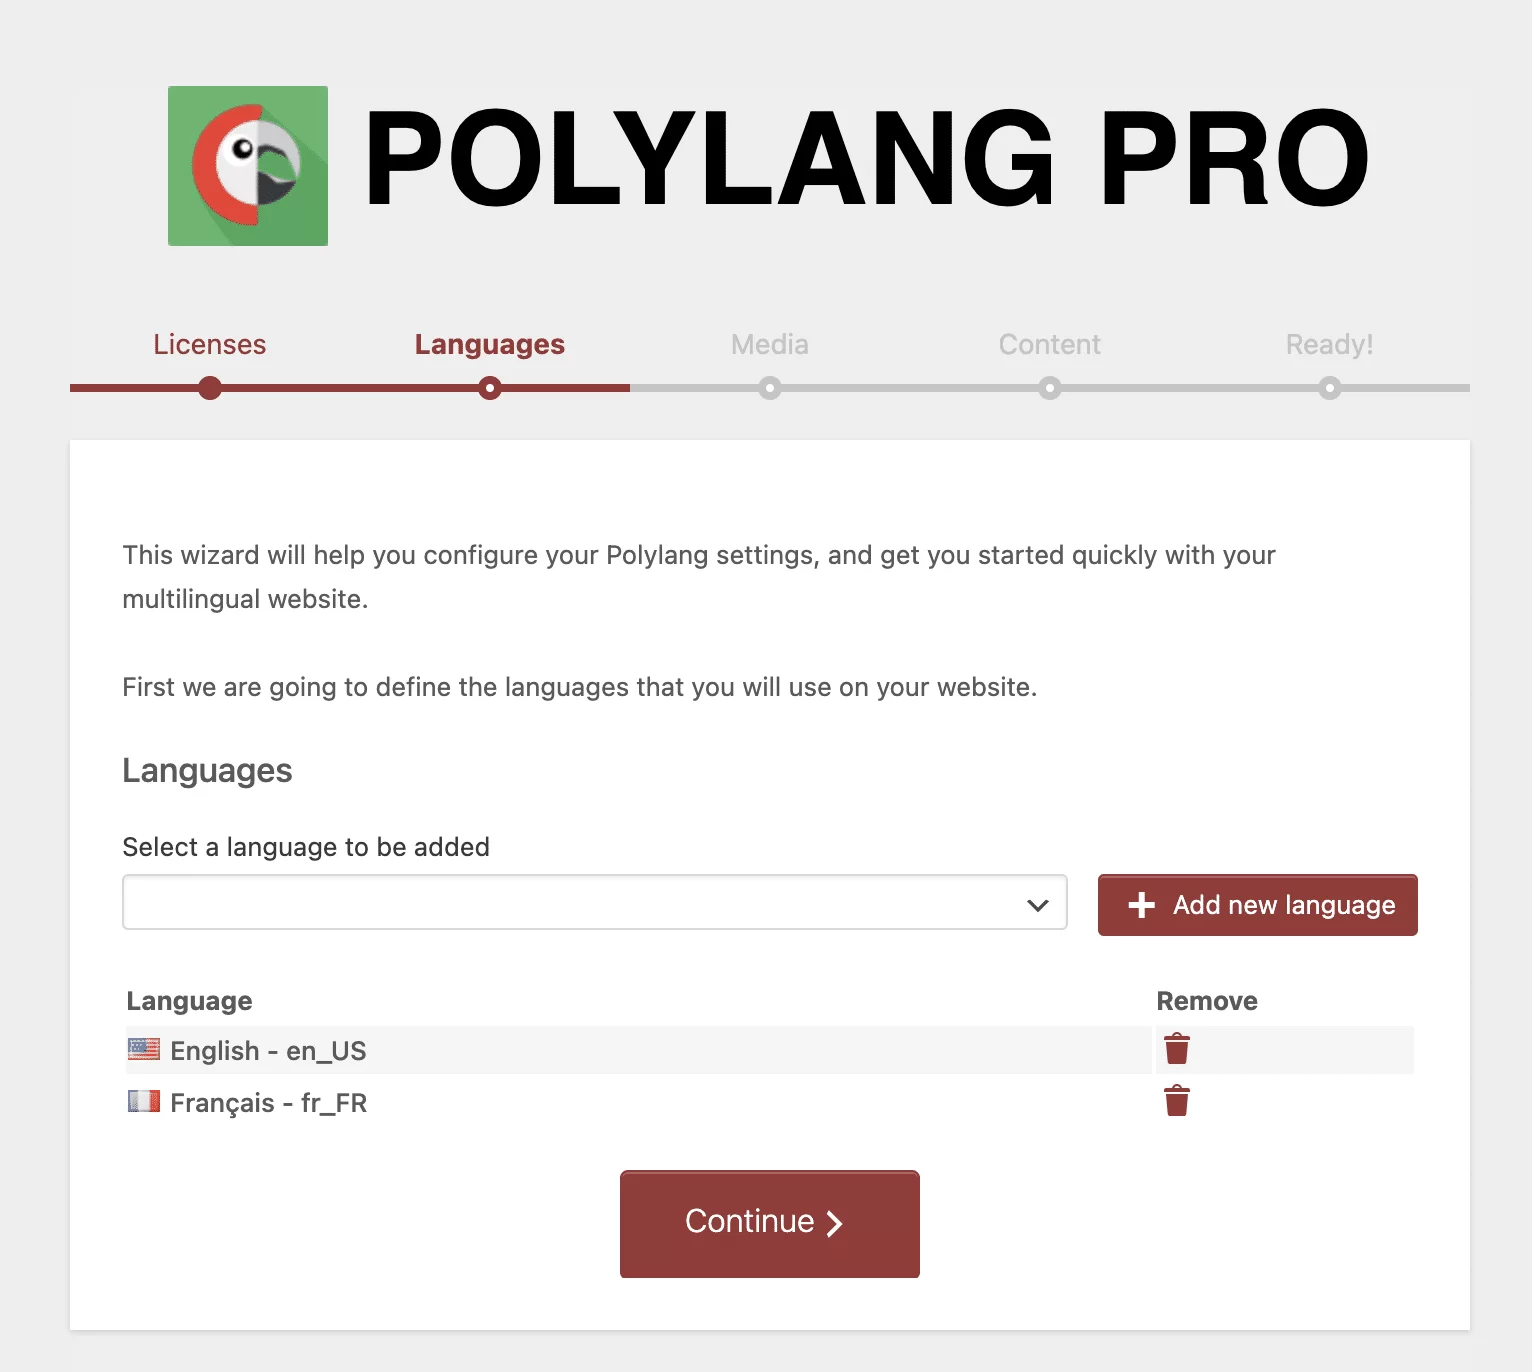
Step 2: Define your website’s language(s)
Which languages will be supported by your website? You must now define it by selecting at least one language from Polylang Plugin‘s list of 100 options.
The most widely spoken languages, such as English, German, Spanish, and Chinese, are all present.
Including their variants, such as British or American English or Spanish from Colombia and Castile.
Yes, even though we speak the same language, we do not always use the same words. You’ll see if you speak with a Quebecer. Tabarnak!
The lesser-used languages still are remembered. You can offer your site in Galician, Latvian, Icelandic, or even Occitan if you’d like.
Please take note that the first language you add will become your multilingual site’s default language (you can change this later, of course).
I decided on French (fr FR) and American English (en-US) for this test.
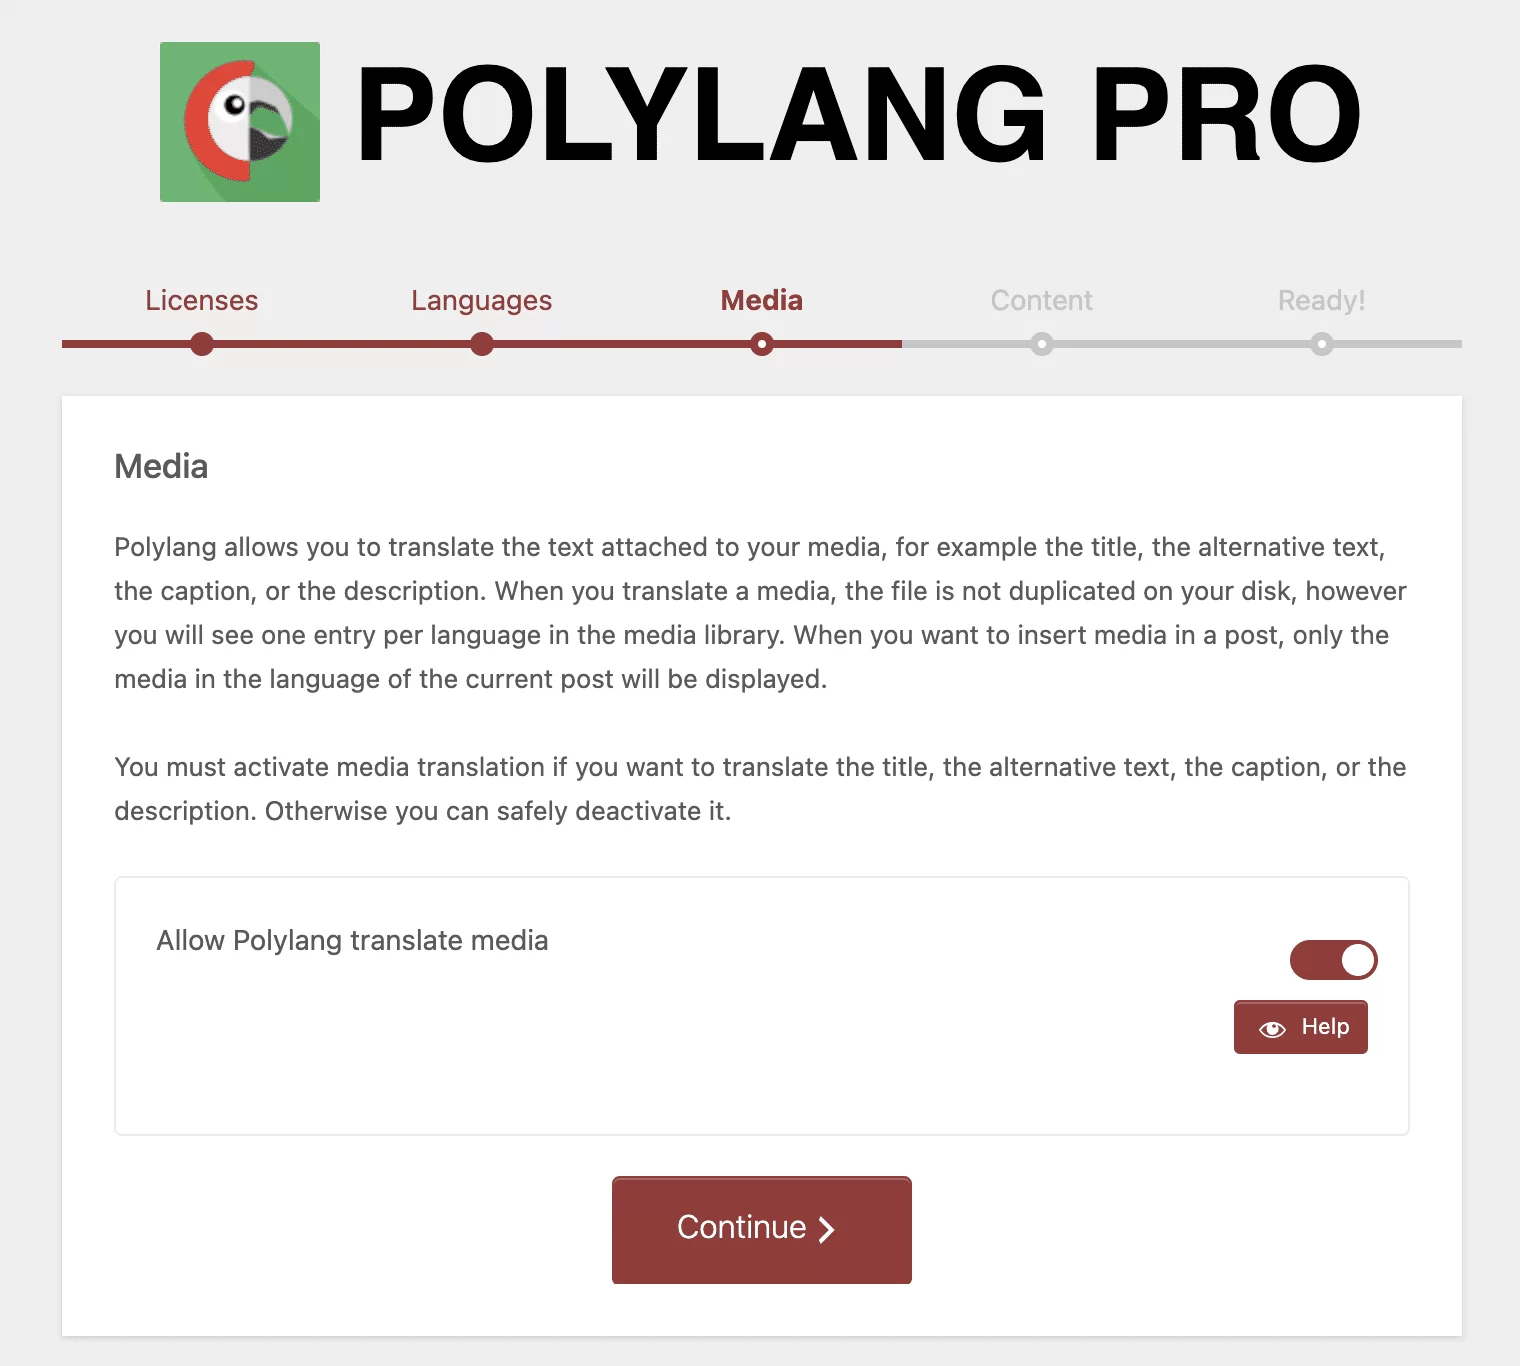
Step 3: Translate the media
Translation of the texts associated with your media, such as the title, alternative text, caption, or description, is advised during the third step, according to Polylang Translate Plugin.
the files you’ve added to your WordPress Media Library as media (images, videos, etc.)
You must decide whether you require the option because it is enabled by default. Uncheck the box if you don’t need it, such as if you use two different images for an article that is being translated into two languages.
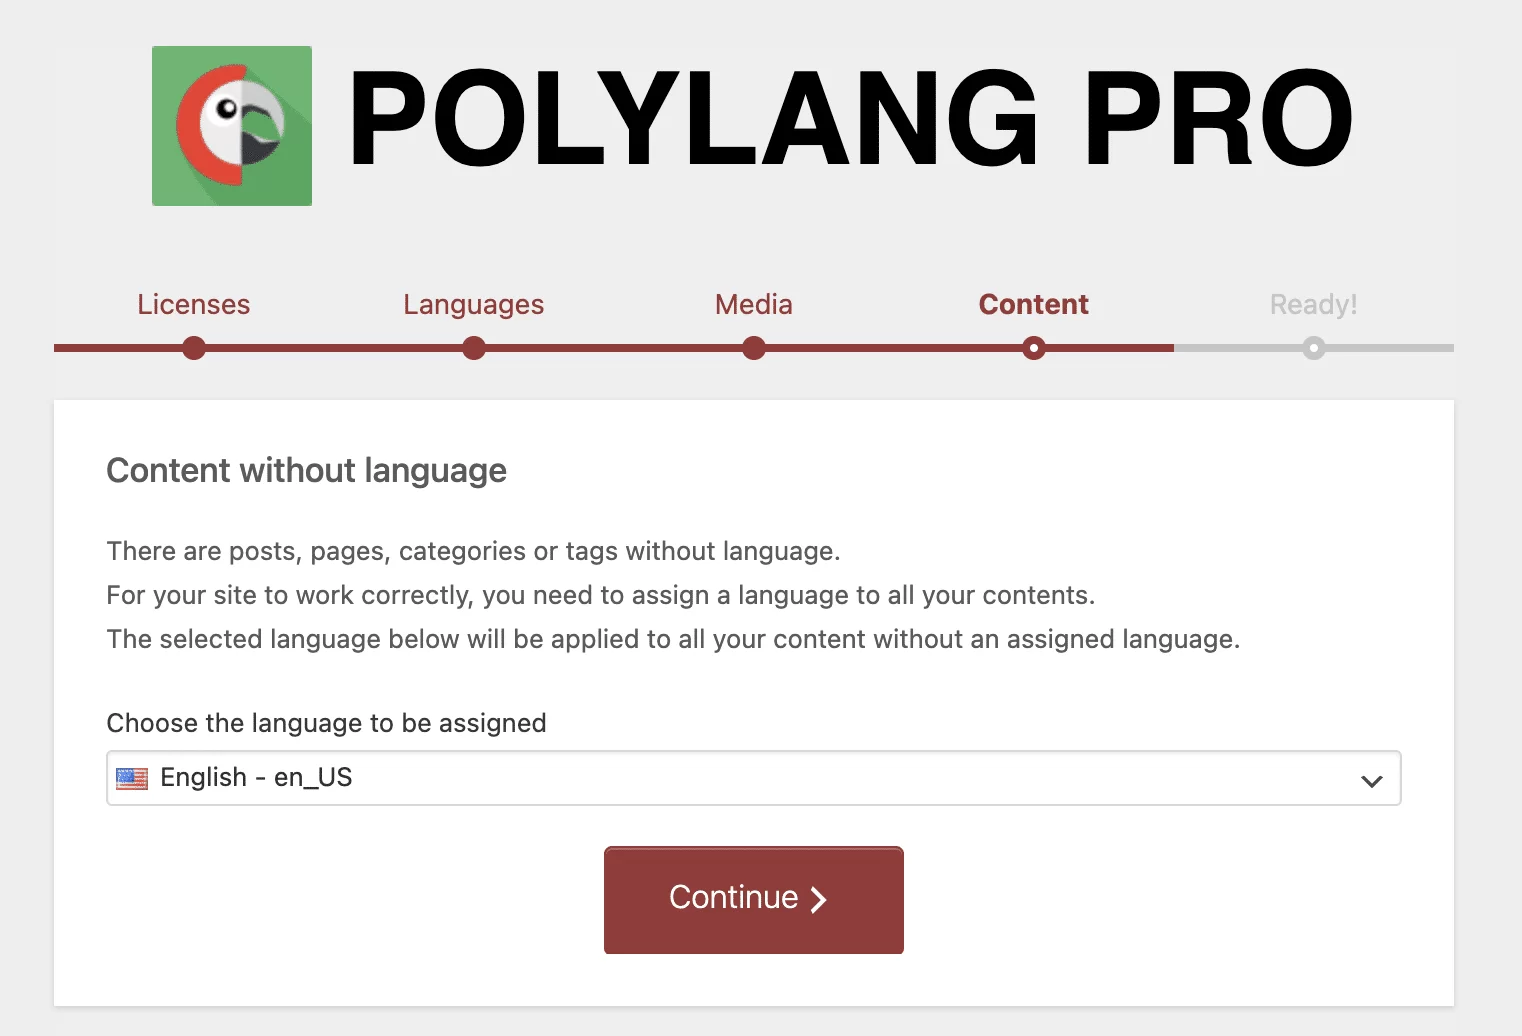
Step 4: Set a language for all of your content
Currently, no language has been assigned to any of the content on your website. As a result, you must give them a default language, which will be the one you chose in step 2 first (American English, in my case).
Step 5: The homepage must be translated
The setup wizard’s second-to-last suggestion is to translate your homepage.
Only if you previously defined a static homepage in the Settings > Reading WordPress menu will Polylang WordPress Plugin present this option to you. This step is not shown in the screenshots because it is not my situation in this test.
Step 6: You’re ready to translate!
All of the configurations needed for the Polylang WP Plugin to function properly have been made.
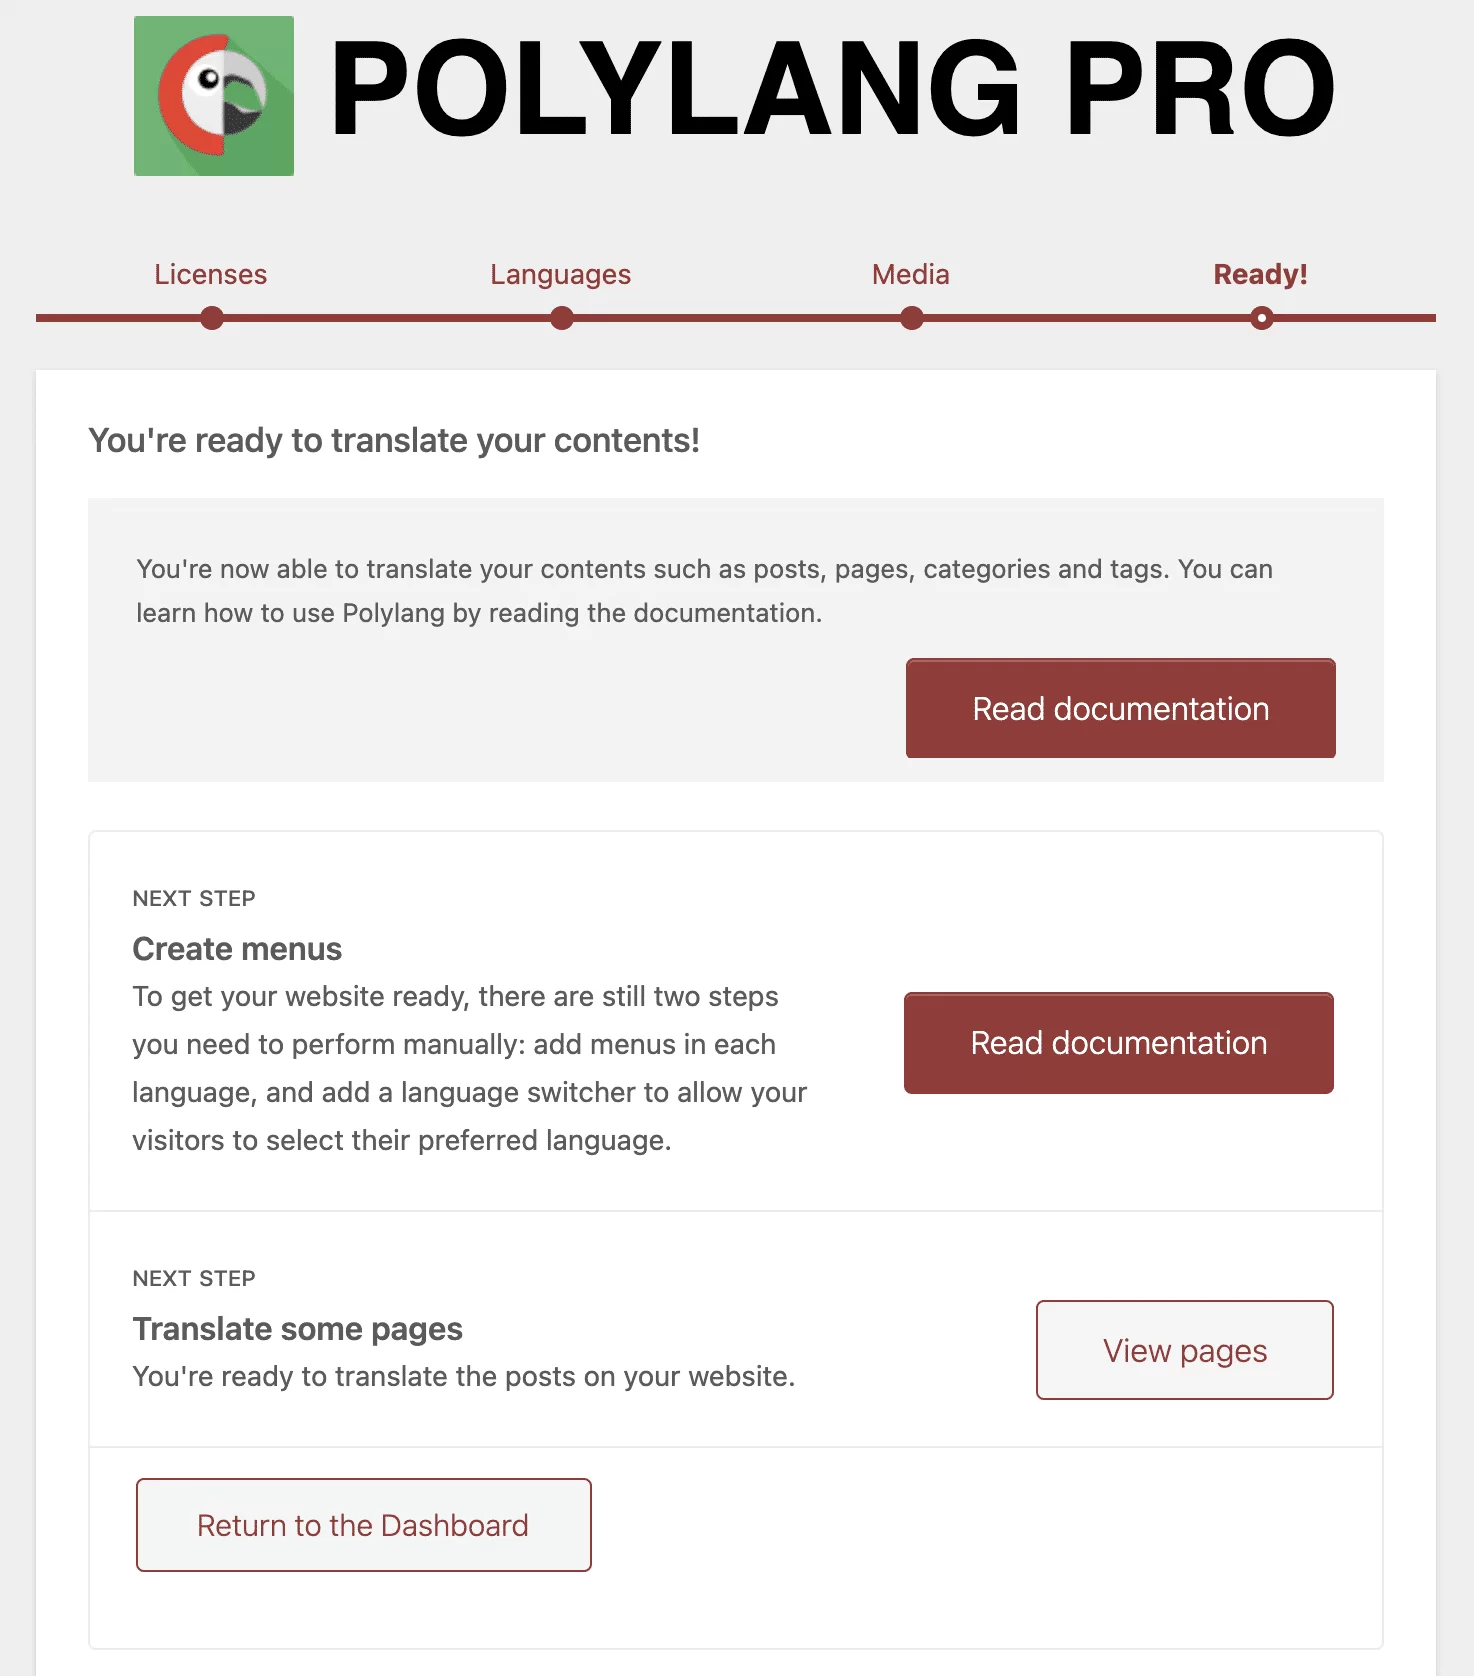
At this point, WordPress Polylang Plugin provides you with a number of choices:
- Check out the manual as aesthetically pleasing and with lots of screenshots.
- Develop menus.
- Translate your website’s pages.
- Go back to the dashboard. I selected this option to show you the various settings in more detail. Observe me.
How To Use Polylang Plugin In WordPress
How to translate content into another language with Polylang Translate Plugin?
Starting with the fundamentals, let’s translate a post from your WordPress website or blog.
To find your most recent posts, select Posts > All Posts from the menu. You can see that I have two on my blog in the screenshot below:
- One English article, “Hello world!”
- One French article (“Bonjour à tous!”).
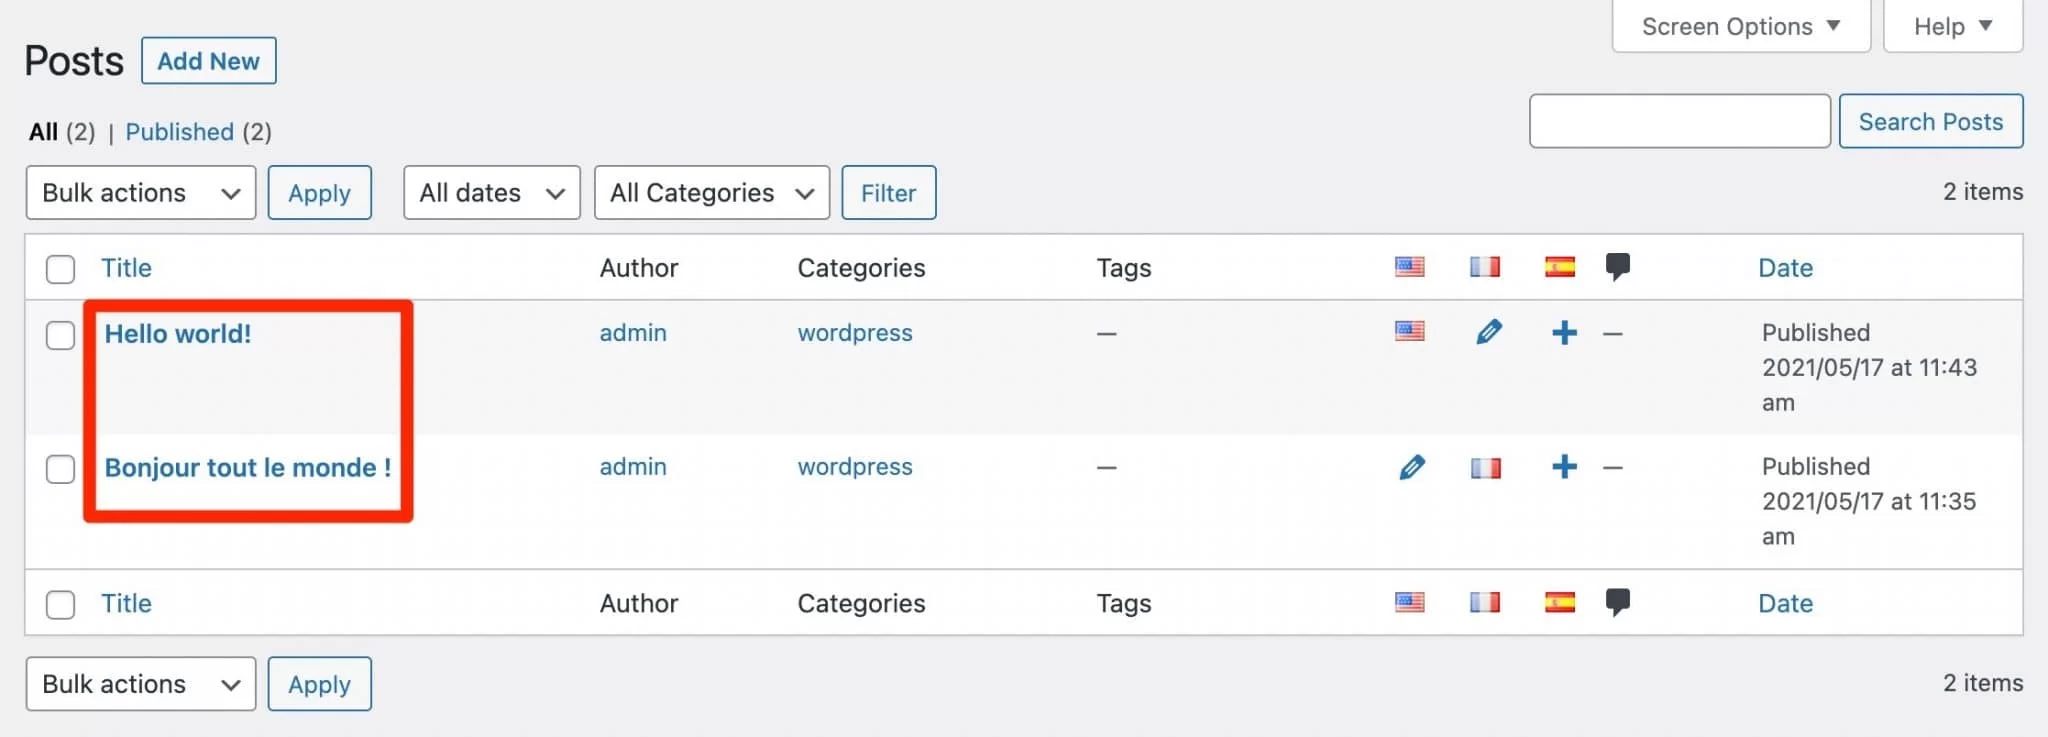
You can see that there are a number of small icons, each with a distinct meaning if you look at them:
When a page has a “flag” icon, it means that it is available in that language. You can edit it by clicking on it.
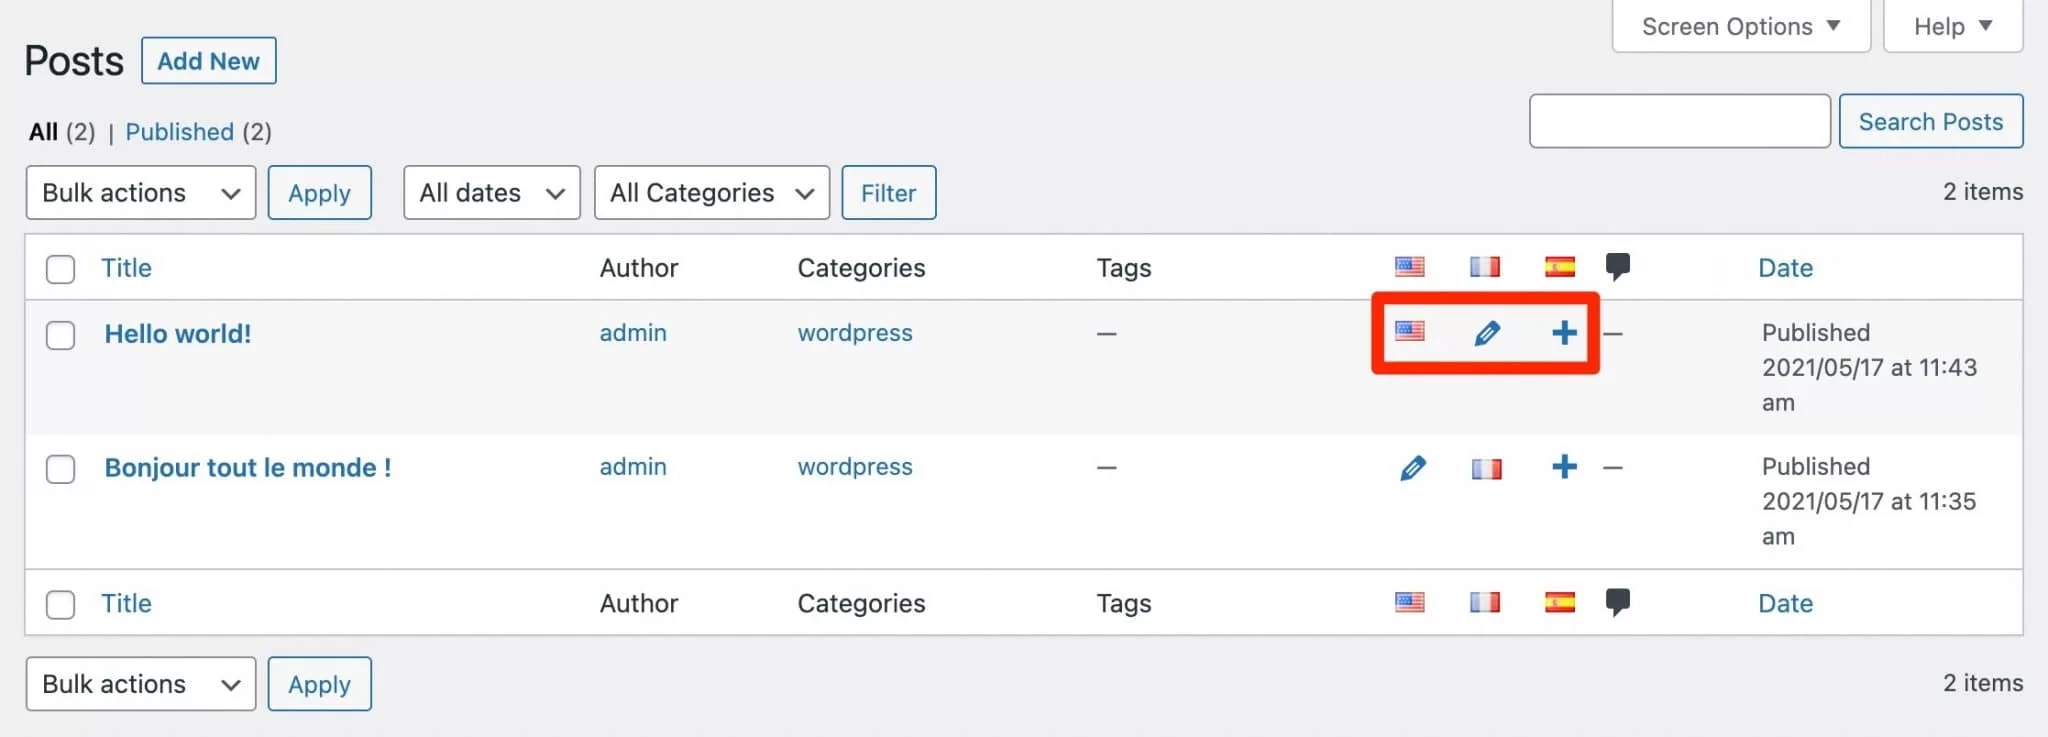
- The “pencil” icon denotes the presence of a translation. By clicking on it, you can change it.
- You can add a new translation by clicking the “+” icon.
- In our case, a Spanish translation is requested even though there isn’t one available right now.
The idea behind adding a brand-new article is the same. After initially selecting a language of your choice, you can add translations in additional languages by clicking the + icon. The process is also the same for categories, tags, custom content types, and pages.
How to automatically translate your content by Polylang WP Plugin?
In the aforementioned situations, manual translation is involved. What if you want the translation process to be automated so that it goes more quickly?
You can utilize the exclusive Polylang Lingotek Translation plugin for free.

It gives you two options:
- Automate the translation of your content. Although it can save you a ton of time, keep in mind that since it is still a machine, the translations may not be accurate. You must carefully read what is being suggested to you. An additional point: the Polylang Plugin‘s description page states that the automatic translation service is free for up to 100,000 characters (letters plus spaces).
- Hire a qualified translator to assist you. However, it will be charged in this instance.
How to create a menu by language with WordPress Polylang Plugin?
Let’s discuss the menu. Create a menu for every language, give it a home, and save it first.
The menu can then be changed and edited by choosing it from the drop-down catalog:
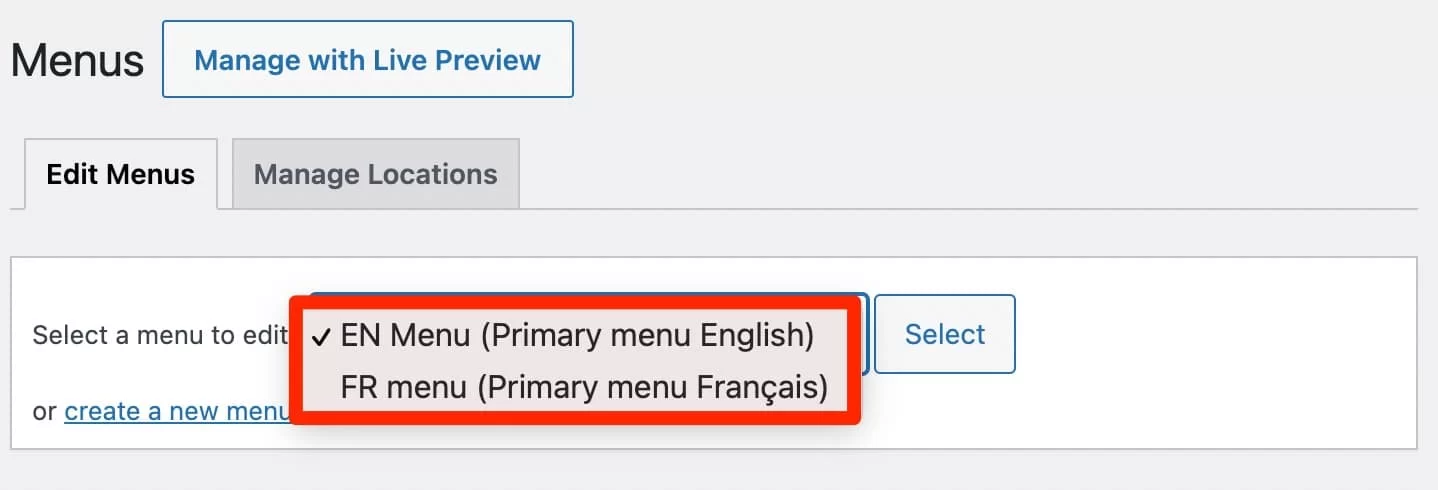
You can add a language switcher to your menu after you’ve added the items of your choice. To make this option visible, check the “Language switcher” box under “Screen Options” if it isn’t already.
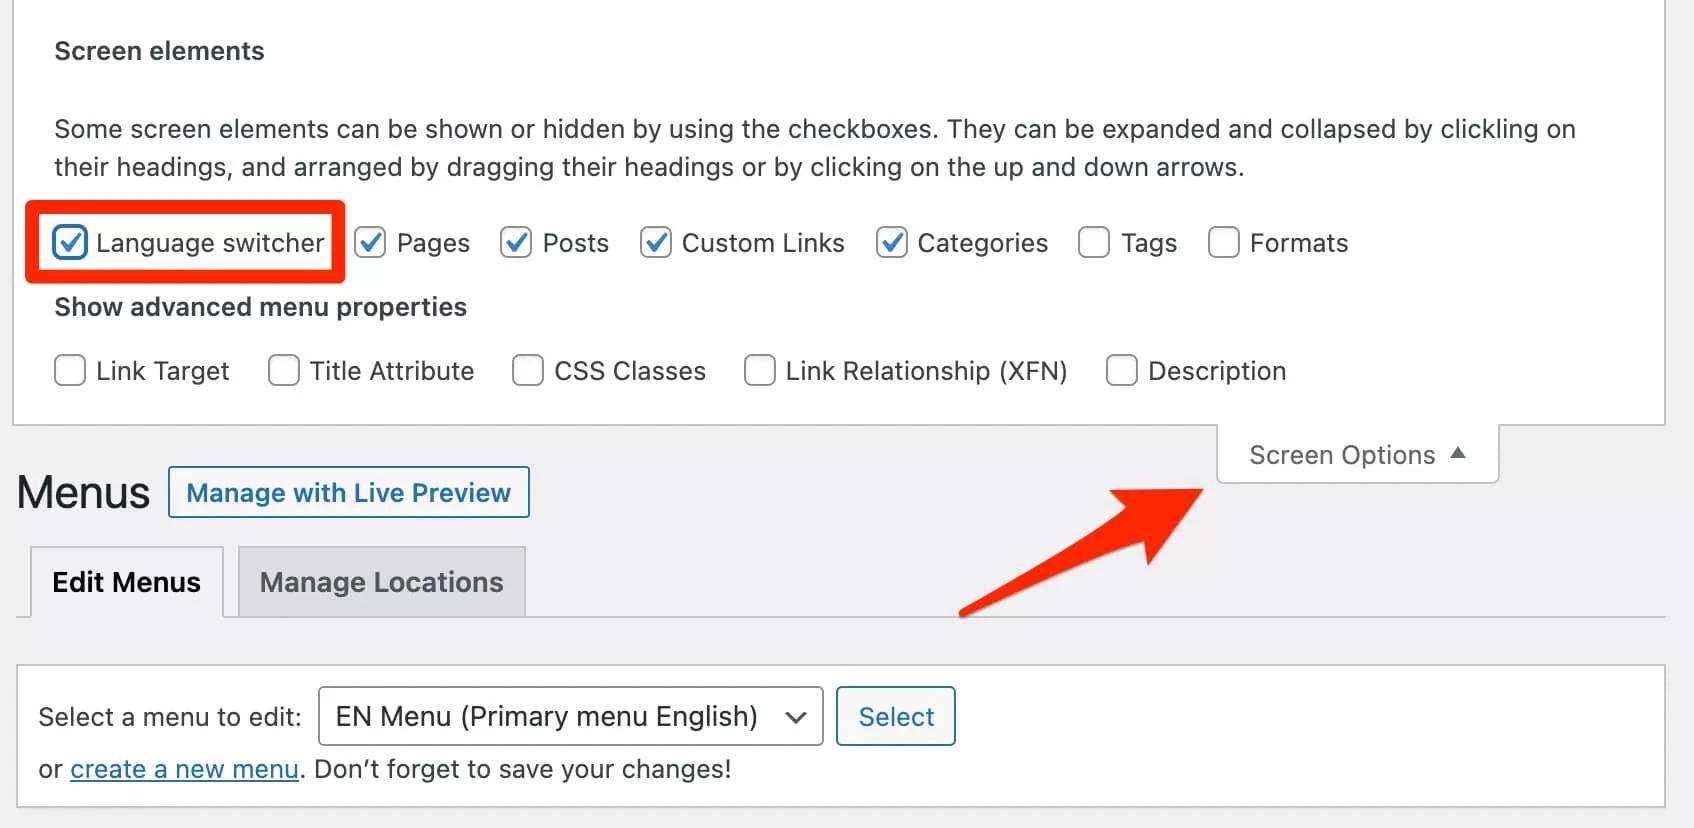
After completing this, you will be given a number of options, including:
- Display a drop-down list of languages.
- The languages’ names should be displayed.
- Show off the flags.
- Cover up the current language, etc.
You should determine what suits you best. In my opinion, the flags speak for themselves and make things simpler to understand.
However, they are not always a wise strategy because a Colombian may not always click on a Spanish flag when using them. The Portuguese flag of Brazil exhibits the same characteristics.
It is preferable, to begin with the language’s name.
On the other hand, we at ThimPress also think that covering up the language in use is a good idea. As a result, the only option for switching to the English version of my website when someone accesses the French version is the name of the English language (and vice versa).
You can see in the image below that switching between versions is as easy as clicking the language name. Each language’s menu is unique.
How to manage the translation of widgets with the Polylang Translate Plugin?
Let’s move on to the widgets after the articles and menus. You can choose to display the widget(s) of your choice in all languages or just one specific language by going to Appearance > Widgets:
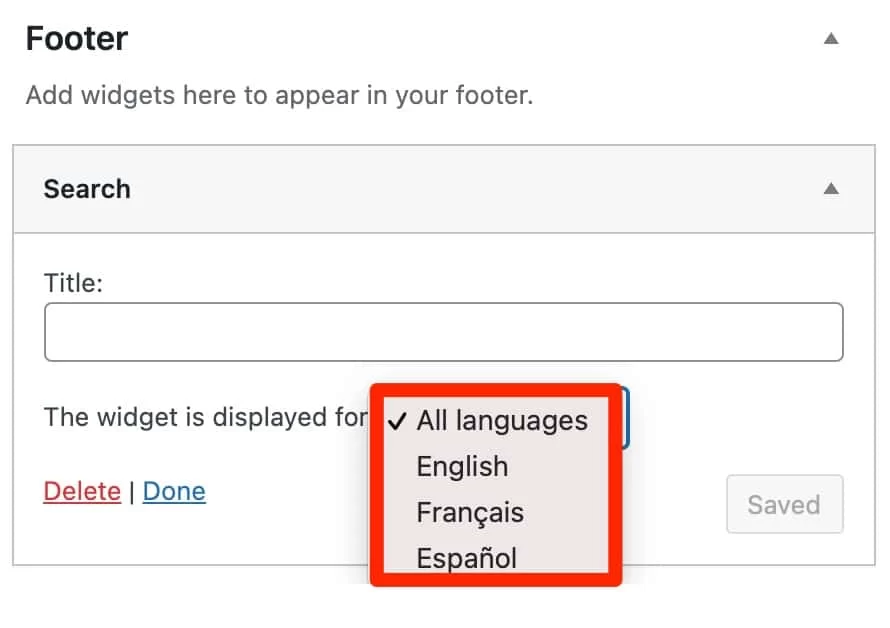
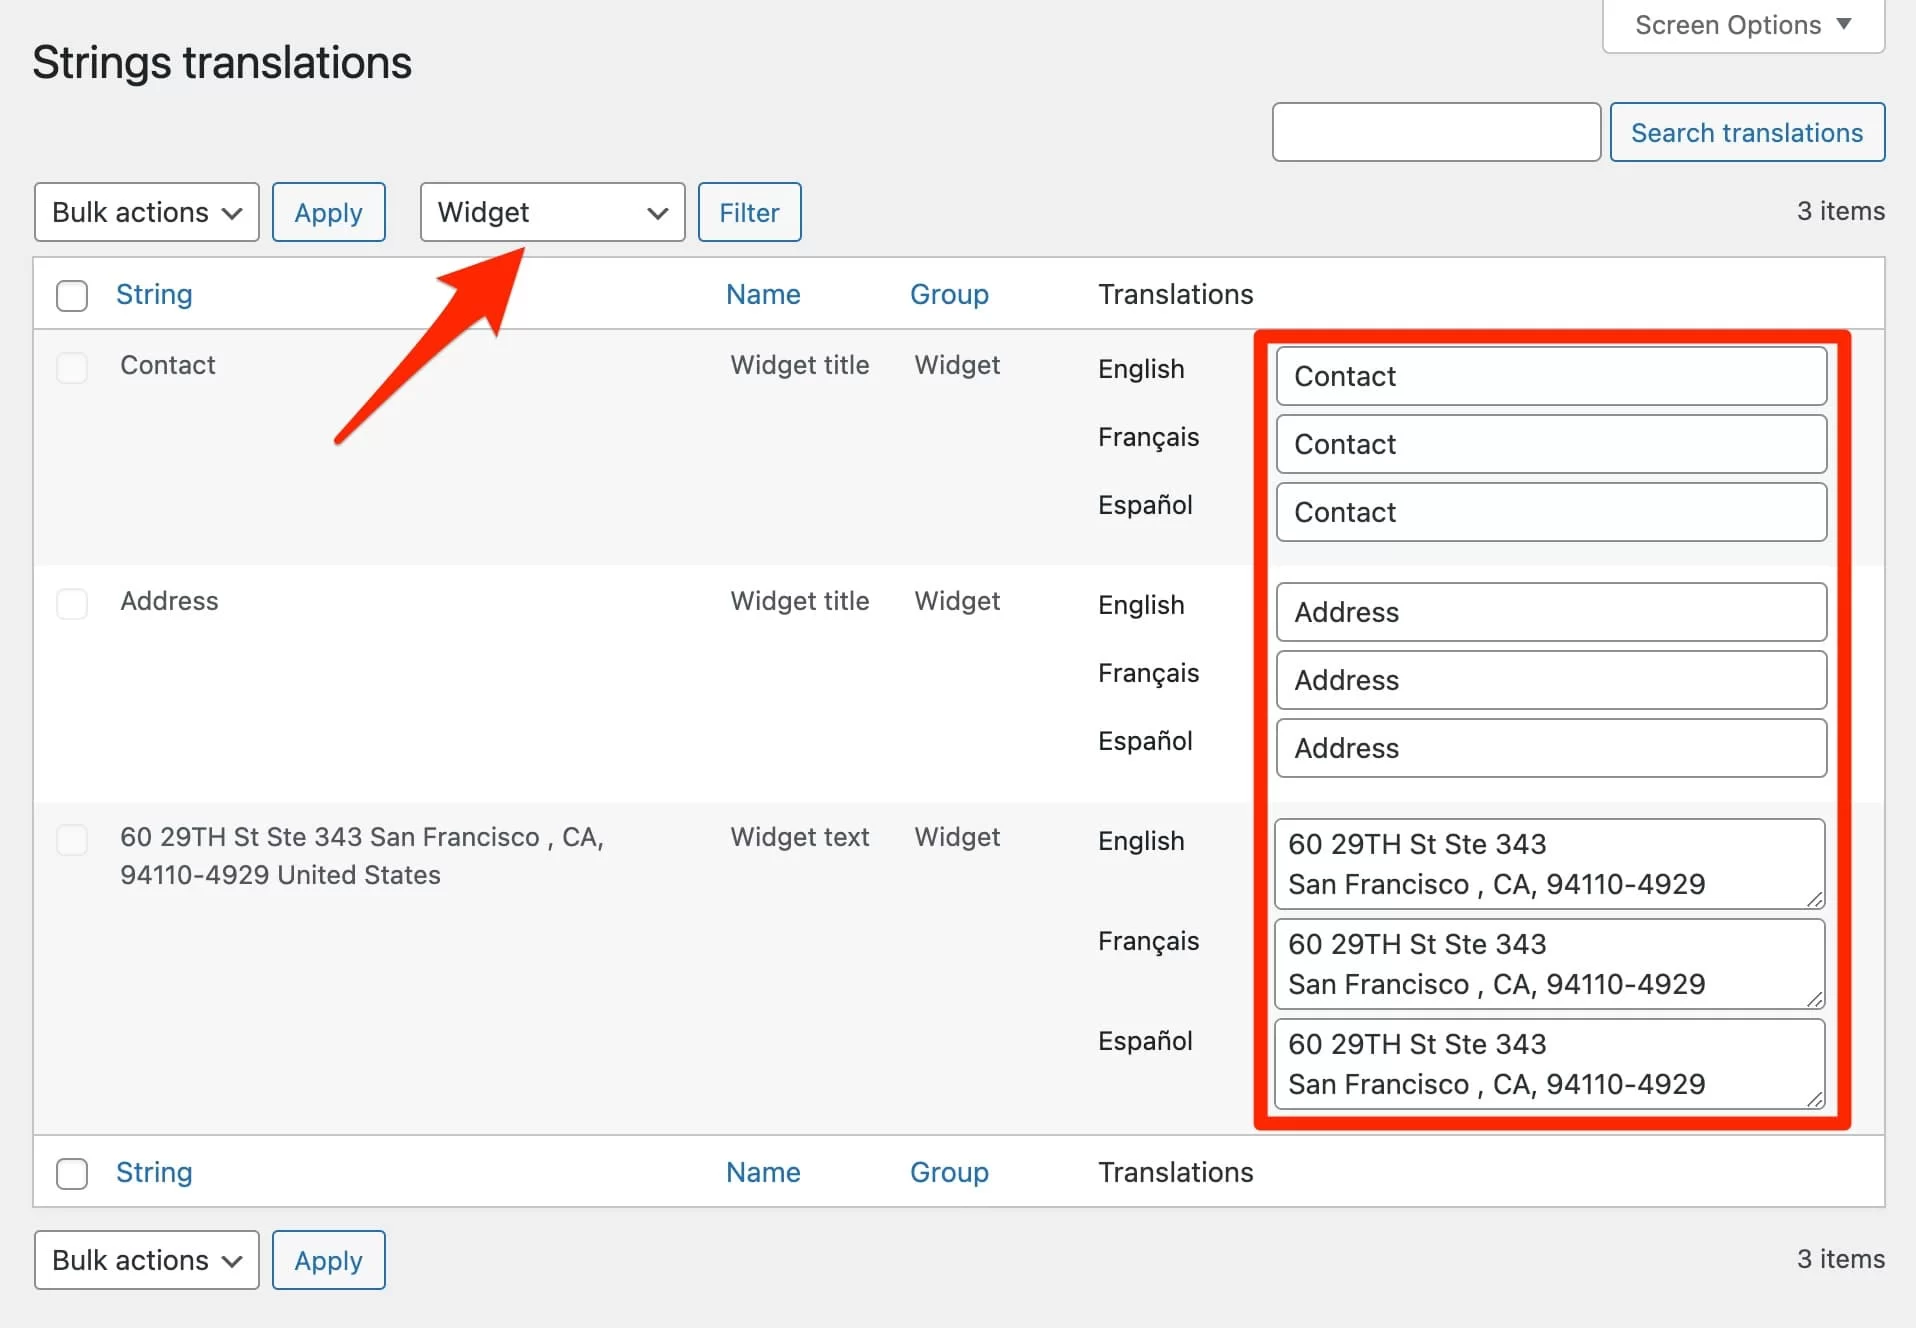
The widget’s title and content can be translated using the “Strings translations” menu if you select “All languages.” Select the texts you want to edit, then filter by widget:
How to display a language switcher in a widget with Plugin Polylang?
When I told you about menu translation, I know you were ecstatic to learn that you could add a language converter so that users could switch between different languages on your website.
They can also be given this option through a widget. Drag and drop the “Language switcher” widget into the area designated for this function by your theme, then select the desired settings to complete the action.
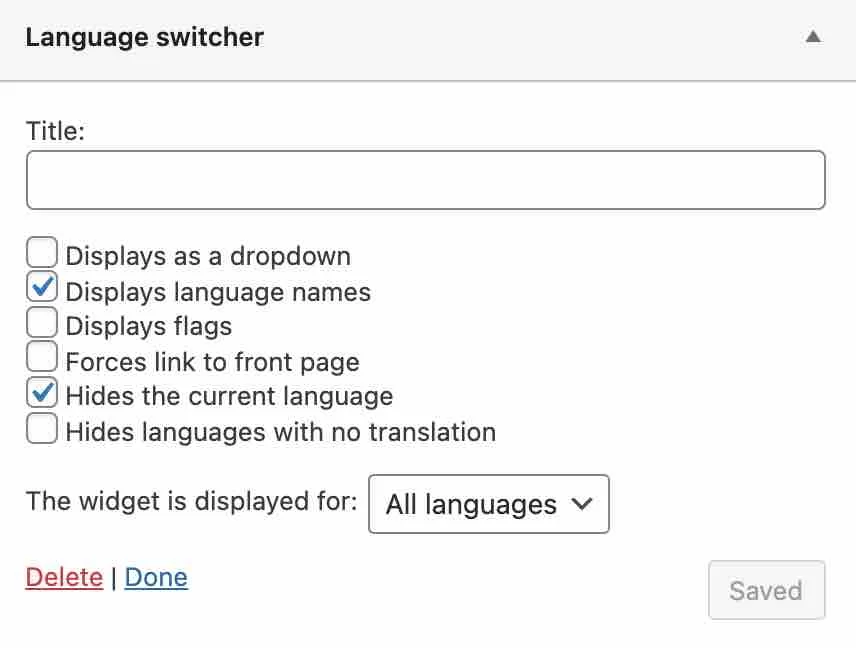
I used the default Twenty Twenty-One theme for this test, which has just one widget area and only lets me display things in my footer.
You may, however, be able to add widgets in a sidebar, for instance, depending on your theme.
How to translate your media Polylang Plugin?
Check that the “Media” module is turned on in the Polylang Plugin settings before you translate the media’s metadata (title, alt tag, and description):

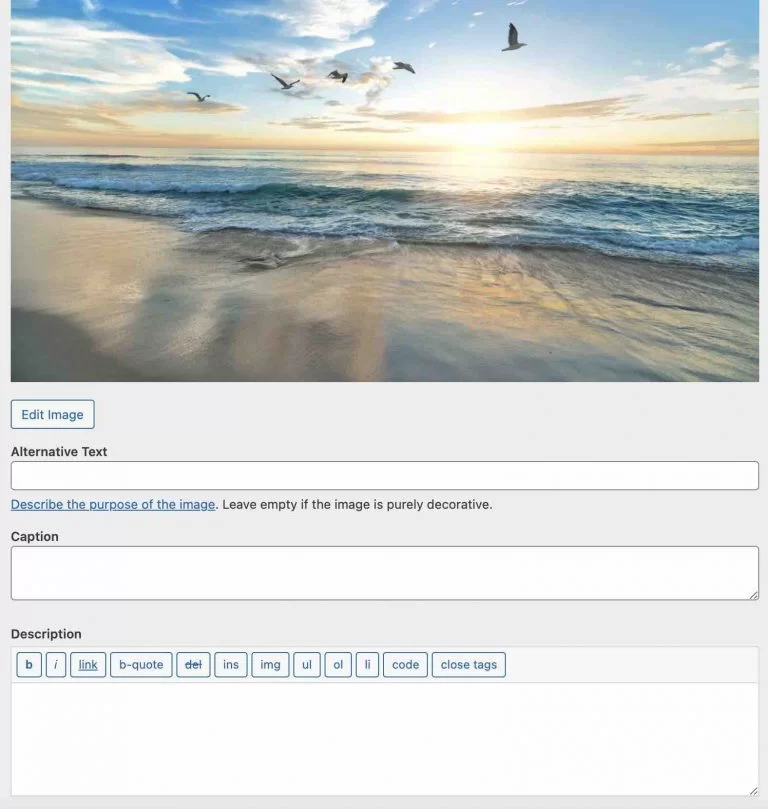
Then, use the icons (pencil, “+,” and “flag”) previously presented to translate the media you are interested in from your Media Library. You can quickly enter a caption, a description, and an alternative text at the bottom of each image.
You now have a much more thorough understanding of the Polylang Plugin WordPress thanks to the translation of posts, menus, widgets, and media.
Conclusion
Check that the “Media” module is turned on in the Polylang Plugin settings before you translate the media’s metadata (title, alt tag, and description):
Then, use the icons (pencil, “+,” and “flag”) previously presented to translate the media you are interested in from your Media Library. You can quickly enter a caption, a description, and an alternative text at the bottom of each image.
You now have a much more thorough understanding of the WordPress Polylang plugin thanks to the translation of posts, menus, widgets, and new media.
Read more: Polylang vs WPML Combats To Become The Best Multilingual Plugin
Contact US | ThimPress:
Website: https://thimpress.com/
Fanpage: https://www.facebook.com/ThimPress
YouTube: https://www.youtube.com/c/ThimPressDesign
Twitter (X): https://x.com/thimpress_com

