Organizing your online school is crucial for a great user experience. When students can easily find the subjects they are interested in, they are more likely to enroll. In the Eduma theme, which uses the powerful LearnPress plugin, structuring your content is straightforward. A key part of this is learning how to create courses category in Eduma.
Proper categories not only improve navigation but also enhance your site’s structure for better search engine visibility. This guide will walk you through 2+ simple and effective methods to add and manage your course categories.
Eduma – Education WordPress Theme
We provide an amazing WordPress theme with fast and responsive designs. Let’s find out!
Why Categorizing Your Courses is Important
Before we dive into the “how,” let’s briefly cover the “why.” Creating distinct categories for your courses offers several key benefits:
- Improved User Navigation: Students can quickly filter and find courses related to specific topics like “WordPress,” “Online Business,” or “Technology.”
- Better Site Structure: A logical hierarchy helps search engines understand your content, which can positively impact your SEO.
- Enhanced Organization: It allows you, the administrator, to manage a large number of courses more efficiently.
Now, let’s explore the two primary methods to create courses category in Eduma.
Method 1: Create Courses Category in Eduma From the LearnPress Categories
This is the most direct method for adding multiple categories and managing them from a central dashboard.
Step 1: Navigate to Course Categories
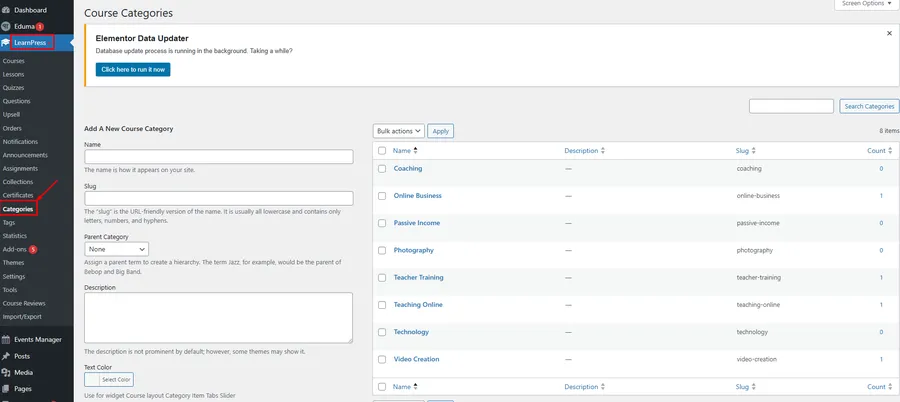
From your WordPress dashboard, go to the left-hand menu and follow this path: LearnPress → Categories.
This will take you to the main “Course Categories” screen, where you can see a list of existing categories on the right and the form to add a new one on the left.
Step 2: Fill in the New Category Details
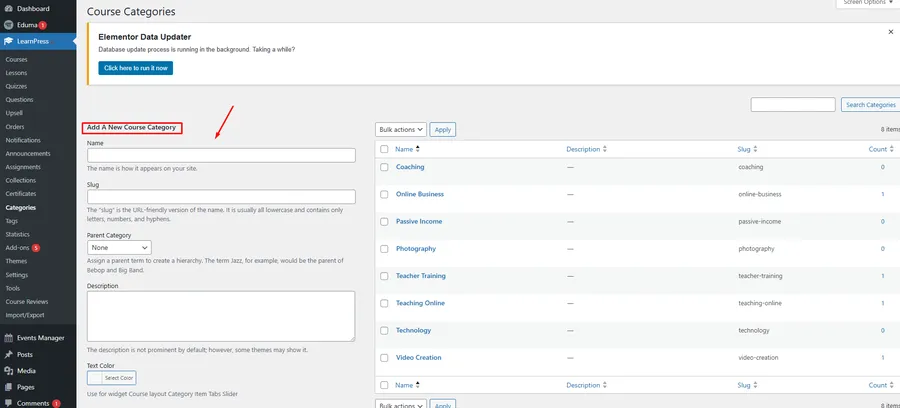
In the “Add A New Course Category” section, you will see several fields.
- Name: This is the title of your category as it will appear on your site. For example: “Coaching,” “Online Business,” or “Photography.”
- Slug: This is the URL-friendly version of the name. It should be in lowercase and contain only letters, numbers, and hyphens. If you leave this field blank, WordPress will automatically generate it from the name.
- Parent Category: If you want to create a sub-category, you can select a parent category from this dropdown. For example, “Beginner Photography” could be a sub-category of “Photography.” If it’s a main category, leave this as “None.”
- Description: You can add a brief description here. While not always visible, some themes or layouts may display it.
- Text Color, Icon, Thumbnail: Eduma may add extra fields like these to enhance the visual presentation of your categories on the front end. You can customize these as needed.
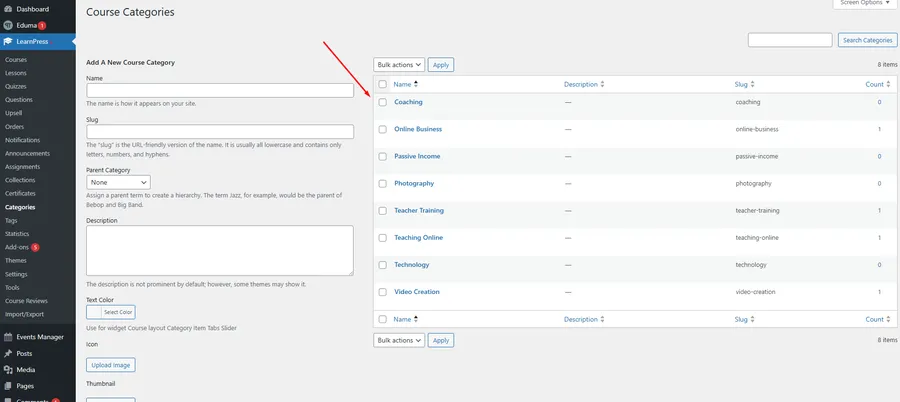
Step 3: Add the New Course Category
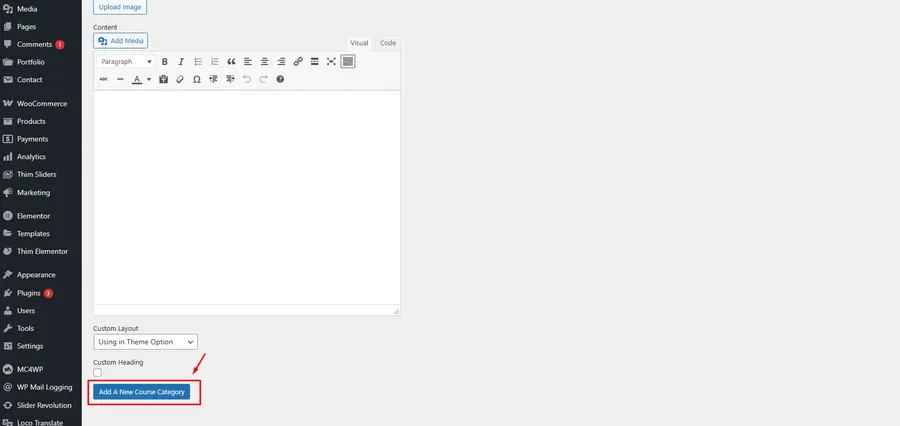
Once you have filled in the details, click the blue “Add A New Course Category” button at the bottom. Your new category will now appear in the list on the right-hand side.
Method 2: Create Courses Category in Eduma From the Course Editor
This method is very convenient when you are already in the process of creating or editing a course and realize you need a new category.
Step 1: Open a Course
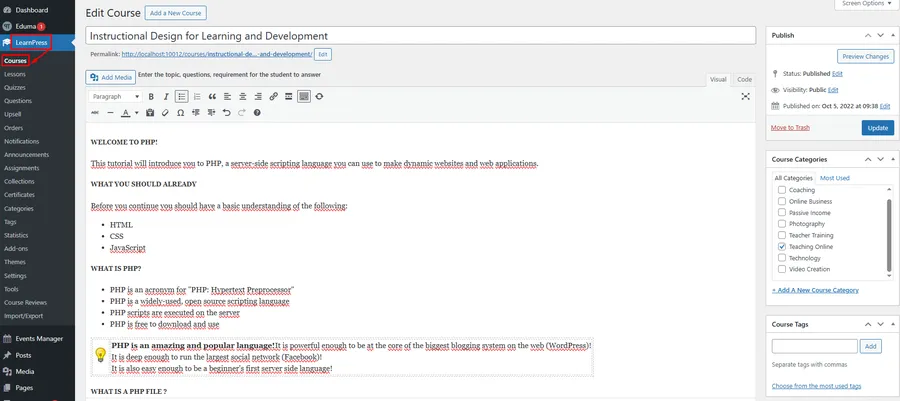
Navigate to LearnPress → Courses and either click “Add New” to create a new course or open an existing one to edit it.
Step 2: Locate the Course Categories Box
On the right-hand side of the course editor screen, you will find a box labeled “Course Categories.” This box lists all your existing categories with checkboxes.
Step 3: Add Your New Category
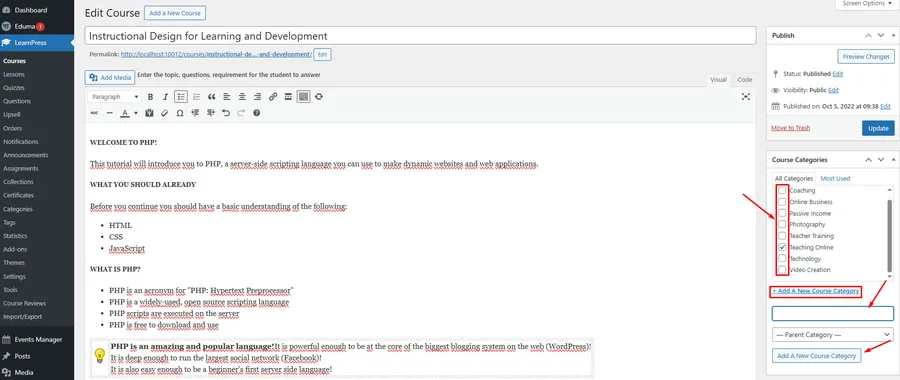
Instead of checking an existing box, click the “+ Add A New Course Category” link.
New fields will appear, allowing you to enter the name for your new category and select a parent category if needed.
Step 4: Publish or Update the Course
After typing the name, click the “Add A New Course Category” button within the box. The new category will be created and automatically checked for the current course. Finally, click “Publish” or “Update” to save your changes.
Conclusion on How To Create Courses Category in Eduma
Organizing your educational content is a fundamental step toward building a successful online learning platform. As you can see, the process to create courses category in Eduma is both simple and flexible. Whether you prefer to manage all categories from a central screen or add them on the fly while creating content, LearnPress provides an intuitive workflow to keep your courses well-structured and easily accessible for your students.
FAQs About Create Courses Category in Eduma
Q1: Can I assign a single course to multiple categories?
Yes, you can. In the "Course Categories" box on the course editor page, simply check the boxes for all the categories you want to assign the course to.
Q2: What is a "slug" and why is it important?
A "slug" is the part of a URL that identifies a specific page or post in a human-readable format. For example, for a category named "Online Business," the slug would be "online-business." It's important for both SEO and user-friendly URLs.
Q4: How do I create a sub-category?
In both methods described above, you can create a sub-category by selecting an existing category from the "Parent Category" dropdown menu. This creates a hierarchical structure.
Read more: How To Create Menu In Eduma Theme: A Step-by-Step Guide
Contact US | ThimPress:
Website: https://thimpress.com/
Fanpage: https://www.facebook.com/ThimPress
YouTube: https://www.youtube.com/c/ThimPressDesign
Twitter (X): https://x.com/thimpress_com


