Do you want to create Ads-slots inside your articles so that you will earn some more profits whenever someone reads your blog? Insert Ads inside posts, pages, and articles is one of the most effective ways to generate revenue for magazines, blogs, or news publication site owners. Most famous bloggers, popular magazines, and even trusted global newspapers worldwide have been doing it.
However, doing a quick search on Google, we guarantee you will not find any readable solution or brief guidance on how to do that for non-techies web owners. Seems like the secret has been kept only for the famous, popular bloggers who both have strong resources in news, writing, media coverage, and also strong resources in tech.
In this article, we will help you uncover the hidden secret and learn how to add Ads slots to your website without having to write even just a single line of code. At the end of this step-by-step tutorial, you will be able to add Ad slots to your post content in less than 10 minutes.
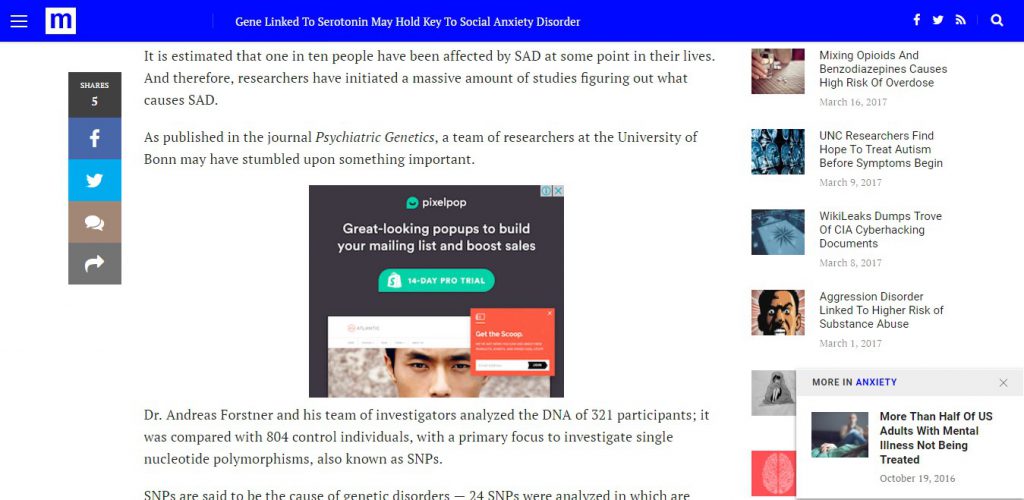
This tutorial is aimed to help the user with the best Magazine WordPress theme, but you can always apply it to your website no matter what theme you’re using. However, it’s our recommendation that you use a high-quality WordPress theme with many great functions like Mag WP to make the most out of your website. This magazine theme is best used for any personal blogs, magazines, or newspapers.
Let’s Start!
Steps to Insert Ads Inside Your Blog Post
1 – Install the Advert Platform
The banner Ads platform that we are using is AdRotate. It’s a free advert placement platform for WordPress. There’s a Pro version with many special features, but just the Free version is powerful enough for us to do what we want to do. Especially, you use a great theme like Mag WP.
For WordPress Magazine Theme Mag WP, we already integrated AdRotate for you, so there’s no need to install it. However, if, for some reason, you have deleted the plugin, or your website hasn’t had it, you can Install the plugin by downloading it directly from here and upload it to your server. Or you can install AdRotate just like any other WordPress plugin from your WP-Admin: Login to your WP-Admin > Plugins > Add New > Search for AdRotate > Install > Activate.
2 – Create your advert
After installing AdRotate, you will see a new item in your WP-Admin left menu – AdRotate.
Please click on AdRotate > Adverts > Add New to create your new advert for your website.
Before clicking Add New, if you have already had some adverts setup, your backend will look something like this:
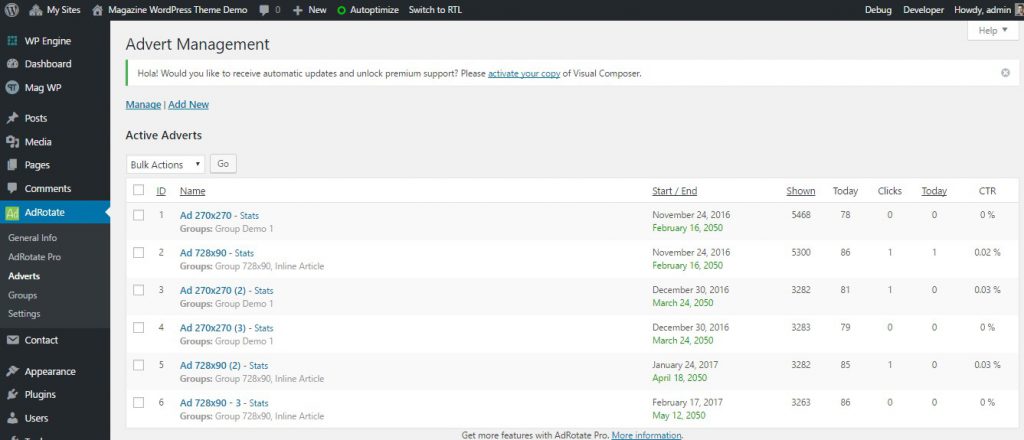
A set of Adverts with some information like Start/End date, the statistics like the number of time displayed, clicks, CTR, etc. You can click on the Stats button to learn more, or you can click on each advert to edit its settings.
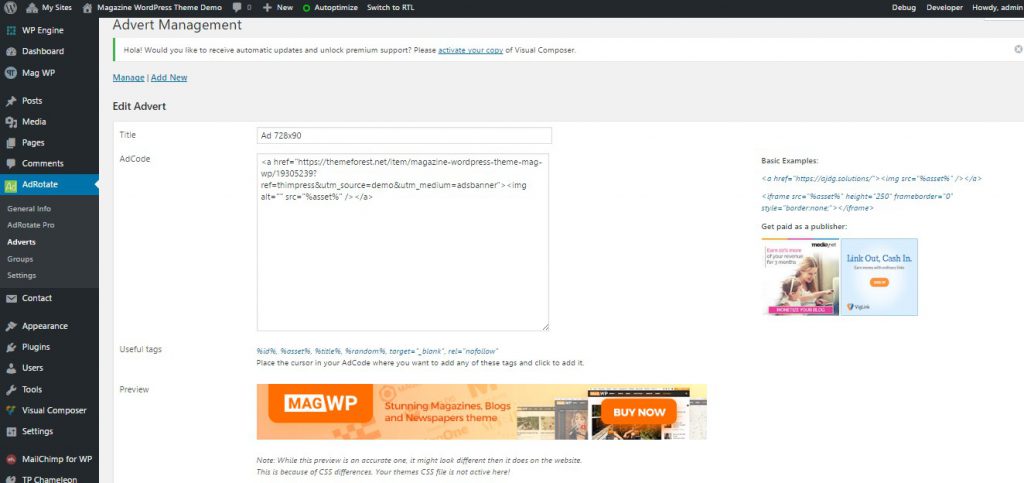
For adding new adverts, this platform supports many Ads types. For example Iframe, Text ads, Image ads, or any other most popular script types being used in the advertising industry. Just type in the title, AdCode, or other settings which fit with your ads. If you take a look on the right side, there will be some basic example advert codes for you.
Below are some more Ads settings which you should take a look at as they will have a big impact on how your adverts will display and how your audiences will perceive those ads. However, let’s just skip it and click Save Advert to move on to the next-most-important part.
At the end of this step, I’ve made several Adverts and prepared for the next step.
3 – Creating Ad Groups – Deciding Where Your Ads Will Be Shown.
a. Basic Ad Group Setting
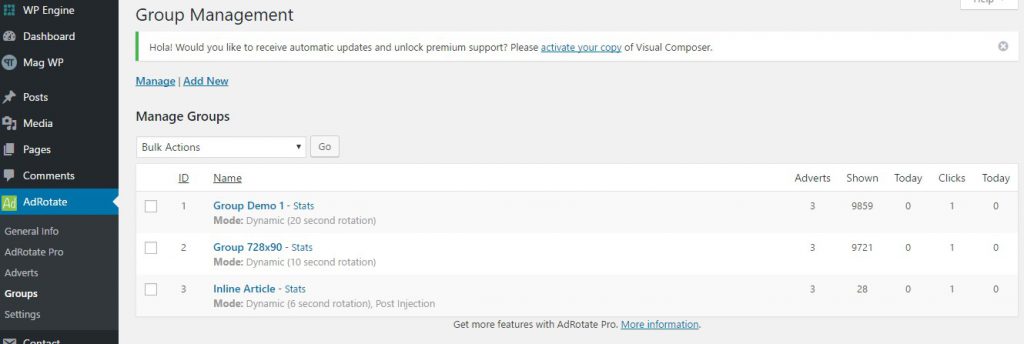
The Groups setting is the place where you will group many of your adverts at once. It’s also where you will decide your adverts will be displayed. It’s the final step of this tutorial. Upon finishing creating Ad Groups, you can show ads inline post content if you wish to.
Please click on Add New to start creating Ad Groups.
Choose the name for your Ad, the mode: Default – One ad at a time, Block mode – shows a block of adverts, or Dynamic Mode – shows a different ad every few seconds.
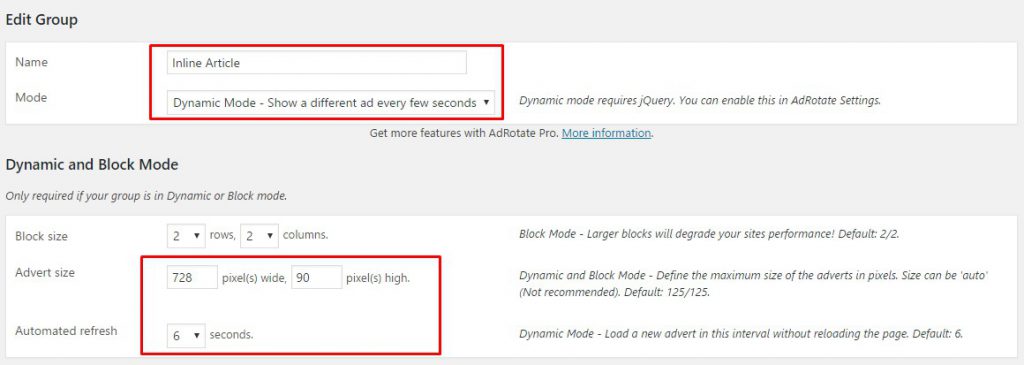
In this example, I’ve chosen Dynamic Mode.
Next, we will need to choose the Advert size – the size of the block Advert. Let’s say 728 x 90 (the dimension of the Ad that I chose) and I’ll set its automated refresh time is 6 seconds, meaning it will automatically load a new advert in this group for every 6 seconds.
In case you may want to align your ads, you can go to “Align the group” under the Advanced setting.
b. Post Injection and Page Injection
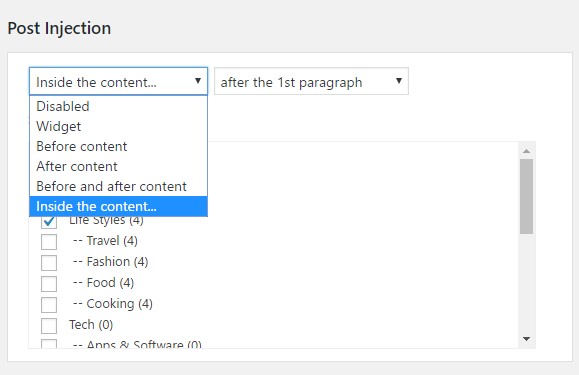
Post Injection and Page Injection will showcase your ads. You can display it in a Widget, before or after content, or both, or even inside the content. Let’s choose Inside the content. Then we will need to choose where exactly we need to put it – After the middle paragraph, the 1st, the 2nd or the third, or even the eighth paragraphs.
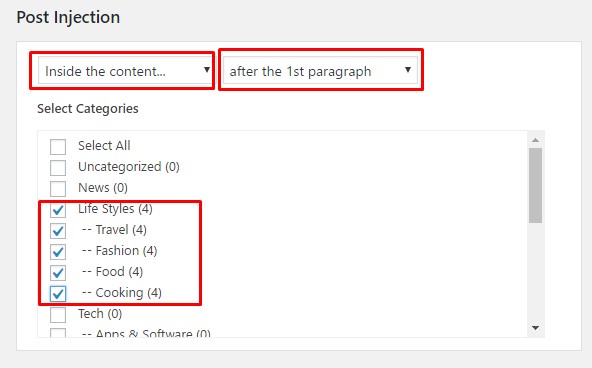
You can also choose to display this Ad Group for which category. If you have a set of adverts for Clothing, you may want to create an Ad Group for the Fashion category. Or you could just choose for all categories – Select All.

We almost finish! The final step is to choose which adverts will belong to this Group. You will find the “Select adverts” section at the end of the page, and you’ll only need to tick on the advert you want.
After that, click on Save Group to save all the settings you’ve made for this Ad Group. You can go directly to an article in the chosen category to see your result.
Conclusion
We hope that you found our guide on How to automatically insert Ads inside your blog post to be helpful. If you have any questions, then please let us know by leaving a comment below.


