In the previous post, we showed you how to install and configure the LearnPress plugin. Today, we will bring you a helpful guide on how to Configure LearnPress Theme.
About LearnPress
LearnPress stands as one of the best LMS themes in the marketplace. Hence, we will show you a list of LearnPress’s significant features:
- Multi-site support.
- Niche and nice interface for WordPress users.
- Able to import or export courses to other sites.
- Do anything with your courses: edit, share, research, examine the courses’ statistics, etc.
- Able to buy or sell courses.
- 100% free.
How to Configure LearnPress
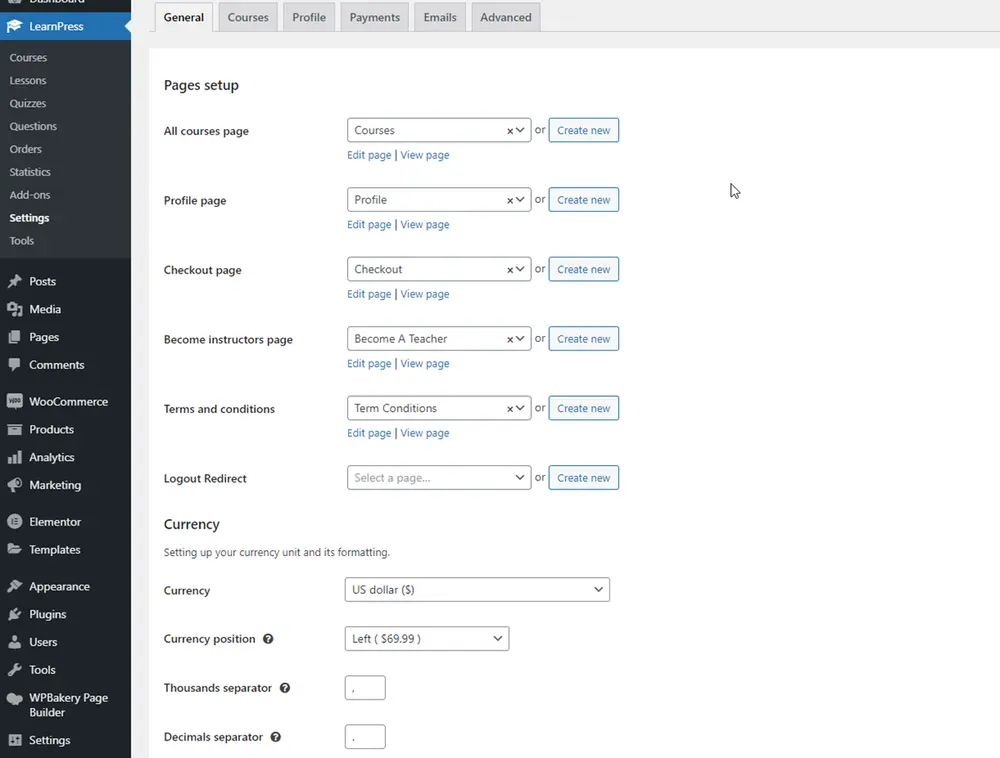
Building a website with LearnPress will not be so difficult, but editing is a bit complicated. First of all, we will learn how to configure LearnPress. You will simply go to your Dashboard, look for LearnPress in the sidebar, and select Settings.
General Tab
Now you can see a settings screen. In the “General” tab, you can change, edit, or create new default pages such as All Courses, Profile, Checkout, Become Instructors, etc. Also, you can select whatever currency you want.
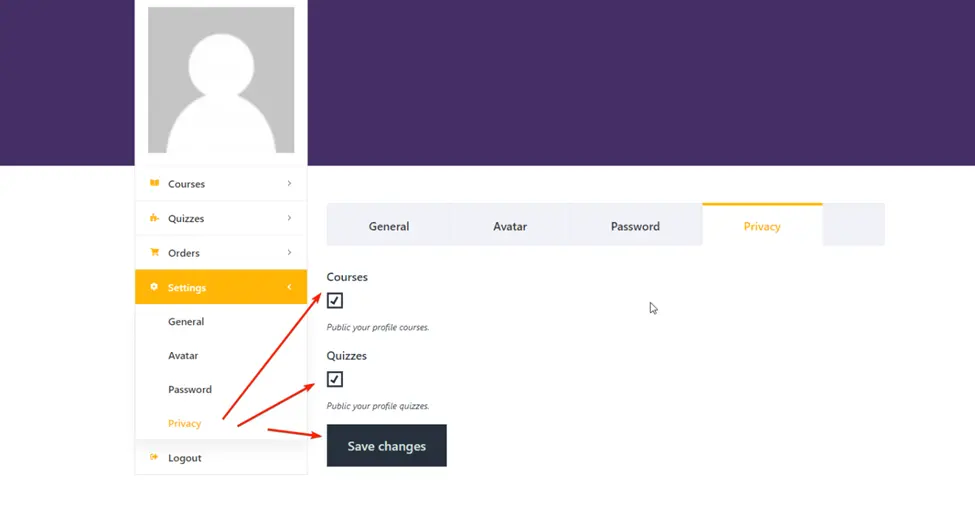
Scroll down to the “Publish Profile” part. Users can show or hide their courses or quizzes when other users visit their profile pages. So to do it, they need to visit their profile page and click on the “Settings” tab. Click “Privacy” to enable or disable courses and quizzes.

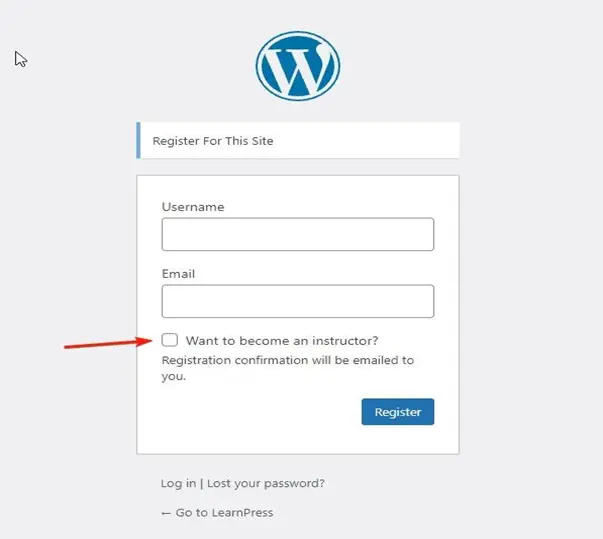
In the “Instructor registration” part, users can request to become instructors on all registration forms if they enable this option. Don’t forget to click the “Save settings” button.
To make sure all users can register, go to “Settings” and select “General.” Hover your mouse over Membership and tick “Anyone can register,” otherwise no one’s going to be able to register.
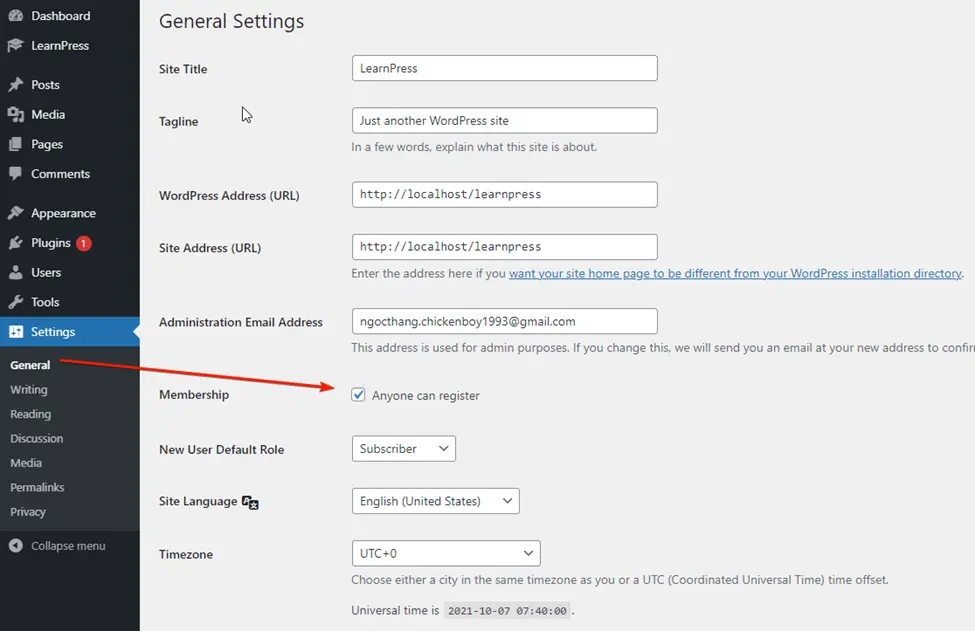
Well done! You have just been urged to configure LearnPress. Next, we will go to see the “Courses” tab.
Course Tab
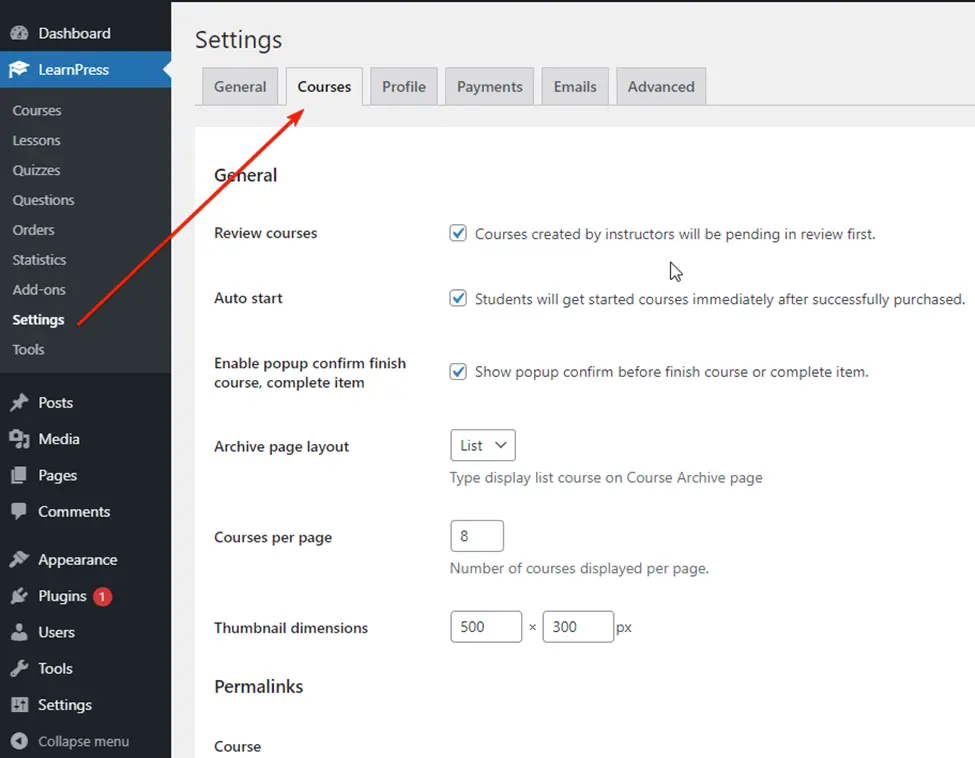
Here, we can enable “Review courses” in LearnPress. With this feature, the course will be “pending” after the instructor creates a course. And only the administrator can publish it. If you disable this feature, there is no review course function.
With LearnPress’s “Autostart,” after students purchase the course, the system will automatically enroll that course for you with the “Continue” button. If you disable this feature, students have to click on the “Start Now” button to enroll in the course.
To show a confirmation popup before finishing a course or completing an item, you can tick “Enable popup to confirm finish course, complete item.” You can choose either grid or list type to display with “Archive page layout.” Besides, you can change the number of courses displayed per page in the “Courses per page” feature. Then you can set permalinks for a course, lesson, quiz, category base, and tag base.
That’s all for the courses tab. Now let’s move to the “Profile” tab.
Profile Tab
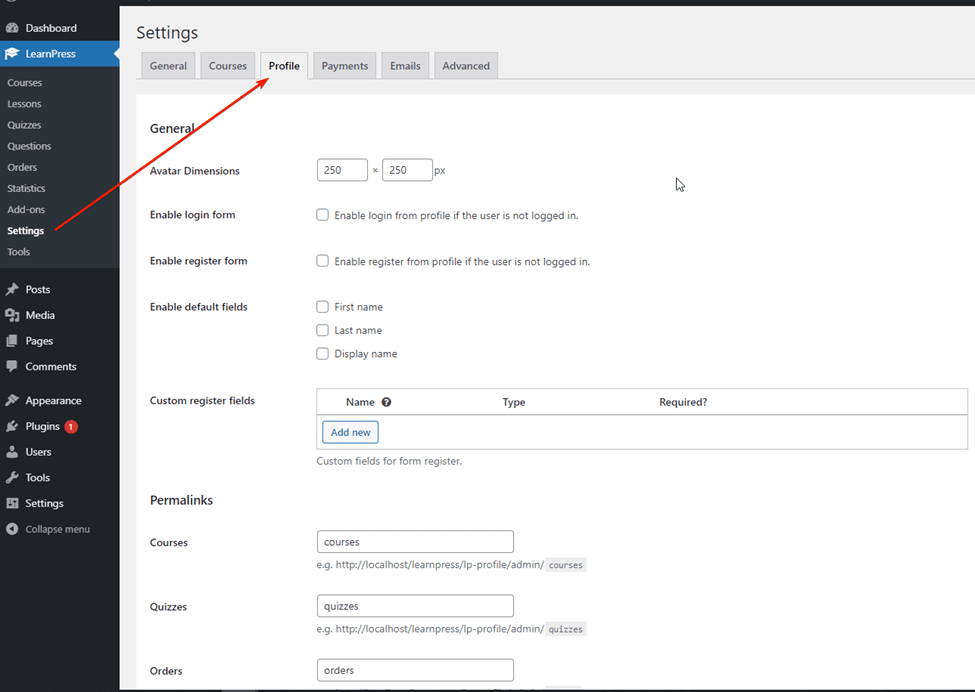
This LearnPress section allows you to configure avatar dimensions. With the “Enable login form” and “Enable register form” features, it will display the login form and the registration form on the profile page if the user doesn’t log in.
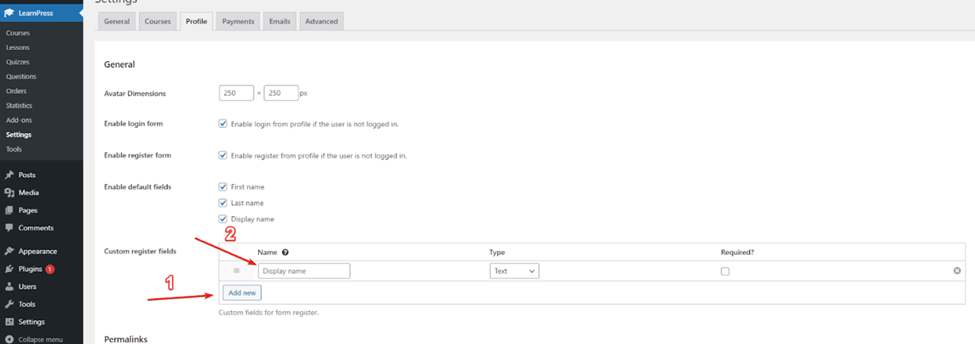
Also, you can add default or custom fields for the registration form, like first name, last name, or display name, with “Enable default fields” and “Custom register fields.” Remember to tick on “required” to set it as a required field. And you can edit permalinks as well.
Payments Tab
So next is the LearnPress “Payments” tab. With the “General” tab, you can enable the “guest checkout” feature and show or hide the login form and the registration form on the checkout page. Also, you can custom order a slug.

After that, move to the PayPal tab. LearnPress allows you to sell your courses using Paypal, which is pretty cool for a free version. Go ahead and enable PayPal, then put your PayPal email in the PayPal email box.

Sandbox mode is just for testing. When your site goes live, you can disable sandbox mode.
Email Tab
Next, we will go ahead with the “Emails” LearnPress tab, where you can configure email when you configure the LearnPress theme. In the General tab, you can edit the “From” name, header image, and footer text and enable or disable the email that you want to use. And remember to save settings.

If you want to edit email content, click “Manage” and choose User. Then, you can write text here and click on any variables to insert them into the email. Don’t forget to save settings.

Advanced Tab
And the last one is the LearnPress Advanced tab:
- Here you can style and enable Gutenberg to edit courses, lessons, quizzes, questions, and debug mode for developers.
- Also, you can change the position of the question navigation.
That’s all for configuring the LearnPress theme. In the next post, we will show you how to install the default theme. We hope you will learn how to edit LearnPress from this post.
Don’t forget to try Eduma, the WordPress theme that will transform your online learning experience. With its powerful features and intuitive design, Eduma is the perfect platform for creating an engaging and effective online learning environment.
Read more:
Contact US | ThimPress:
Website: https://thimpress.com/
Fanpage: https://www.facebook.com/ThimPress
YouTube: https://www.youtube.com/c/ThimPressDesign
Twitter (X): https://x.com/thimpress_com

