So you want a corner of the internet that’s actually yours. Maybe you need to create a portfolio website for freelance work, a place to share your writing, or just a page where people can find you instead of scrolling through five different social profiles.
Whatever the reason, learning how to create a personal web page is a lot more approachable than it looks, and you don’t need to write a single line of code to do it.
This guide walks through the entire process: picking a platform, choosing a domain name, setting up WordPress, designing your pages, and publishing content that actually gets found on Google. By the end, you’ll have a live site and a clear idea of what to add next.
Eduma – Education WordPress Theme
We provide an amazing WordPress theme with fast and responsive designs. Let’s find out!
Why build a personal web page in the first place
A personal web page gives you one link that represents everything you do, instead of scattering your work across Instagram, LinkedIn, and a Google Doc resume. Recruiters, clients, and collaborators check personal sites before they check anything else, because a site you built and maintain says more about your skills than a bio line ever could.
There’s also a control angle. Social platforms change their algorithms, shut down features, or ban accounts by mistake. A domain name and a hosting account are yours. Nobody can deplatform a website you own outright.
Writers use personal pages to publish essays without waiting on a publication’s editorial calendar. Developers use them to show off projects with live demos. Teachers and coaches use them to host lessons, downloads, and even paid courses. The format is flexible enough to fit almost any goal, which is exactly why the planning step matters so much.
There’s a search visibility benefit too. When someone types your name into Google, a personal site you control usually outranks a bare social profile, because search engines can crawl and index far more of a website than they can a locked-down app. Over time, that means your site becomes the first thing people see, not whatever random post happened to get shared.
A personal site also acts as a working notebook. Instead of losing track of every project you’ve shipped or every idea you’ve had, a simple portfolio entry or blog post gives you a dated, searchable record you can point back to during a performance review, a client pitch, or a job interview two years later.
Planning before you touch any software
Every good site starts with a decision, not a template. Skipping this step is the most common reason personal sites stall out after the first week.
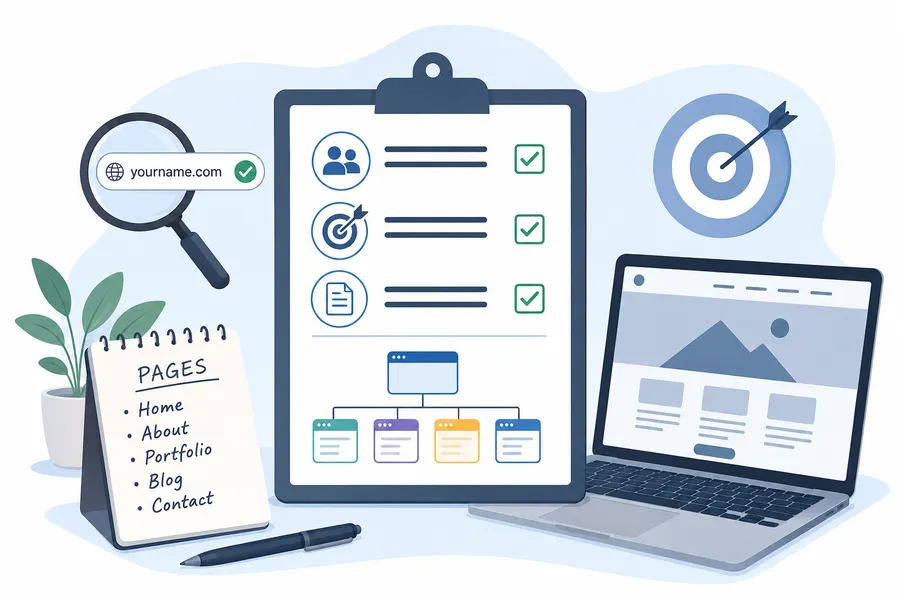
Before you open any website builder, write down the answer to three questions: who is this site for, what do you want visitors to do, and how much content will you realistically publish in the first three months. A site meant to land freelance clients needs a portfolio and a contact form above everything else. A site meant to build an audience needs a blog and an email signup. Trying to do both at once, on day one, usually means neither gets built well.
Choosing your niche and goal
Pick one primary goal for the site’s homepage. If you’re a designer, that goal is probably “show my best five projects.” If you’re a consultant, it’s probably “explain what I do and how to book a call.” Every other page on the site should support that one goal instead of competing with it.
Picking a domain name
Your domain name is the address people type to find you, like yourname.com. Keep it short, easy to spell out loud, and free of hyphens or numbers if you can manage it. If your exact name is taken, try adding your profession (“janedoe” becomes “janedoedesigns”) rather than a random string of digits, since that keeps the name memorable and still recognizably yours. Domain registrars typically charge between $10 and $20 a year for a standard .com, so check availability early since good names disappear fast.
Stick with a .com extension when you can, since it’s still the one people type by default even when they half-remember your name. A .me or .dev extension works fine as a backup if your exact .com is taken and you’d rather not add extra words to the name.
Mapping out the pages you actually need
Before you start designing anything, sketch a short list of pages on paper: homepage, about, contact, and whatever showcases your work. Resist adding a page just because a template includes it. A “services” page you never update is worse than no page at all, since visitors notice when content looks abandoned.
Picking the right platform
This is where most of the real decisions happen, and it’s worth slowing down here. The three most common routes for how to develop personal website projects are a hosted website builder, a static site generator, or self-hosted WordPress. Each one trades off convenience against control.
Hosted builders like Squarespace or Wix get you a live page in an afternoon, with drag-and-drop page builder editing and no server maintenance. The tradeoff is that you’re renting space on their platform, monthly fees never stop, and moving your content elsewhere later is painful. Static site generators like Jekyll or Hugo are fast and cheap to host, but they expect you to be comfortable with a code editor and version control, which rules them out for a lot of first-time site owners.
Self-hosted WordPress sits in the middle, and it’s the option most personal site owners land on once they’ve compared the alternatives. You own your hosting account, you can install any of the tens of thousands of free and premium themes, and you’re not locked into one company’s pricing changes. The tradeoff is a slightly steeper learning curve during setup, though that curve has gotten much shorter over the last few WordPress releases.
| Platform | Setup time | Monthly cost | Ownership | Best for |
| Squarespace / Wix | 1-2 hours | $16-$49 | Rented | Fast launch, low technical comfort |
| Jekyll / Hugo (static) | Several hours | $0-$5 (hosting only) | Full | Developers comfortable with code |
| Self-hosted WordPress | 1-3 hours | $5-$15 (hosting + domain) | Full | Long-term flexibility, blogging, courses |
If you’re weighing building a personal website for the long haul rather than a quick weekend project, self-hosted WordPress is usually the better bet, since it scales from a simple bio page to a full blog or online course without a platform migration.
What “self-hosted” actually means
Self-hosted simply means the WordPress software runs on a hosting account you pay for and control, rather than on servers owned by a single website-builder company. That distinction matters more than it sounds. On a hosted builder, if the company changes its pricing tiers or discontinues a feature you rely on, you have no choice but to adapt. On self-hosted WordPress, you can switch hosting companies at any time without losing your content, your domain, or your design, because the software itself belongs to you.
When a hosted builder still makes sense
None of this means hosted builders are a bad choice. If you need a single landing page live within the hour, or you have zero interest in ever touching a settings panel, a hosted builder gets you there with the least friction. The tradeoff only starts to matter once you plan to publish regularly, add a store, or run a course, at which point the monthly fees and feature limits of a hosted plan tend to add up faster than a self-hosted setup.
Step-by-step Setup on WordPress
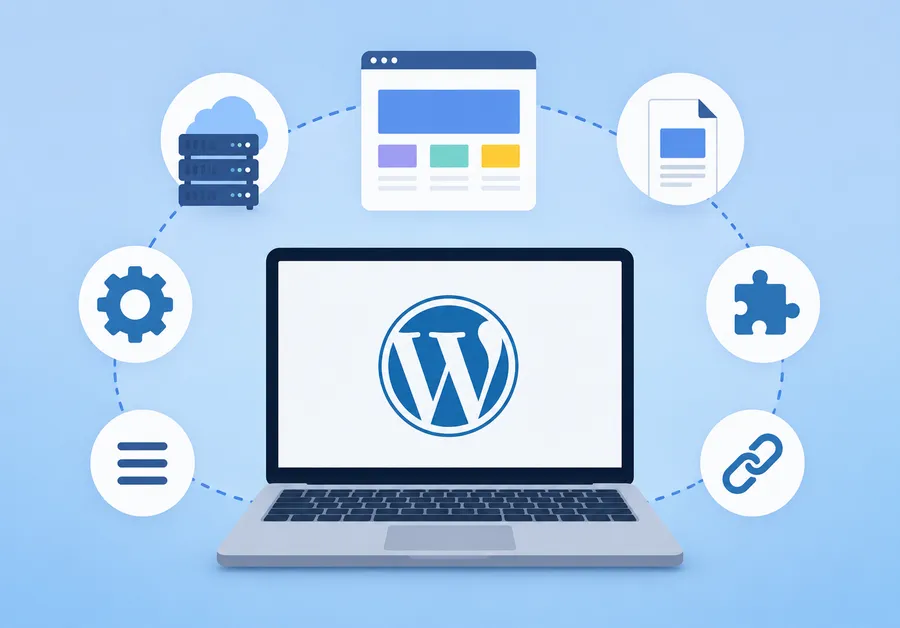
Once you’ve settled on WordPress, the actual setup is a lot more mechanical than people expect. Here’s the process from an empty domain to a live homepage.
Step 1: Buy hosting and a domain
Pick a hosting provider that offers one-click WordPress installs, since nearly every major host does at this point. During checkout, most hosts let you register your domain in the same order, which saves you from connecting two separate accounts later.
Step 2: Install WordPress
Log into your hosting control panel and look for a WordPress installer, usually labeled something like “Install WordPress” or “One-Click Apps.” Fill in your site title, an admin username, and a strong password. The installer usually finishes in under five minutes and drops you straight into the WordPress dashboard.
Step 3: Choose a theme
Your theme controls the layout, colors, and overall feel of the site. Go to Appearance > Themes inside the dashboard to browse free options, or upload a premium theme if you’ve already picked one. A block-based theme built for full-site editing gives you the most flexibility, since you can rearrange headers, footers, and templates without touching any code.
If you’re planning to add courses or paid lessons down the line, this is worth thinking about now rather than after you’ve built out ten pages. ThimPress’s Eduma theme is built specifically for education and membership sites and pairs directly with the free LearnPress plugin, so you can add a course catalog, lesson progress tracking, and quizzes to what would otherwise be a plain personal page.
Step 4: Set up your essential pages
Every personal site needs at minimum a homepage, an about page, a contact page, and one page that showcases your actual work, whether that’s a portfolio, a resume, or a list of published articles. Create these under Pages > Add New before you worry about blog posts, since these are the pages visitors land on first.
Step 5: Install a small set of plugins
Resist the urge to install twenty plugins in your first week. Start with an SEO plugin such as Rank Math or Yoast, a caching plugin for speed, and a security plugin, then add anything else only when you have a specific feature in mind.
Step 6: Set up your navigation menu
Go to Appearance > Menus and add links to each of your core pages in the order you want them to appear across the top of your site. Keep the menu short, five items or fewer, since a cluttered navigation bar makes visitors work harder to find what they came for. Put your showcase or portfolio page first after the homepage, since that’s usually the page people actually want.
Step 7: Set your permalink structure
Under Settings > Permalinks, choose the “Post name” option so your page URLs read as yoursite.com/about instead of a string of numbers. Clean URLs are easier for visitors to remember and easier for search engines to understand, and changing this setting later can break existing links, so it’s worth setting correctly the first time.
Designing pages people actually want to read
A personal site doesn’t need to look like an agency portfolio to work. It needs to load fast, read clearly on a phone screen, and make it obvious within five seconds what the visitor should do next.
Keep the homepage focused
Lead with one sentence that explains who you are and what you do, followed by your best three to five pieces of work or a short list of services. Cut anything that doesn’t directly support that one goal you picked during the planning phase.
Write an about page that sounds like you
Skip the resume-style bullet list and write like you’re introducing yourself to someone at a conference. Mention what you’re working on now, not just what you’ve done in the past, since that’s what makes an about page feel current instead of stale.
Make contact effortless
A contact form with three fields, name, email, and message, converts better than a page that only lists an email address, mostly because people are more likely to fill in a form on the spot than open their own email app.
Optimize images before you upload them
Large, uncompressed photos are the number one reason personal sites feel slow. Resize images to the actual display width before uploading, and run them through a compression tool so a 4 MB photo from your phone becomes a 200 KB file without a visible quality drop. A faster homepage keeps visitors around long enough to actually read your work.
Write basic SEO into every page as you go
Give every page a clear, unique title and a short meta description that explains what the page covers, using whichever SEO plugin you installed earlier. Add descriptive alt text to every image, not just “photo1.jpg,” since that’s what helps search engines and screen readers understand what’s on the page. None of this takes more than a minute or two per page, and skipping it is the most common reason a well-designed site never shows up in search results.
Adding content, courses, or a blog
Once the core pages are live, the site starts earning its keep through regular content. This is also the stage where starting a personal website shifts from a one-time project into an ongoing habit.
Blogging on your own domain
A blog section, published under Posts rather than Pages, lets you publish opinions, tutorials, or updates on a schedule. Search engines reward sites that publish consistently, so even one well-researched post a month beats ten rushed posts in a single week followed by silence.
Turning your expertise into a course
If you have a skill worth teaching, a personal site is a natural place to sell it directly instead of splitting revenue with a third-party course marketplace. This is exactly the use case ThimPress built for: pairing the Eduma theme with the LearnPress plugin gives you course pages, student dashboards, and quiz functionality on top of the same WordPress install you already set up, so you’re not managing a second platform just to sell lessons.
Building an email list from day one
Add a simple email signup form to your homepage or blog sidebar early, even before you have anything to send. An email list is the one audience channel a platform change can’t take away from you, unlike a social media following that lives on someone else’s servers.
Showcasing a portfolio the right way
If your goal is landing freelance work, treat each portfolio entry like a small case study rather than a bare image gallery. Describe the problem you were solving, the decisions you made, and the outcome, even if the outcome is just “the client shipped it.” A one-line caption under a screenshot tells visitors far less than three sentences of context, and context is what actually convinces someone to reach out.
Keeping your site running smoothly
A personal site is not a “build it once and forget it” project. A handful of small habits keep it fast, secure, and up to date without turning into a part-time job.
Update regularly
Log into your dashboard every few weeks and update WordPress core, your theme, and your plugins. Outdated software is the single biggest cause of hacked personal sites, and most updates take less than two minutes to apply.
Back up before you experiment
Before installing a new theme or plugin, take a full backup, either through your host’s built-in tool or a plugin like UpdraftPlus. If something breaks, you can roll back in minutes instead of rebuilding from scratch.
Check your site speed periodically
Run your homepage through a free tool like PageSpeed Insights every couple of months. If load time creeps up, the usual culprits are uncompressed images and too many active plugins, both of which are quick fixes once you spot them.
Review your content twice a year
Old blog posts and portfolio pieces go stale. Set a reminder every six months to update outdated screenshots, dead links, and any project descriptions that no longer reflect your current work.
Watch your analytics, but don’t obsess over them
Install a lightweight analytics tool so you can see which pages get visited and where people drop off, then check it once a month rather than every day. If your about page gets steady traffic but your contact page barely gets a click, that’s a signal to move your contact link somewhere more visible, not a reason to panic over daily number swings.
How to make a personal site that grows with you
The version of the site you launch in week one won’t be the version you’re running in year two, and that’s expected. How to make a personal site that lasts comes down to starting with a simple, focused structure and adding features only when you have a real reason to, rather than front-loading every plugin and page type before you’ve published a single piece of content.
Start with the essentials: homepage, about, contact, and one showcase page. Add a blog when you have something to say on a schedule. Add course functionality when you actually have a lesson to teach. Each addition should answer a need you’ve already felt, not a feature you saw on someone else’s site.
FAQs About How to Create a Personal Web Page
Do I need coding skills to build a personal website?
No. Platforms like WordPress use a visual block editor for pages and posts, so you can build a complete site without writing code. Coding knowledge becomes useful only if you want deep custom design work later, but it’s not required to launch.
How much does it cost to start a personal website?
A basic setup with shared hosting and a domain name typically runs $5 to $15 a month, plus roughly $10 to $20 a year for the domain itself. Premium themes or plugins are optional add-ons on top of that base cost.
Should I use a free subdomain or buy my own domain?
Buy your own domain if you’re serious about the site lasting more than a few months. A custom domain looks more professional, is easier for people to remember, and gives you full ownership instead of relying on a free platform’s subdomain.
How long does it take to launch a personal website?
A basic site with a homepage, about page, and contact page can go live in a single afternoon once hosting and a theme are set up. Adding a full blog, portfolio, or course section usually stretches the timeline to one or two weeks, depending on how much content you’re writing from scratch.
Conclusion
Building a personal web page isn’t a one-afternoon sprint followed by nothing, and it isn’t a multi-month engineering project either. Pick your domain, choose a platform that matches how much control you want, set up the essential pages, and publish something small on a regular schedule. The site you launch this week will look nothing like the one you’re running a year from now, and that’s exactly how it should work.
Read more: How to Get a Web Address for Free in Minutes