Are you looking to customize your WordPress theme without losing your changes during updates? With WordPress powering over 43% of all websites on the internet, according to W3Techs, ensuring your customizations are preserved through a WordPress child theme is crucial for long-term site maintenance.
A child theme allows you to modify the design and functionality of your site while preserving the core features of the parent theme. This is a best practice recommended by WordPress experts to ensure a stable and maintainable website.
In this guide, we’ll walk you through the process of creating a child theme step by step, so you can safely customize your WordPress site.
Eduma – Education WordPress Theme
We provide an amazing WordPress theme with fast and responsive designs. Let’s find out!
Why Should You Use Child Themes for WordPress?

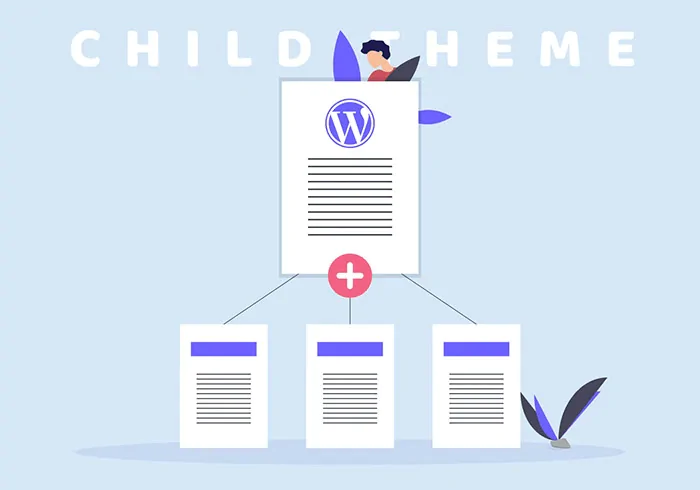
A WordPress child theme is a sub-theme that inherits all the features, functionality, and styling of a parent theme. It allows you to customize your website without modifying the parent theme’s core files, ensuring a safer and more efficient way to make changes.
Here’s why using a child theme is beneficial:
- Preserves Customizations During Updates: When WordPress or the parent theme updates, your customizations remain intact, preventing loss of changes.
- Enhances Site Stability and Security: Since you’re not modifying core theme files, updates remain smooth and free from conflicts or errors.
- Saves Time and Effort: Developers and site owners can quickly make modifications without redoing work after each update.
- Reusable Across Websites: Once customized, the child theme can be used on other WordPress websites, streamlining workflow for developers and agencies.
Using a child theme is a best practice for WordPress customization, ensuring flexibility, efficiency, and long-term maintainability for your website.
Notices Before Making a Child Theme

Creating a child theme WordPress requires some technical skills, particularly in HTML, CSS, and PHP. While you don’t need to be an expert, having a foundational understanding of these languages will help you modify your theme effectively.
Key Considerations:
- Understand What to Change – Identify the elements you want to customize before starting. Modifying unnecessary components may lead to compatibility or performance issues.
- Basic PHP Knowledge – Even if you’re copying and pasting code snippets from tutorials, understanding how they work is crucial for troubleshooting errors.
- Use a Development Environment – Always test your child theme in a staging environment before applying changes to your live website. This prevents disruptions and allows you to experiment safely.
- Choose the Right Parent Theme – Ensure that the parent theme aligns with your website’s goals. The fewer modifications required, the better it is for performance, security, and long-term maintenance.
In the below parts, we will use the LearnPress theme as an example for a better illustration of the WordPress create child theme.
How To Build the First Child Theme?
You have 2 options when making child themes WordPress. You may use the manual way to get familiar with all files. Otherwise, applying a plugin will work with complicated files and folders.
Now, we will begin the customization.
Using Code To Create WordPress Child Theme
To begin, you will open /wp-content/themes/ in the WordPress Installation and make a new folder for your WordPress child theme. Name it as you like.
Then, you have to create the first 2 files for your child theme. Open a text editor and paste the below code into the empty doc:
1 Theme Name:   LP Child Theme
2 Theme URI:    https://www.wpbeginner.com/
3 Description:  A LearnPress child theme
4 Author:       ThimPress
5 Author URI:   https://thimpress.com
6 Template:     learnpress
7 Version:      1.0.0
8 Text Domain:  learnpresschild
You can change the information as you plan and save this file to your style.css file in the recent child theme’s folder. Well, you have just made the child theme’s main stylesheet.
Next, you will make a 2nd file to import the stylesheets from the parent theme. Make a new document in your text editor and copy this code:
1 /* enqueue scripts and style from parent theme */
2
3 function learnpress_styles() {
4 wp_enqueue_style( 'child-style', get_stylesheet_uri(),
5 array( 'learn-press-style' ), wp_get_theme()->get('Version') );
6 (
7 add_action( 'wp_enqueue_scripts', 'learnpress_styles');
When you use LearnPress as the parent theme, this code will start working. Thus, most themes will work like this. Save this file and it will become your child theme’s functions.php folder.
After those steps, you will have a basic child theme. In the “Appearance”, choose “Themes” and “Activate”. Therefore, your site will begin to use the child theme. If you need to customize, move to the next part.
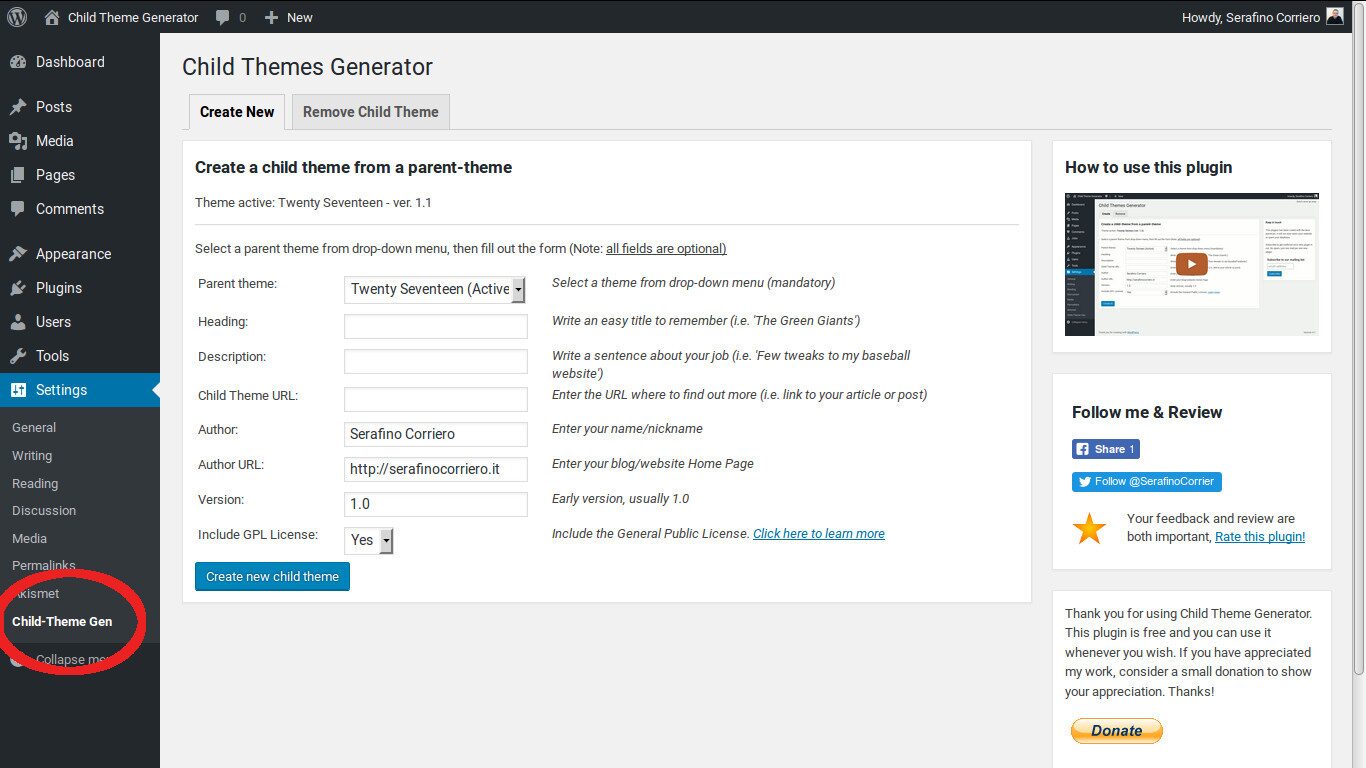
Using Plugins to Create WordPress Child Theme
We suggest you use the Child Theme Configurator plugin. Since it requires no coding, you can easily make changes and customizations.

First, install the plugin on your site. For more guides about plugin installation, see our guide about how to install WordPress plugins.
When activating, you go to “Tools” -> “Child Themes” and choose LearnPress in the parent theme asking popup. Choose “Analyze” to check the compatibility to be a parent theme. Next, you will have to name the child theme’s folder for saving files and where to save them. In the default setting, choose “Click to Edit Child Theme Attributes”. Then you will fulfill the child theme’s information.
When making a child theme manually, your child theme won’t inherit menus and tools from the parent theme. To solve it, use the Child Theme Configurator.
At last, choose “Create New Theme Child” to finish. In this step, your child theme will have the functions.php and style.css for further development. Apparently, remember to preview your child plugin. Afterward, you select “Activate & Publish” to publish your child theme.
Now, we will start customizing your WordPress child theme.
How To Do WordPress Child Theme’s Customization?
We will create a child theme on WordPress a little unlike the parent theme by adding code to the file “style.css”.
Copy Code from the Firefox/Chrome Inspector
You can use the Inspector widgets of Chrome and Firefox to discover the needed CSS code. Besides, you can use these tools to access all sites’ CSS and HTML elements.
To see a CSS file of a post or o site, right-click and choose “Inspect”. Your screen will split into 2 halves and you can see the page’s CSS and HTML. When you move the mouse over the HTML lines, the inspector tool will show you in the uptop window. Also, do the CSS rules.
There will be a temporary color change in the back. To make it permanent, copy this CSS rule line and paste in the child theme’s style.css file:
1 body {
2     background-color: #fdf8ef;
3 )
Save changes and preview the site. Besides, you can re-launch this for any element in the stylesheet of the theme. Well, we give you a full stylesheet for a child theme here:
1 Theme Name:   WPB Child Theme
2  Theme URI:    https://www.thimpress.com
3  Description:  A LearnPress child theme
4  Author:       ThimPress
5  Author URI:   https://www.thimpress.com
6  Template:     learnpress
7  Version:      1.0.0
8  Text Domain:  learnpresschild
9  */
10
11 .site-title {
12     color: #7d7b77;
13 )
14 .site-description {
15     color: #aba8a2;
16 )
17 body {
18      background-color: #fdf8ef;
19      color: #7d7b77;
20 )
21 .entry-footer {
22     color: #aba8a2;
23 )
24 .entry-title {
25     color: #aba8a2;
26     font-weight: bold;
27 )
28 .widget-area {
29     color: #7d7b77;
30 )
Copy Code from the Parent Theme’s style.css File
As you can see, it’s possible to copy from the parent theme style.css file paste it to the child theme and customize it.
For instance, the code for the page’s background color is:
1 background-color: var(--global--color-background);‘–global–color-background’ is a variable used in the theme’s various places. You will have to change the value of the variable if you need to change the color in those places at the same time.
Move to /wp-content/themes/learnpress in the WordPress installation folder and open the file style.css in the text editor to look for the –global–color-background’s place. That variable can be changed with another variable. You can find a big bunch of color variables in the parent theme’s style.css file.
After selecting the suitable color options, you copy and paste that code line into the child theme’s style.css file, and replace the old ones with the chosen new ones for your color tendency. Then, the colors will be divided based on the planned color schemes. This process will make your color schemes consistent and quickly edited.
How To Customize the Template Files of WordPress Theme?
In a theme, file-handling areas in a website are called templates. The templates are usually named after the section they handle. Thus, some important sections are managed by various files or content templates.
To customize a template, find that file in the parent theme and copy it to the child theme. Then, open it in the text editor and start modifying it.
We will show you a tutorial for this process with the file footer.php. Copy it to the child theme’s folder and open it in a plain text editor. For example, let’s delete the “Proudly powered by WordPress” link in the footer and add a copyright notice. To start, delete all between the <div class=”powered-by”> tags.
1 <div class="powered-by">
2     <?php
3     printf(
4         /* translators: %s: WordPress. */
5         esc_html__( 'Proudly powered by %s.', 'learnpress' ),
6         '<a href="' . esc_url( __( 'https://wordpress.org/',
7 'learnpress' ) ) . '">WordPress</a>'
8     );
9     ?>    </div><!-- .powered-by -->
Then you will paste in the code you find below those tags in the example below.
1 <div class="powered-by">
2 <p>© Copyright <?php echo date("Y"); ?>. All rights reserved.</p>
3 </div><!-- .powered-by -->Choose “Save Changes” and when you come back to the site, you will see the new copyright notice.
How To Add Functionalities to Your WordPress Child Theme?
To change or add a function to your site, you will have to look for the functions.php file. This file uses PHP code to make this process run.
Usually, you are guided to copy and paste code snippets into the function.php file but they will be deleted when you update PHP or your theme. Therefore, we suggest you should use a child theme to add the code snippets. Well, let’s move to the adding widgets process. Add the code snippet into the functions.php file of the child theme.
1 <?php
2 // Register Sidebars
3 function custom_sidebars() {
4
5     $args = array(
6        'id'            => 'custom_sidebar',
7         'name'          => __( 'Custom Widget Area', 'text_domain' ),
8         'description'   => __( 'A custom widget area', 'text_domain' ),
9         'before_title'  => '<h3 class="widget-title">',
10         'after_title'   => '</h3>',
11         'before_widget' => '<aside id="%1$s" class="widget %2$s">',
12         'after_widget'  => '</aside>',
13     );
14     register_sidebar( $args );
15
16 )
17 add_action( 'widgets_init', 'custom_sidebars' );
18 ?>
Save and navigate to “Appearance” -> “Widgets” to see the new tool. Additionally, you can look for more information about adding a function area. You can add lots of features by adding code snippets to your site’s functions.php file.
That’s all about how to create a child theme in WordPress. Let’s move to the part of the fixing error.
How To Fix Errors When Create a Child Theme?
You can meet any problem making a child theme at any moment. Therefore, you should not give up easily.
Syntax problems can be caused by some missing in the coding process. Also, it’s the most popular error that all users can meet. Besides, if things don’t go right, you can always delete the WordPress theme or child theme and start over.
Conclusion
We hope you can acquire knowledge about making a child theme through our article. Thanks for your readings!
Read more:
How to Fix the HTTP Error 500 WordPress
How To Create Menu In Eduma Theme: A Step-by-Step Guide
WordPress: How to Prevent Content Thieves
Contact US | ThimPress:
Website: https://thimpress.com/
Fanpage: https://www.facebook.com/ThimPress
YouTube: https://www.youtube.com/c/ThimPressDesign
Twitter (X): https://x.com/thimpress_com


