Do you want to streamline your WordPress checkout process? Adding a 1-click checkout can significantly improve the customer experience and drive sales for your eCommerce site.
A simplified checkout process is key for any online store, and a one-click option allows customers to complete purchases quickly and easily.
In this article, we will guide you through implementing a one-click checkout on your WordPress site, potentially boosting conversions and increasing your bottom line.
Eduma – Education WordPress Theme
We provide an amazing WordPress theme with fast and responsive designs. Let’s find out!
What is One-Click Checkout?
One-click checkout is a way for you to buy things online quickly and easily. It lets you skip the hassle of typing in your name, address, and payment information every time you shop on the same website.
Here’s how it usually works:
- First Purchase: When you buy something for the first time, you enter all your information like normal.
- Information Saved: The website securely stores your details (like a credit card number) with your permission.
- Future Purchases: Next time you shop there, you just click a button (usually labeled “Buy Now” or similar) and the order is placed!
One-click checkout saves you time and can make shopping online a lot smoother.
Why You Need A One-click Checkout In WordPress
Long checkout processes make shoppers abandon their carts. The more steps involved, the less likely they are to finish the purchase. Studies show that 22% of abandoned carts are due to long checkouts.
One-click checkout solves this problem. It adds a “buy now” button, so returning customers can skip filling out their information. Their details are saved, making it like an autocomplete feature but even faster.
One click, and the purchase is complete. This simple change increases sales and reduces abandoned carts. It works for any website selling products or services.
Method 1: Set Up a One-Click Checkout in WordPress With Direct Checkout for WooCommerce Plugin
One-click checkout can significantly boost your sales by simplifying the purchase process for customers. If you’re looking for a budget-friendly solution, the “Direct Checkout for WooCommerce” plugin is an excellent option.
How to Set Up Direct Checkout for WooCommerce:
Begin by installing and activating the “Direct Checkout for WooCommerce” plugin from the WordPress plugin repository.
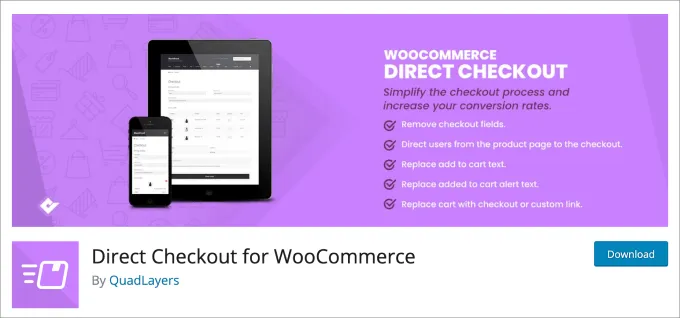
After activation, navigate to your WordPress dashboard and go to WooCommerce > Settings.
Click on the Payments tab and select Express Checkout. Check the box to Enable Express Checkout.
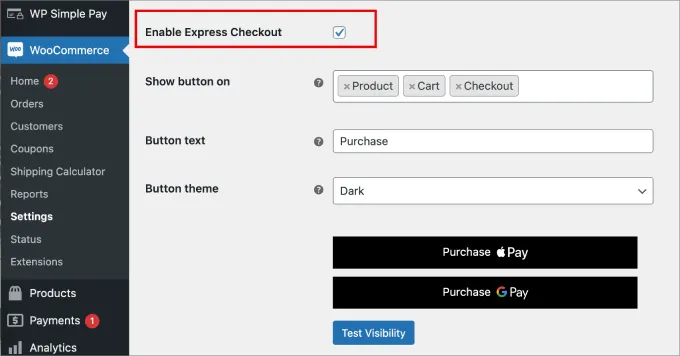
The plugin offers several customization options.
You can choose where the one-click checkout button appears (product pages, shop page, etc.), as well as the button’s color, text, and style to match your store’s design.
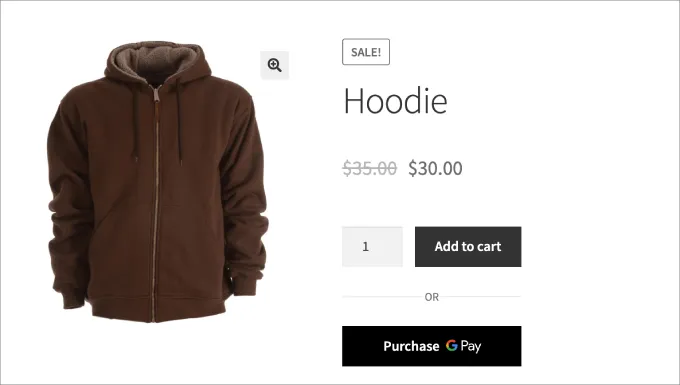
Once enabled, the plugin adds a prominent “Buy Now” (or your customized text) button to your chosen locations. When a customer clicks this button, they bypass the cart page and are taken directly to the checkout page, where they can complete their purchase with minimal steps.
Method 2: Set Up a One-Click Checkout in WordPress With the FunnelKit Automation plugin
For eCommerce businesses using WooCommerce, FunnelKit Funnel Builder is a powerful tool to simplify the express checkout process.
This versatile platform allows you to create sales funnels that increase your average order value, reduce abandoned carts, and attract more potential customers.
With FunnelKit, you can build lead capture pages, offer order bumps, design checkout forms, and even implement slide-in carts – all without requiring any coding knowledge.
If you already have your WooCommerce product pages ready, here’s how to set up one-click checkouts using FunnelKit:
Begin by installing and activating the FunnelKit Automation plugin.

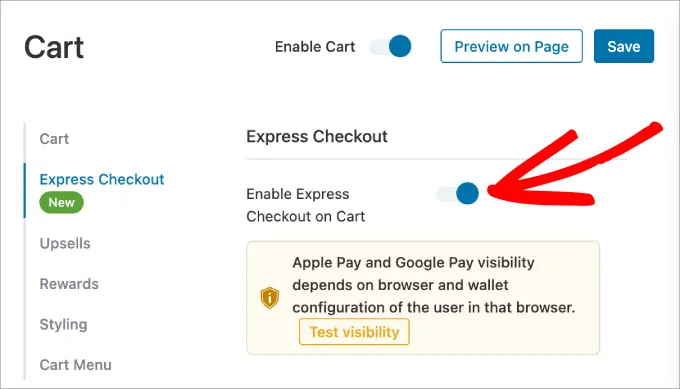
In your WordPress dashboard -> FunnelKit, navigate to the Cart section and turn on the ‘Enable Cart‘ option. Under the ‘Express Checkout‘ tab, connect your Stripe account to FunnelKit.
If you don’t have a Stripe account, you can easily create one during this process.
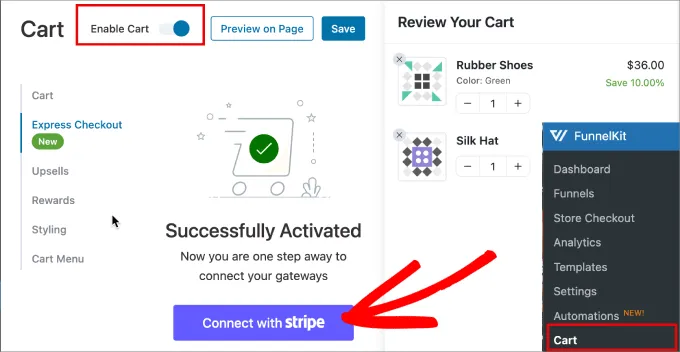
Once connected, activate the ‘Credit Card (Stripe)’ option and save your settings.
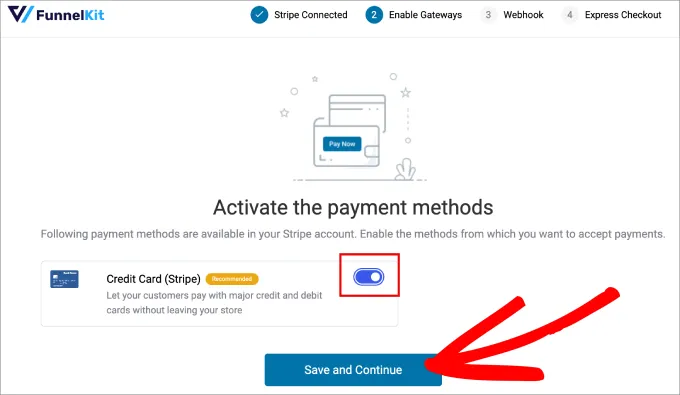
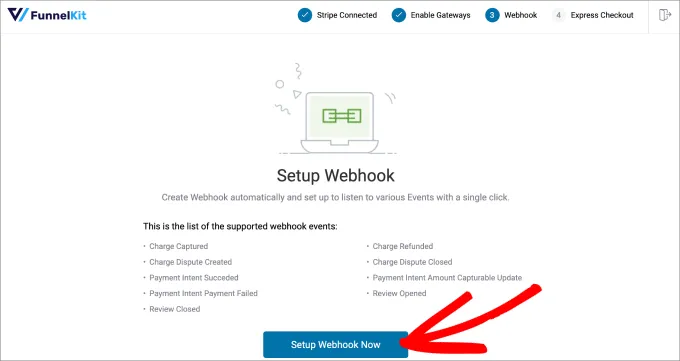
Follow the prompts to set up a webhook, which will enable automatic payment processing for one-click checkouts.
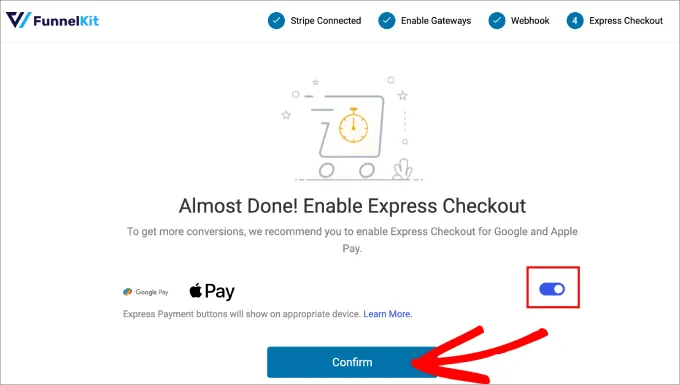
Activate the express checkout options for Google Pay and Apple Pay.
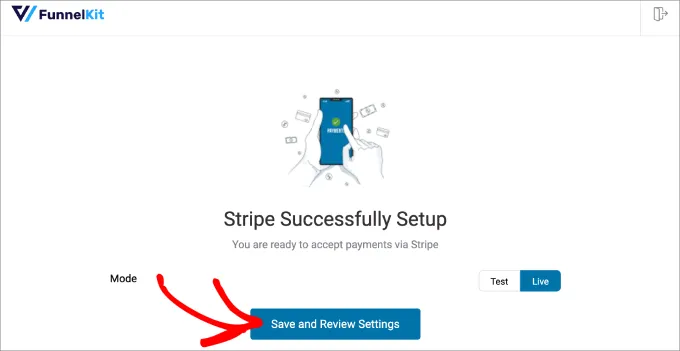
After confirming the successful Stripe setup, you can choose between ‘Live’ mode for real payments or ‘Test’ mode for practice. Save your settings.
Return to FunnelKit’s Cart section and enable the ‘Enable Express Checkout on Cart‘ option. Save your changes.
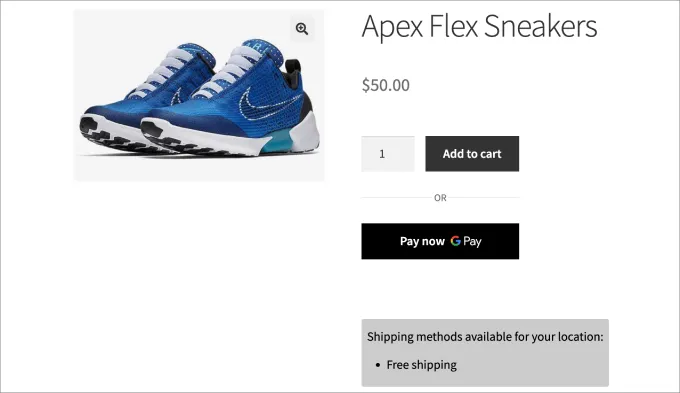
Now, when customers visit your product page, they’ll see a ‘Pay Now‘ option.
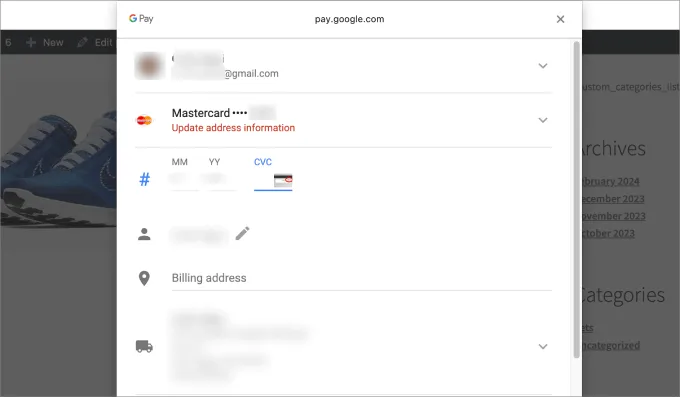
Upon selecting this, a window will appear, pre-filling their payment details from their Google or Apple Pay accounts, leading to a seamless one-click checkout experience.
Final Thoughts: One-Click Checkout in WordPress
Simplify your checkout for happier customers! One-click checkout is the key to a smoother shopping experience. It saves time, boosts sales, and reduces abandoned carts. Whether you choose the free “Direct Checkout for WooCommerce” plugin or the powerful FunnelKit for advanced features, implementing a one-click checkout is a perfect solution. Try it today and watch your sales grow!
Read More: 7+ Great Free LearnPress Themes to Start With
Contact US | ThimPress:
Website: https://thimpress.com/
Fanpage: https://www.facebook.com/ThimPress
YouTube: https://www.youtube.com/c/ThimPressDesign
Twitter (X): https://x.com/thimpress_com


