Are you planning to share your knowledge with the world through an online course? WordPress can be your magic portal!
Creating online courses with WordPress is surprisingly simple, especially when you use the power of WordPress LMS plugins. In this blog post, we have made it as simple as 7 easy steps that will change your WordPress site into a thriving online learning platform.
Ready to dive in? Let’s learn how to create an online course in WordPress with us now!
Eduma – Education WordPress Theme
We provide an amazing WordPress theme with fast and responsive designs. Let’s find out!
Step 1: Finding The Right WordPress LMS Plugin
Finding the perfect Learning Management System (LMS) plugin is a crucial step to create an online course in WordPress. WordPress, known for its user-friendliness, offers a variety of LMS plugins to cater to your needs, even if you’re new to website building. While many options exist, let’s explore why LearnPress stands out as a powerful choice.

When selecting your LMS, prioritize features that empower your teaching vision. Here are some key aspects to consider:
- Intuitive Course Builder: Simplifies the process of creating structured and engaging courses.
- Versatile Quiz Creator: Design interactive and challenging quizzes to assess learner understanding.
- Seamless Payment Integration: Support multiple payment gateways (WooCommerce) for easy transactions.
- Responsive Design: Ensure your courses look great and function flawlessly on any device.
- Co-instructor Integration: Empower multiple educators to collaborate on course creation.
- Interactive Learning Environment: Foster engagement through email integration, social sharing, and Q&A forums.
LearnPress provides all the essential features listed above, and much more! Its user-friendly interface and extensive functionalities make it perfect for both beginners and experienced course creators. In this guide, we’ll delve into the world of LearnPress, guiding you through the steps to effortlessly build and publish your online courses.
Step 2: Set Up Your WordPress Website
For complete control and customization, starting a self-hosted website on WordPress.org is a popular choice. Here’s what you’ll need to create an online course in WordPress:

- Domain Name: This is your website’s unique address on the internet. Choose a name that reflects your brand and is easy to remember.
- WordPress Hosting: Imagine this as your website’s rented space on the internet. It stores your website’s files and makes them accessible to visitors. Opt for a reliable hosting provider with good security features and performance.
- SSL Certificate: This encrypts communication between your website and visitors, creating a secure connection for online transactions. It’s crucial for building trust and protecting sensitive information.
Beyond the basics, consider upgrading to a premium hosting plan for:
- Enhanced Security: A robust plan often includes advanced security measures like firewalls and malware scanning to protect your website from threats.
- Improved Performance: Higher-tier plans typically offer better server resources, resulting in faster loading times and a smoother user experience.
- Increased Scalability: As your website grows, a scalable plan can accommodate more traffic and data, ensuring your site remains reliable.
- Greater Flexibility: Premium plans often provide more storage, bandwidth, and customization options to cater to your specific needs.
Please note that the best hosting plan for you depends on your website’s size, traffic, and budget. Carefully evaluate your needs and choose a plan that offers the right balance of features and affordability.
Step 3: Install LearnPress To Create An Online Course In WordPress
Now that your WordPress website is up and running, it’s time to transform it into a powerful learning platform with LearnPress, a user-friendly and feature-rich Learning Management System (LMS) plugin.

Whether you’re an educator with years of experience or a complete beginner, LearnPress makes creating and delivering online courses a breeze; no coding skills are required.
Here’s a step-by-step guide to installing LearnPress on your WordPress site to create an online course in WordPress:
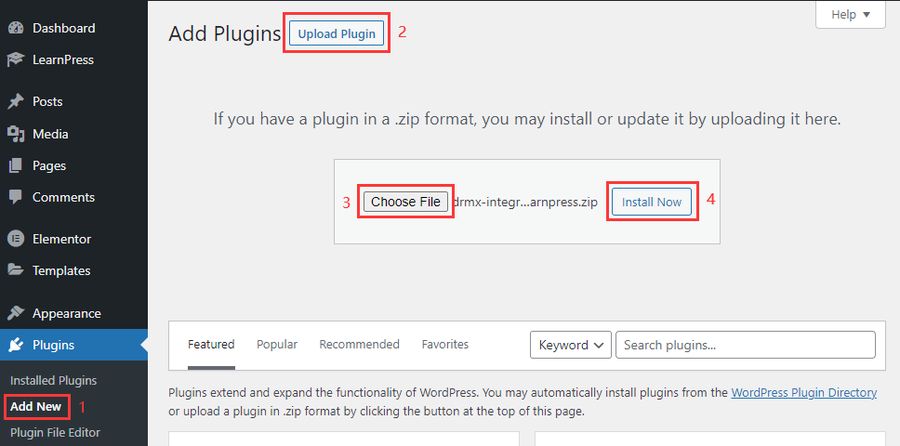
- Log in to your WordPress admin panel.
- On the left-hand sidebar, click on “Plugins” and then select “Add New.“
- In the search bar at the top right corner, type “LearnPress” and hit enter.
- Click on “Install Now” and wait for the installation to complete. Once done, click on “Activate” to bring LearnPress to life on your site.
Congratulations! You’ve successfully installed LearnPress on your WordPress site. You can refer to our completed video guide here:
Step 4: Use WordPress LMS-based Theme – Create An Online Course In WordPress
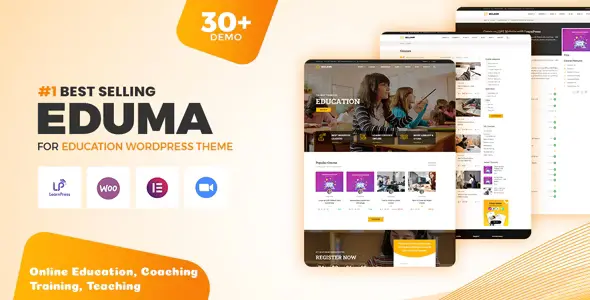
While you can certainly use an existing theme, it’s highly recommended that you consider an LMS-based theme like Eduma to create an online course in WordPress. These themes are specifically designed for online learning platforms and make the process of creating and managing courses much easier.
They come with features like course builders, drag-and-drop page builders, and student management tools that are specifically tailored to the needs of online educators.

Eduma is a popular education theme that is built on LearnPress, a powerful and flexible LMS plugin for WordPress. With Eduma, you can create beautiful and engaging online courses that will attract students and help you convert them into paying customers. The theme comes with a variety of pre-built templates and layouts that you can use to get your site up and running quickly and easily.
Of course, you can also use LearnPress with any WordPress theme, as it is fully theme-compatible. However, using an LMS-based theme like Eduma can save you a lot of time and effort and give you a site that is optimized for online learning.
Step 5: Create An Online Course In WordPress
You can create and sell online courses in no time with a drag-and-drop method.
- Open your WordPress dashboard.
- Go to LearnPress > Courses > Add New.
- Click on the Add New button to create online courses.
This will take you to the course creation page. Fill in your course title, a detailed course description, tags, and the featured image for your course. This is the image that will appear as your course thumbnail.
Next, you can add a course excerpt. This is a brief summary that you write when you create online courses, which are ideal for people who don’t want to read a long description.
After that, you can upload all the useful course attachments and also specify the prerequisites that students need to fulfill before enrolling in your course.
To create online courses, you need to make sure you’re targeting the right potential students. Completing all the above fields is designed to ensure that.
Then, you can choose the course name from the product list, and WooCommerce will handle all the transactions.
To add more information to create online courses, you can enter the course duration, course difficulty level, benefits of the course, target audience, requirements, list of resources in the course, and more.
Finally, you can include a video trailer and the instructors who will be teaching the course. That’s it; you have just finished your process to create an online course in WordPress.
Step 6: Create Lesson, Quiz, and Question – Create An Online Course In WordPress
Here is a step-by-step guilde to create lessons, quiz, and question with LearnPress:
Creating a Lesson:
- Navigate to LearnPress: In your WordPress dashboard, go to LearnPress > Lessons > Add New.
- Enter Lesson Details:
- Title: Give your lesson a clear and descriptive title.
- Content: Add your lesson content using the block editor. You can include text, images, videos, PDFs, and more.
- Settings: Adjust settings like prerequisites, duration, and visibility.
- Save and Publish: Click Publish to make your lesson live.
Creating a Quiz:
- Navigate to LearnPress: Go to LearnPress > Quizzes > Add New.
- Enter Quiz Details:
- Title: Name your quiz appropriately.
- Settings: Configure quiz settings like passing grade, time limit, and question shuffling.
- Questions: Click Add New Question to start adding questions.
- Adding Questions:
- Choose Question Type: Select from various question types like Single Choice, Multiple Choice, True/False, Fill in the Blanks, etc.
- Enter Question Details: Write the question prompt, and answer choices, and mark the correct answer(s).
- Add More Questions: Repeat the process for each question.
- Save and Publish: Click Publish to make your quiz available.
Creating a Question:
While creating a quiz, you can add questions directly. However, you can also create standalone questions for later use:
- Navigate to LearnPress: Go to LearnPress > Questions > Add New.
- Enter Question Details: Follow the same steps as adding questions to a quiz: choosing the question type, entering the prompt, and selecting options.
- Save and Publish: Click Publish to create the standalone question.
Step 7: Offer Certificates – Create An Online Course In WordPress
Motivating and rewarding your students is a crucial part of running a successful online course.
Certificates Add-On For LearnPress makes this easy by allowing you to issue beautiful, personalized certificates upon course completion. This not only adds value to your courses but also boosts student engagement and satisfaction.
You can check out our detailed guide on LearnPress Certificates Integration or take a quick look at how to set up it below:
- Purchase and install the Certificate add-on: Available on the ThimPress website.
- Create a certificate template: Use the drag-and-drop builder or choose a pre-built template.
- Set criteria for certificate issuance: Define when students should receive their certificates.
- Integrate with your course(s): Link the certificate template to your desired LearnPress courses.
- Track and manage certificates: View issued certificates and manage student access.
Final Thoughts – How To Create An Online Course In WordPress
Congratulations! With these 7 easy steps, you’ve built the foundation for your very own online course using WordPress and LearnPress. Remember, creating an engaging learning experience takes time and effort, but the rewards are plentiful. By following these steps and adding your unique touch, you’ll be well on your way to empowering others through knowledge.
Read More: Best Magazine WordPress Theme
Contact US | ThimPress:
Website: https://thimpress.com/
Fanpage: https://www.facebook.com/ThimPress
YouTube: https://www.youtube.com/c/ThimPressDesign
Twitter (X): https://x.com/thimpress_com


