Do you know that you can Create an Online Course Marketplace Using WordPress that attracts millions of students and instructors, like Udemy and Coursera?
Udemy, one of the most popular online eLearning platforms, has over 59 million learners, 70,000 instructors, and 213,000 online courses in over 75 languages.
Coursera, another top online education platform, has over 87 million learners, 4,000 instructors, and 5,100 courses in more than 50 languages.
And these numbers are only growing as online education becomes more accessible and in demand.
According to a recent report, the global massive open online course market is expected to grow from $9.38 billion in 2021 to $12.60 billion in 2022 at a compound annual growth rate (CAGR) of 34.3%. The market is expected to grow to $40.61 billion in 2026 at a CAGR of 34%.
This growth is driven by the rising preference for online learning across the globe as well as the increasing demand for skill development and certification in various fields.
You can consider the huge potential of eLearning to build or create an online course marketplace using WordPress. It’s not only affordable but also easy.
So, are you ready to dive into our step-by-step guide on how to do it?
How to Create An Online Course Marketplace Using WordPress
Now, we will go step by step together to create an online course marketplace using WordPress:
Step 1: Get a Domain Name and Web Hosting
The first thing you need to do is get a domain name and web hosting to create an online course marketplace website:
- Domain name: This is your web address (For example, thimpress.com). Keep in mind that you should choose a unique, recognizable, and easy-to-remember name.
- Web hosting: This is a server where you store all your eLearning site files and course content so that students can access them when they visit your site.
Even though you can use WordPress for free, getting a domain name and web hosting comes with a price tag.
Of course, when it comes to selecting a hosting provider, you have many options.
However, I recommend that you look into Bluehost or SiteGround because they have affordable hosting plans. Furthermore, WordPress recommends them.
Once you have completed purchasing a domain name and web hosting, let’s move on to the next step.
Step 2: Set Up WordPress

You will be creating a solid foundation for your online course platform using WordPress.
WordPress is very popular, so most hosting services offer plans that are compatible with it or tools that can install it for you automatically.
However, if you’re doing it yourself, I recommend following this WordPress installation guide.
It is important to do all the steps in the same order to ensure a proper site setup. After WordPress is done, you can go on to the exciting part.
Step 3: Select a Learning Management System plugin (LMS Plugin)
This is critical to the success of your course marketplace. You can use your LMS plugin to create an online marketplace website like Udemy or Coursera.
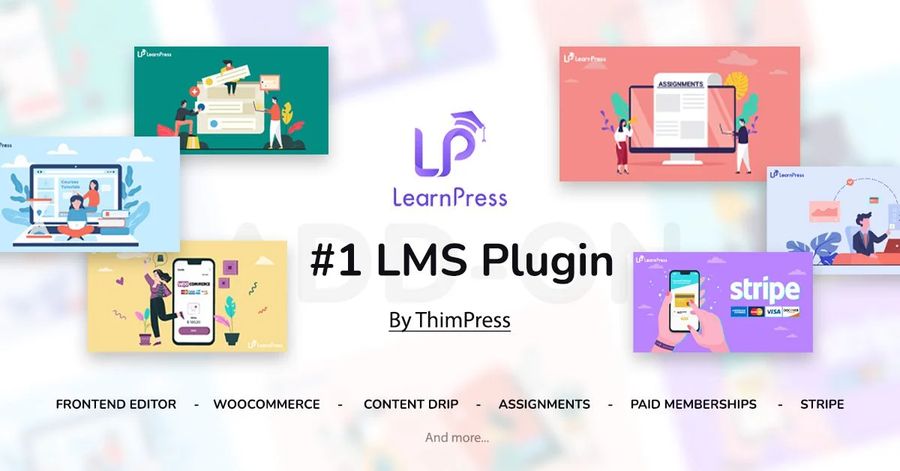
There are numerous LMS plugins available for WordPress eLearning websites, and LearnPress is the most famous one.

With LearnPress, you can trust that your online courses are safe, easy to use, flexible, and affordable.
Once you have done your own research and found out that LearnPress is the right fit, this in-depth guide on setting up LearnPress will make your task much simpler.
Don’t miss our awesome video tutorial if you love visual learning!
Step 4: Choose an eLearning WordPress Theme
Since a theme is practically the soul of any website, it’s important to pick an eLearning theme first.
The eLearning theme you choose has a huge impact on how you build a complete course marketplace. It affects your website’s appearance, features, user experience, performance, navigation options, and more.
You can pick from a plethora of themes thanks to WordPress’s rich library of options. One thing you need to take note of is that the theme you select has to be compatible with the LMS plugin. This is absolutely essential for the smooth operation of your website.
Want to save time searching for themes? No problem; we’ve got you covered. Check out the best eLearning themes (such as Eduma or Coaching) that are popular and trusted, and grab one for a fast and easy setup.
And the best part is that these themes are compatible with the most popular LMS plugin – LearnPress, because they were created by the same awesome team at ThimPress.
Step 5: Import Demo Content To Build Your Courses
This step is where you begin to change your standard eLearning website into a course marketplace similar to Udemy.
Designing your website requires a lot of time and effort to create courses and lessons from scratch and configure the menus, homepage, and other elements.
But if you want to launch your online course marketplace site quickly without spending too much time, your Eduma theme lets you do that. You can easily import a pre-designed demo website with Eduma in no time!

Imagine having a website that can do everything for your eLearning business. That’s what Eduma can offer you. With Eduma, you can:
- Choose from different demo designs that suit any eLearning purpose.
- Easily create and manage courses, lessons, quizzes, and more.
- Enjoy a ready-made homepage, AJAX, menus, sticky sidebar, and navigation options.
- Works well with WooCommerce, Elementor, bbPress, and more.
- Provide multi-instructors and other features.
By changing Eduma’s demo content with your own, your website will be ready to use!
And, kudos, you have an online course marketplace that is close to going live.
Step 6: Configure Instructors To Create & Manage Courses
To run a successful course marketplace, you’ll need to provide an extensive selection of courses taught by instructors who specialize in those subjects.
To assist you with that, you can use the co-instructors add-on for LearnPress to effortlessly add multiple instructors/ teachers to create courses, lessons, topics, quizzes, etc.
And, as instructors, aside from developing their own courses, they can also:
- Edit content, manage students, and share commissions with other instructors on your course marketplace.
- Share courses with other course authors.
- Communicate with students using forums (discussion boards) and social networks, thanks to the compatibility of LearnPress with bbPress and BuddyPress
- Create and manage assignments for their courses and grade them online using the Assignments add-on
- Track the progress and results of their students in each course and export the grade book to CSV.
Furthermore, you can set up instructor profile pages, where you can display their photo, bio, expertise, qualifications, courses created, ratings, and so on. These profile pages help instructors establish their credibility and showcase their personalities, which can attract more students to enroll in their courses.
By completing this step, you have successfully enabled multi-instructors to create, teach, and sell courses on your course marketplace.
Step 7: Develop a Lively Student-teacher Interaction System
For any course to be practical, your instructor needs to communicate frequently with your students and answer their questions. Students’ and teachers’ relationships need to be solid.
A benefit of LearnPress is that your instructors can communicate with students directly.
BuddyPress is a plugin that assists you in creating a social networking platform similar to Facebook.
You can use it to create profiles, groups, micro-communities, private messaging functionality, and more. This way, you can make your online courses more fun and interactive by creating a network of students and teachers.

Step 8: Create Forums And Groups for Your Online Courses
The key to building an effective course marketplace is not only in its configuration. It’s all about how much time your students spend on your platform and how they feel about it.
So, if you want to create a sense of community among your students that encourages them to participate more actively in course activities, consider including discussion forums and groups.
By using a plugin like bbPress, you can set up forums for different subjects, where students and teachers can talk about the course, express their thoughts about various assignments in groups, and become part of a cooperative learning community.

This can improve the level of discussion about courses on your platform and stimulate innovation as well.
Step 9: Set Up Your Payment Gateway Integrations
LearnPress allows you to set up different payment methods for your online courses, such as PayPal, Stripe, WooCommerce, and more.
You can configure your LearnPress payment gateway integrations by following the instructions in the LearnPress settings.
This way, you can accept payments from your learners and manage your transactions easily.
You can also use WooCommerce to add more course-selling options. It’ll enable you to set discounts and sell course bundles and physical products too.
LearnPress can give a commission to each instructor, and you can keep track of the commission earned and make payments. The percentage commission for each instructor can be varied at your discretion.
Moreover, you can still do a lot more to improve the value of your online marketplace site. So far, we have focused on the basic setup. Now, let us see how you can make your course marketplace website better.
Step 10: Include Any Additional Features That You Desire
Besides the basic features of a course marketplace, you can also use other plugins to improve your website.
Don’t forget that if you purchase a theme that integrates with the LMS plugin, you’ll have a full pack of famous plugins that support your online course marketplace, so you don’t need to do this step.
Some plugins you should add are an email marketing integration plugin, a social sharing integration plugin, a membership plugin, and more.
We recommend that you add any or all of these features as your course marketplace expands.
Final Thoughts
In conclusion, create an online course marketplace using WordPress is easier than it may seem. With the help of LearnPress, a powerful WordPress LMS plugin, you can easily create and sell courses online. You can also use various plugins and add-ons to improve your online site with features such as commissions, assignments, email marketing, and more.
By following the steps in this guide, you can set up your own online course marketplace and start earning money from your knowledge and skills. We hope you found this guide helpful and wish you all the best in your online education journey.
Read More: 10+ Best Themes for LMS Course Builder: A Comprehensive Review and Comparison
Contact US | ThimPress:
Website: https://thimpress.com/
Fanpage: https://www.facebook.com/ThimPress
YouTube: https://www.youtube.com/c/ThimPressDesign
Twitter (X): https://x.com/thimpress_com


